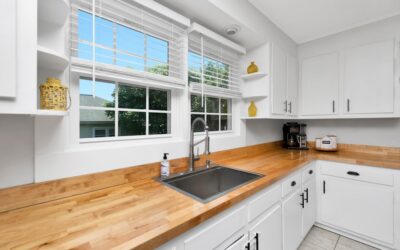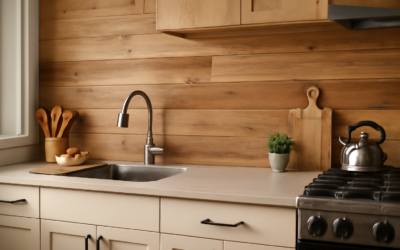
Wood on the wall behind a kitchen counter is an unexpected, warm alternative to the usual tile or stone, and it can transform a sterile kitchen into something inviting. A butcher block backsplash uses the same edge-glued hardwood panels found in countertops, mounted vertically to bring natural grain and warmth to your walls. It is affordable and DIY-friendly, but wood near water and heat needs the right sealing and placement to avoid trouble. This guide walks through how to install one, how to protect it, and where it makes sense.
Part of our Countertops guide — explore the full guide →
What a Butcher Block Backsplash Is
A butcher block backsplash is a panel of solid hardwood, typically maple, oak, walnut, or birch, made from strips glued together and mounted on the wall behind your counter. It often pairs beautifully with a matching or coordinating butcher block countertop, or contrasts with stone counters for a layered, organic look. Thicknesses are usually thinner than countertop slabs since the wall panel bears no weight.
Pros and Cons
- Warmth and character: Wood adds a cozy, natural feel that tile and stone cannot replicate.
- Affordable: Often cheaper than stone or quality tile, especially as a DIY project.
- DIY-friendly: Cut and mount with standard woodworking tools.
- Repairable: Sand out scratches and refinish as needed.
On the downside, wood is vulnerable to water, heat, and staining if not sealed and placed carefully. It demands more maintenance than tile and is not ideal directly behind a sink or cooktop without protection.
Sealing Is Non-Negotiable
Because a backsplash catches splashes, grease, and steam, sealing is essential. You have two main approaches, each with trade-offs.
- Food-safe oil and wax: Mineral oil or a beeswax blend penetrates the wood for a natural matte look; easy to reapply but needs frequent maintenance and offers less water protection.
- Film-forming finish: Polyurethane or a marine-grade varnish forms a hard, waterproof shell; far more durable for a backsplash but harder to spot-repair.
For a backsplash that will see water and grease, a durable film finish like polyurethane is usually the smarter choice, since you are not cutting food on it the way you would a countertop. Apply multiple coats per the manufacturer and let it cure fully before exposing it to moisture.
Heat and the Range
Wood and direct flame do not mix. Behind a gas or electric range, the area immediately around the burners can get hot enough to scorch or discolor wood and, in extreme cases, pose a fire risk. Many homeowners install a tile, stone, or stainless steel panel directly behind the cooktop and run the butcher block across the rest of the wall, blending materials for both safety and looks. Check your local building codes and the range manufacturer’s clearance requirements before placing any combustible material near a heat source.
How to Install
- Measure the wall area and cut the butcher block to fit, accounting for outlets and any tile transition zones.
- Sand the panel smooth and seal all sides, including the back and edges, to prevent moisture from entering the unsealed wood.
- Apply construction adhesive to the back and secure the panel to the wall, using screws into studs for heavier panels.
- Caulk the seam where the backsplash meets the countertop with a flexible, water-resistant caulk to block water intrusion.
- Apply a final finish coat after installation and let it cure before use.
Cost Expectations
Butcher block backsplash material typically runs $20 to $60 per square foot of panel, less than premium tile or stone in many cases. Because a backsplash covers a small area, total material cost is often modest, and DIY installation saves labor. Plan to budget for quality sealer and periodic refinishing supplies as part of ownership.
Care and Maintenance
Wipe the backsplash with a damp cloth and mild soap, avoiding harsh chemicals and standing water. Reapply oil finishes regularly, or recoat film finishes when they show wear. Address any cracks in the caulk line promptly so water cannot get behind the panel. Keep the area behind the range protected, and never let the wood stay wet for long.
Choosing the Right Wood Species
The species you pick affects both looks and durability. Maple is hard, light-toned, and affordable, making it the most common choice. Oak brings prominent grain and warmth at a moderate price. Walnut offers a rich, dark, upscale look but costs more. Birch is budget-friendly and pale. For a backsplash, choose a hardwood rather than a soft species, since harder woods resist dents and hold finishes better. If you are matching an existing butcher block counter, use the same species for a seamless look, or deliberately contrast for visual interest.
Around Outlets and Windows
Real kitchens have outlets, switches, and sometimes a window above the counter, and the backsplash has to work around them. Measure and mark cutouts carefully before mounting, and cut clean openings with a jigsaw so cover plates sit flush. Seal the cut edges around outlets thoroughly, because exposed end grain absorbs moisture fastest. Where the backsplash meets a window casing or upper cabinets, caulk the seams with a flexible, paintable, water-resistant caulk so water and steam cannot sneak behind the panel.
Design Combinations That Work
Butcher block backsplash plays well with several materials. Pair warm wood with white or light cabinets for a bright, modern-farmhouse contrast. Combine it with a stone or quartz counter for a layered, organic look that softens an all-stone kitchen. Add a tile, stone, or stainless panel behind the range for safety while running wood across the rest of the wall, blending function and style. Open shelving in a matching wood ties the look together. Used thoughtfully, the warmth of wood becomes a focal point rather than an afterthought.
Final Thoughts
A butcher block backsplash brings warmth and personality to a kitchen at a friendly price, and it is well within reach for a confident DIYer. The keys to success are thorough sealing, a flexible caulk line at the counter, and keeping combustible wood away from direct range heat. Handle those details and you get a striking, natural backsplash that pairs beautifully with both wood and stone counters for years to come.