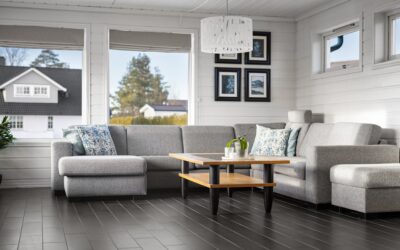
Few flooring upgrades stretch a dollar as far as vinyl, and the cheapest vinyl floor tiles can transform a tired kitchen or bathroom for less than a dollar a square foot. Vinyl is waterproof, forgiving to install, and available in convincing wood and stone looks that once cost many times more. The challenge is buying cheap without buying junk that peels, curls, or wears through in a year. This guide shows you exactly what the low end delivers, where corners get cut, and how to get a floor that looks great and lasts.
Part of our Tile & Grout guide — explore the full guide →
Why Vinyl Dominates the Budget Floor Market
Vinyl has taken over budget flooring because it solves the problems that plague cheaper alternatives. It is fully waterproof, so it belongs in bathrooms, laundry rooms, and basements where laminate and wood would swell and fail. It is soft and quiet underfoot compared to tile, and it forgives an imperfect subfloor better than almost any hard surface.
Installation is where vinyl really wins for the money. Peel-and-stick tiles need nothing more than a clean floor and a utility knife, putting a full room makeover within reach of a first-time DIYer over a weekend. That combination of low material cost and low labor cost is exactly why vinyl has become the default choice for landlords, flippers, and homeowners on a tight budget.
Maintenance costs stay low over the life of the floor, too. Vinyl needs no sealing, waxing, or refinishing the way stone, grout, or hardwood does; a damp mop and the occasional sweep keep it looking new. For a family weighing the total cost of ownership rather than just the sticker price, that hands-off upkeep quietly adds to vinyl’s already strong value case.
How Cheap Can You Really Go?
The price floor on vinyl is genuinely low. Basic peel-and-stick vinyl tiles start around $0.50 to $1 per square foot, and self-stick 12-by-12-inch squares from big-box stores frequently sell for under $1. Luxury vinyl tile, or LVT, with a rigid core and a thicker wear layer runs higher, generally $1.50 to $3 per square foot on the value end.
Even at the top of the budget range, vinyl undercuts most other flooring. For comparison, you can often floor an entire small bathroom for the price of a few boxes of ceramic tile plus the mortar and grout it demands. Just remember that with the very cheapest peel-and-stick, you are trading long-term durability for that rock-bottom price, so match the product to how hard the room gets used.
Peel-and-Stick Versus Luxury Vinyl Tile
The two ends of the budget spectrum behave very differently. Peel-and-stick tiles are the cheapest and easiest, but the adhesive is only as good as your prep, and in humid or high-traffic areas the edges can lift over time. They shine as a low-stakes update for a rental, a starter home, or a room you plan to redo again in a few years.
Luxury vinyl tile costs more but plays in a different league of durability. Rigid-core LVT clicks together like a floating floor, spans minor subfloor flaws, and carries a real wear layer that resists scratches and dents from furniture and pets. If you want the cheap price of vinyl but expect the floor to last a decade, spending the extra dollar per square foot on LVT is almost always the smarter long-term move.
The One Spec That Matters Most: Wear Layer
If you learn only one thing about buying budget vinyl, make it the wear layer. This clear top coating, measured in mils, is what stands between your floor and daily abrasion, and it is the single best predictor of how long the tile will last. A mil is one-thousandth of an inch, and thicker means tougher.
For light-use spaces like a guest bathroom or a closet, a 6-mil wear layer will do. Living areas, hallways, and kitchens really want 12 mils or more, and 20-mil products approach commercial durability. The cheapest peel-and-stick tiles often skimp here with 2 to 4 mil layers, which is fine for a quick refresh but wears through fast under real traffic, so always check this number before price shopping.
Where Budget Vinyl Falls Short
Being honest about the downsides helps you set the right expectations. The cheapest vinyl floor tiles have thin wear layers and weaker adhesives, so they are prone to lifting edges, gapping, and visible wear in busy areas within a couple of years. They also telegraph subfloor imperfections; every ridge, nail head, or dip underneath can eventually show through a thin tile.
Cheap vinyl can also look cheap if you are not careful. Low-end products use fewer pattern repeats, so the same wood grain or stone image shows up again and again across a floor, breaking the illusion. Some bargain vinyl can also dent under heavy furniture legs and may discolor from rubber mats or direct sun over time, so consider felt pads and rugs in vulnerable spots.
Resale and permanence are worth a thought as well. The very cheapest peel-and-stick is glued directly down and can be a chore to remove cleanly, sometimes leaving residue or damaging the subfloor when it finally comes up. If you think you will want to change the floor again in a few years, a floating click-lock LVT that lifts out without adhesive is friendlier to your future self, even though it costs a little more today.
Installation Tips for a Floor That Lasts
With vinyl, prep is everything, and it is where budget installs succeed or fail. Start with a clean, dry, level subfloor, filling low spots and sanding down high ones, because thin tile will mirror whatever is beneath it. Let the tiles acclimate in the room for 24 to 48 hours so they adjust to temperature and humidity and do not shrink or gap after they are down.
For peel-and-stick, press each tile firmly and roll the whole floor with a flooring roller or even a rolling pin to fully activate the adhesive. Dry-lay the pattern first, starting from the center of the room so cut pieces land evenly at the walls, and stagger the seams on plank styles for a natural look. Sharp blades and patient, straight cuts separate a floor that looks bought from one that looks slapped down.
Shopping Smart for the Best Value
Getting the most from a small budget is about matching product to purpose. For a rental turnover or a room you will redo soon, the cheapest peel-and-stick makes perfect sense. For a floor you want to forget about for ten years, stretch to a rigid-core LVT with a 12-mil or thicker wear layer, since the modest upcharge buys years of extra life.
Watch for clearance and closeout deals at home centers and discount tile outlets, and always buy 10 percent extra for cuts, waste, and future repairs. Check the wear-layer spec, read reviews for edge-lifting complaints, and inspect a box for consistent color before you commit. Do that homework and the cheapest vinyl floor tiles will give you a waterproof, attractive, budget-friendly floor that far outperforms its price tag.
Finally, weigh the warranty against the price. Even inexpensive vinyl often carries a wear warranty ranging from a handful of years on the thinnest peel-and-stick to 15 or 20 years on rigid-core LVT, and that number is a useful shorthand for how much abuse the manufacturer expects the product to take. Pair a realistic warranty with the right wear layer for your room, prep the subfloor properly, and you will have a floor that quietly does its job for years without ever demanding much money or attention.
Prefer to explore on your own?
See how new flooring looks in your actual room in seconds — free, no signup.
Try the free Floor Studio →