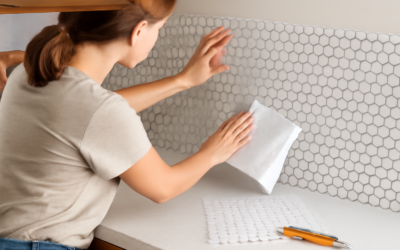
The chevron pattern has long signaled good taste, and now you can get it without mortar, grout, or a contractor. Chevron peel and stick tile puts that crisp, continuous zigzag within reach of any homeowner willing to spend an afternoon with a level and a utility knife. These adhesive-backed tiles bring instant style to backsplashes, accent walls, and low-traffic floors, making them a favorite for renters, quick refreshes, and budget-minded upgrades. This guide covers what they are, where they work, what they cost, and how to install them well.
Part of our Tile & Grout guide — explore the full guide →
What Chevron Peel and Stick Tile Is
These are self-adhesive tiles printed or molded with the V-shaped chevron pattern, backed with a strong pressure-sensitive adhesive. Instead of setting each piece in thinset and grouting the joints, you simply peel off the backing paper and press the tile onto a clean, flat surface. Many products come in larger sheets that group several chevron rows together, so a small backsplash can go up in an hour or two. Materials range from vinyl and PVC to gel-based and metal-look finishes, and some include a raised or 3D texture that mimics real stone or ceramic surprisingly well.
Types and Materials
Not all peel and stick tiles are created equal, and the material affects both look and durability:
- Vinyl and PVC: The most common and affordable, offering a flat printed chevron in countless colors.
- Gel or epoxy-topped: A clear resin layer adds a glossy, dimensional, almost ceramic-like appearance and better water resistance.
- Metal-look: Aluminum or metal-composite tiles deliver a sleek, industrial chevron with real reflectivity.
- Stone and glass composite: Higher-end options blend real material chips for a more authentic feel at a higher price.
For kitchens and bathrooms, prioritize water-resistant gel or vinyl products specifically rated for wet areas.
Where to Use It
Chevron peel and stick tile shines in spots that see moderate use and where a full tile job would be overkill. Kitchen backsplashes are the classic application, adding pattern behind a range or sink without the mess of grout. Bathroom vanity walls, laundry rooms, and home-office accent walls all benefit from the quick transformation. It also works on the risers of a staircase, inside a bookcase for a pop of pattern, or as a temporary floor treatment in a low-traffic room. Renters especially love it because many products remove cleanly, leaving little or no residue behind.
Advantages of Going Peel and Stick
The biggest draw is simplicity. There is no mixing thinset, no waiting for mortar to cure, and no grouting or sealing. The tools are minimal, usually a utility knife, a level, a straightedge, and maybe a small roller. Cleanup is nearly nonexistent, and the low cost makes it easy to experiment with a bold pattern you might hesitate to commit to permanently. Because it is thin, it often installs over existing tile or a smooth wall without demolition. And when your taste changes, many peel and stick products come off far more easily than traditional tile.
What It Costs
Price is one of the pattern’s biggest selling points. Basic vinyl chevron peel and stick tile typically runs $4 to $9 per square foot, while premium gel, metal-look, or stone-composite versions range from about $9 to $18 per square foot. Because you are installing it yourself, you skip labor charges that can double or triple the cost of a professionally tiled surface. A standard kitchen backsplash of 25 to 30 square feet often comes in under $250 in materials. Factor in a few basic tools if you do not already own them, plus a small overage for mistakes and cuts around outlets.
How to Install It Step by Step
A clean, smooth, dry surface is the key to a lasting result. Follow these steps:
- Prep the surface: Clean thoroughly to remove grease, dust, and soap film. Adhesive will not bond to a dirty or glossy wall, so degrease and lightly sand slick surfaces.
- Plan your layout: Find the center or a key edge and mark level guide lines. Chevron patterns look wrong fast if the first row is crooked.
- Peel and press: Remove the backing, align the tile to your guide line, and press firmly from the center outward to push out air.
- Roll or smooth: Run a hand roller or a clean cloth over each tile to maximize adhesion.
- Cut to fit: Use a sharp utility knife and a straightedge to trim around outlets, edges, and corners.
- Seal edges if needed: In wet areas, a thin bead of clear caulk along seams adds protection.
Durability and Care
Peel and stick tile is not as tough as real ceramic or porcelain, so set expectations accordingly. On walls and backsplashes it can last several years with light care, but on floors it wears faster and is best limited to low-traffic areas. Heat is its enemy, so keep it a safe distance from stovetop burners and avoid direct high heat. Clean with a soft cloth and mild soap rather than abrasive scrubbers, which can scratch the printed surface. Water can eventually creep under edges in humid areas, so sealing seams and promptly wiping spills extends its life considerably.
Limitations to Keep in Mind
Honesty helps you avoid disappointment. Peel and stick chevron will not fool anyone up close the way real tile does, and cheaper versions can look obviously printed. Adhesion depends entirely on surface prep, so textured, dirty, or freshly painted walls may cause tiles to lift. It is not a permanent, decades-long solution, and it does not add the resale value that genuine tile can. Extreme humidity, direct heat, and heavy abuse shorten its lifespan. For a high-end kitchen you plan to keep for twenty years, traditional tile is still the better investment.
Common Mistakes to Avoid
Most disappointing peel and stick projects trace back to a handful of avoidable errors, and knowing them in advance saves you frustration. The biggest culprit is poor surface prep. Skipping the degreasing step or applying tile over a glossy, freshly painted, or textured wall almost guarantees edges will lift within weeks. Give paint at least a few weeks to fully cure, scuff slick surfaces lightly, and wipe everything down with a degreaser before you peel a single backing sheet. A clean, smooth, dry wall is non-negotiable.
The second common mistake is starting without a level guide line. Chevron patterns are unforgiving of even a slight tilt, and because each row builds on the last, a crooked first course throws off the entire wall. Take the extra ten minutes to snap a level line and dry-fit a row before committing. Rushing the pressing step is another frequent error; the adhesive needs firm, even pressure from the center outward, and a small hand roller makes a real difference in how long the tiles stay put. Cutting carelessly around outlets and edges also gives the job away, so use a sharp blade, a fresh straightedge, and measure twice. Finally, people often place these tiles in the wrong environment, such as directly behind a stovetop where high heat can loosen the adhesive, or on a heavily used floor where they wear out fast. Match the product to a low-heat, moderate-traffic spot, seal the seams in damp areas, and your chevron peel and stick tile will look sharp far longer than a rushed, poorly prepped installation ever could.
Is Chevron Peel and Stick Tile Right for You?
If you want a stylish, on-trend update on a modest budget and a short timeline, chevron peel and stick tile is hard to beat. It rewards careful surface prep and level layout with a designer look that belies its low cost and easy installation. It is ideal for renters, first-time DIYers, and anyone testing a bold pattern before committing to permanent tile. Keep it in appropriate low-moisture, moderate-traffic areas, care for it gently, and this affordable chevron peel and stick tile can keep your walls looking sharp for years.
Prefer to explore on your own?
See how new flooring looks in your actual room in seconds — free, no signup.
Try the free Floor Studio →