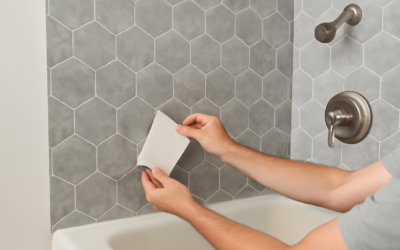
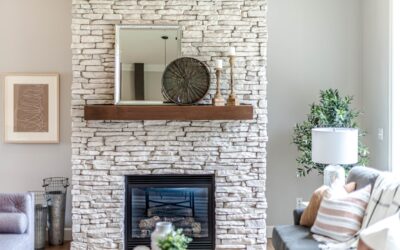
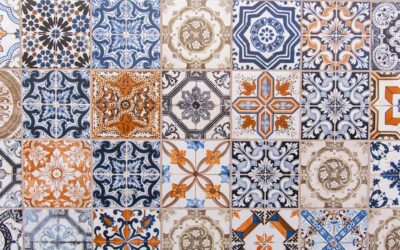
For homeowners and renters who want the tile look without the mortar, grout, and demolition, peel and stick ceramic tile promises a fast, affordable, and beginner-friendly path to a fresh surface. These adhesive-backed tiles press directly onto walls, backsplashes, and some floors, transforming a space in hours rather than days. But the category is often misunderstood, and knowing exactly what you are buying makes all the difference in your results. This complete guide explains how these tiles work, where they succeed, what they cost, and how to install them for a durable, attractive finish.
Part of our Tile & Grout guide — explore the full guide →
- What Is Peel and Stick Ceramic Tile
- Benefits of Peel and Stick Tile
- Limitations to Understand
- Where to Use Peel and Stick Ceramic Tile
- Cost of Peel and Stick Ceramic Tile
- How to Install Peel and Stick Tile
- Care and Longevity
- Peel and Stick Versus Traditional Tile
- Is Peel and Stick Ceramic Tile Right for You
What Is Peel and Stick Ceramic Tile
The term covers a few different products, so clarity matters. Some peel and stick tiles are made from vinyl or gel printed to look like ceramic, while others are genuine thin ceramic or stone pieces mounted on a self-adhesive backing. The traditional versions are lightweight vinyl or composite tiles with a printed tile design and a peel-off adhesive layer. Newer options include real thin ceramic and glass mosaic sheets bonded to a flexible adhesive mat, giving a more authentic look and feel. Both share the same core promise: no thin-set mortar, no messy grouting, and no special tools required for basic installation.
Understanding which type you are buying is essential, since a printed vinyl tile behaves very differently from a genuine ceramic mosaic sheet in terms of durability, feel, and appropriate use.
Benefits of Peel and Stick Tile
The appeal of these products is easy to see, especially for budget-conscious and DIY-minded homeowners. They offer a stack of practical advantages over traditional tiling.
- Easy installation: No mortar or grout, and most projects finish in an afternoon.
- Beginner-friendly: Minimal tools and skills required, ideal for first-time DIYers.
- Affordable: Lower material and labor costs than traditional tile.
- Renter-friendly: Many varieties remove without damaging the original surface.
- Low mess: No demolition, dust, or drying time to wait through.
For a quick kitchen or bathroom refresh on a modest budget, few solutions match the convenience and speed of quality peel and stick tile.
Limitations to Understand
These tiles are a convenient overlay, not a full replacement for traditional tile, and honest expectations prevent disappointment. Most peel and stick products perform best on walls and backsplashes rather than heavy-traffic floors or constantly wet areas. In showers and tub surrounds, prolonged water exposure can loosen the adhesive over time, so these zones are generally not recommended unless the product is specifically rated for them. On floors, only tiles designed and rated for flooring should be used, and even then in lower-traffic spaces.
They also require a smooth, clean, flat surface to adhere well; textured, glossy, or uneven walls make for a weak bond. And while durable for their category, they will not match the decades-long lifespan of true mortar-set ceramic. Knowing these boundaries helps you place them where they will truly succeed.
Where to Use Peel and Stick Ceramic Tile
Placement is the key to lasting results. The best applications keep the tile away from constant water and heavy abuse.
- Kitchen backsplashes: The ideal use, refreshing the wall behind counters and stoves.
- Bathroom walls outside the shower: Great for vanity backsplashes and dry wall areas.
- Laundry and mudroom walls: Durable accents in lower-moisture spaces.
- Accent walls: An easy way to add pattern and texture to any room.
- Low-traffic floors: Only with floor-rated products, in spaces like powder rooms.
Avoiding the inside of showers and high-traffic entry floors keeps the adhesive intact and the tile looking its best for as long as possible.
Cost of Peel and Stick Ceramic Tile
These tiles are among the more affordable tiling options, especially once you factor in the labor you save. Here are realistic ranges.
- Vinyl and gel peel and stick tiles: $4 to $10 per square foot.
- Genuine thin ceramic or glass mosaic sheets: $8 to $20 per square foot.
- Installation: often free if you DIY, or a modest fee if hired out.
Because you skip mortar, grout, and professional tiling labor, the total project cost is typically far lower than traditional tile. A standard kitchen backsplash can often be completed for a couple hundred dollars in materials, making this an accessible upgrade for almost any budget.
How to Install Peel and Stick Tile
Preparation determines whether these tiles last for years or peel within weeks, so take your time with the surface. Follow these steps for a clean, durable result:
- Clean the surface thoroughly with a degreaser, then wipe with rubbing alcohol to remove all residue.
- Let it dry completely, since any moisture or film weakens the bond.
- Measure and dry-fit tiles first to plan alignment and cuts before peeling any backing.
- Peel and press from one edge, smoothing outward to avoid air bubbles.
- Use a utility knife or scissors to trim tiles around outlets and edges, and firmly roll or press for full adhesion.
Starting with an impeccably clean, smooth, dry surface gives the adhesive its best grip. Rushing the prep is the most common reason these tiles fail early.
Care and Longevity
Maintenance is simple: wipe the tiles with a damp cloth and mild cleaner, avoiding abrasive scrubbers that can damage printed surfaces or loosen edges. In a dry, well-placed spot, quality peel and stick tile can look great for several years, while genuine thin ceramic versions last longer than printed vinyl. Keeping the surface dry, cleaning gently, and ensuring good ventilation all extend their life. In damp areas or on floors, expect a shorter lifespan and plan to refresh them periodically.
Peel and Stick Versus Traditional Tile
Deciding between peel and stick and traditional mortar-set tile comes down to weighing convenience against permanence. Each has a clear place, and understanding the trade-offs helps you choose wisely for your situation. Traditional tile, set in thin-set mortar and finished with grout, is the gold standard for durability and water resistance, lasting for decades and handling floors, showers, and heavy traffic with ease. The trade-offs are higher cost, a longer and messier installation, and the need for real skill or a professional.
Peel and stick tile flips those priorities. It installs in a fraction of the time with no mortar, grout, or special tools, costs less, and can often be removed cleanly, making it ideal for renters, quick refreshes, and budget projects. In exchange, it is less durable, less water-resistant, and unsuitable for showers and heavy-traffic floors unless specifically rated for them. It is a convenient overlay, not a permanent structural surface.
Consider your priorities before choosing:
- Choose peel and stick for speed, low cost, and easy, reversible updates.
- Choose traditional tile for showers, floors, and lasting, permanent results.
- Peel and stick suits renters and DIY beginners; traditional suits long-term investments.
- Peel and stick refreshes a look for years; traditional tile lasts for decades.
For many homeowners, the two are not competitors but tools for different jobs. Peel and stick shines when you want a fast, affordable, low-commitment update to a backsplash or wall, while traditional tile remains the right call for permanent installations in wet or high-traffic areas. Matching the product to the project ensures you get results you will be happy with.
Is Peel and Stick Ceramic Tile Right for You
Choosing peel and stick ceramic tile makes excellent sense when you want a fast, affordable, and beginner-friendly way to update a backsplash or wall, especially as a renter or first-time DIYer. Set your expectations honestly: know exactly which product you are buying, keep it out of showers and heavy-traffic floors unless it is specifically rated for them, and install it on an impeccably clean, smooth surface for the best bond. Placed thoughtfully and applied with care, it delivers a surprising amount of style and satisfaction for very little money and effort, making it one of the easiest home upgrades you can tackle yourself.
Prefer to explore on your own?
See how new flooring looks in your actual room in seconds — free, no signup.
Try the free Floor Studio →