Most chimney leaks that homeowners blame on flashing actually start at the top, where a cracked or poorly built crown lets water pour straight into the masonry. A properly built concrete chimney cap — more precisely called a chimney crown — is the single most important weather defense your chimney has, shedding rain away from the brick and sealing the top of the chase. Yet the majority of crowns poured by masons are done wrong: too thin, no overhang, and made from mortar instead of real concrete. Here is what a correct concrete cap looks like, what the options cost, and how to fix one that is failing.
Chimney Cap vs. Chimney Crown: Clearing Up the Terms
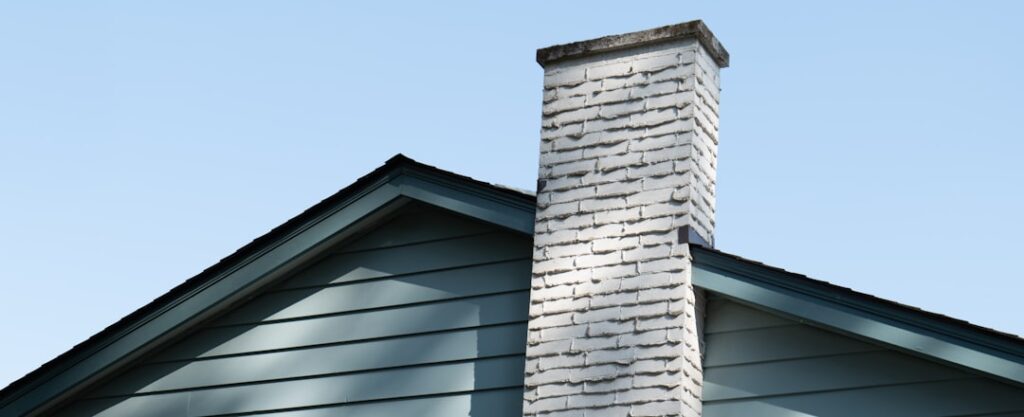
The terminology trips people up because two different components sit at the top of a chimney. The crown (also called a wash or cap in masonry trade slang) is the concrete slab that covers the top course of brick, sloping away from the flue to shed water. The cap in retail terms usually means the metal hood with mesh screening that covers the flue opening itself to keep out rain, birds, and embers.
When people search for a concrete chimney cap, they almost always mean the concrete crown — the poured or precast slab. This article covers that component. Ideally your chimney has both: a concrete crown protecting the masonry and a stainless or copper cap protecting the flue opening. A $60 stainless flue cap plus a sound crown will outlast a dozen caulk-and-pray repairs.
What a Properly Built Concrete Crown Requires
The Brick Industry Association and CSIA both publish crown specs, and they agree on the fundamentals. A correct crown has:
- Minimum 2-inch thickness at the thinnest edge, thickening toward the flue — 3 to 4 inches at the center is common
- A 2 to 2.5-inch overhang beyond the chimney face on all four sides, so runoff drips clear of the brick
- A drip edge (kerf or groove) cut into the underside of the overhang, forcing water to fall off rather than wick back to the masonry
- A slope of at least 3 degrees (roughly 1/4 inch per foot minimum; most pros do closer to 1 inch of fall) from flue to edge
- A bond break — a layer of felt or sealant between the crown and the flue tile, plus a flexible expansion joint around the flue, because clay flue liners expand at a different rate than concrete
- Real concrete, ideally an air-entrained mix with pea gravel aggregate rated 3,500 to 4,000 PSI, sometimes reinforced with welded wire or fiberglass fibers
Compare that to what many chimneys actually have: a half-inch smear of leftover mortar troweled flat against the flue with zero overhang. Mortar crowns crack within a few freeze-thaw cycles because mortar is not designed for horizontal weather exposure. If your crown looks like a gray icing job with no lip, it was built wrong regardless of its current condition.
Precast Concrete Chimney Caps
Precast crowns are factory-made slabs, cast in controlled conditions with proper reinforcement, vibration, and curing. They arrive with the overhang, drip kerf, and flue opening already formed. You bed them in mortar or a flexible sealant on top of the chimney, seal around the flue, and the job is done in an hour.
Sizes run from about 20 by 20 inches for a single-flue stack up to 4-foot custom units for large fireplace chimneys. Expect to pay $150 to $500 for standard sizes and $600 to $1,200 for large or custom precast units, plus delivery — these pieces weigh 150 to 500 pounds, which is the main drawback. Getting a 300-pound slab onto a two-story roof requires a lift, a crane truck, or several very committed helpers and a well-planned rigging setup. For single-story chimneys, precast is often the best combination of quality and cost.
Cast-in-Place Concrete Crowns
A cast-in-place crown is formed and poured on top of the chimney. The mason builds a perimeter form that projects 2 to 2.5 inches past the brick, installs a bond break over the top course and around the flue, lays in reinforcing mesh, then pours and trowels the concrete to a slope. A strip of beveled molding tacked inside the form underside creates the drip kerf.
Done right, this produces a monolithic crown perfectly fitted to any chimney footprint, including odd shapes and multi-flue stacks that precast cannot match. Cost for a professionally formed and poured crown runs $600 to $1,500 depending on chimney size, roof pitch, and access. The pour uses only 2 to 4 bags of concrete mix (about $25 in material), so you are paying almost entirely for skilled labor and staging. The weak point is workmanship: a rushed crew skipping the bond break or overhang gives you a crown that cracks in 5 years instead of lasting 50.
Repairing a Cracked Concrete Cap
Whether to repair or replace comes down to crack width and coverage. Hairline cracks under 1/8 inch in an otherwise sound, properly sloped crown can be sealed. Anything wider, any spalling that exposes aggregate, or a crown with missing chunks calls for replacement — patches on a structurally failed crown are temporary at best.
Sealing a Sound Crown
Clean the surface with a wire brush and rinse, fill cracks with a polyurethane masonry sealant such as Sikaflex Crack Flex, then coat the entire crown with a flexible elastomeric crown sealer. CrownCoat by SaverSystems and CrownSeal are the two products chimney sweeps use most; a gallon covers about 40 sq ft, costs $90 to $120, and carries a 15-year warranty. Brush it on 1/8 inch thick, extending over the drip edge and up to (but not bonded rigidly against) the flue tile.
Resurfacing
For crowns with wide shallow deterioration but sound structure, a trowel-grade repair mortar like Quikrete Vinyl Concrete Patcher can rebuild slope and thickness at minimal cost. Feather it from 1/4 inch at the flue to the outer edge, cure it damp, then topcoat with elastomeric sealer. This buys 5 to 10 years for under $100 in materials.
DIY Installation Tips and Common Mistakes
If you pour your own crown, a few details separate a 50-year crown from a 5-year one. Never bond the concrete directly to the flue tile — wrap the tile with 1/4-inch foam or felt first, then caulk that joint with high-temp sealant after curing. Do not skip the overhang; a flush crown dumps every drop of runoff down the brick face, which is exactly what causes spalled brick and failed mortar joints below. Use concrete with small aggregate, not mortar mix or sand mix. Dampen the top course of brick before pouring so it does not suck water out of the mix. Finally, cure the pour slowly — cover it with plastic for 3 days, and never pour when temperatures will drop below 40°F within 48 hours.
Safety deserves a word too. Chimney work means roof work, usually at the ridge. Use a harness anchored to a rated roof anchor, stage materials with a rope and bucket, and check the weather. More homeowners get hurt on the ladder than on the chimney.
How to Inspect Your Crown Without Climbing
You can spot most crown failures from the ground with binoculars. Look for visible cracks radiating from the flue, white staining (efflorescence) on the upper courses of brick, spalled brick faces near the top, or dark streaks running down from the crown edge — all signs water is getting past the cap. Inside the house, check the ceiling and walls around the chimney chase after hard rains, and shine a flashlight up the flue during your annual sweep visit. Catching a crown problem at the hairline-crack stage means a $150 sealer fix instead of a four-figure rebuild, so make the binocular check part of your spring gutter routine.
What It All Costs
Budget numbers for the common scenarios: sealing a sound crown with elastomeric coating runs $150 to $400 professionally, or about $100 DIY. A precast concrete chimney cap installed runs $400 to $900 for typical sizes. A new cast-in-place crown runs $600 to $1,500. Full crown demolition and rebuild on a large multi-flue chimney with difficult access can reach $2,000 to $3,000. Add $60 to $250 for a stainless flue cap while the crew is up there — it protects the flue liner and keeps animals out, and installing it during crown work costs almost nothing in extra labor. Against the $3,000 to $8,000 price of rebuilding a water-damaged chimney stack, every one of these numbers is cheap insurance.