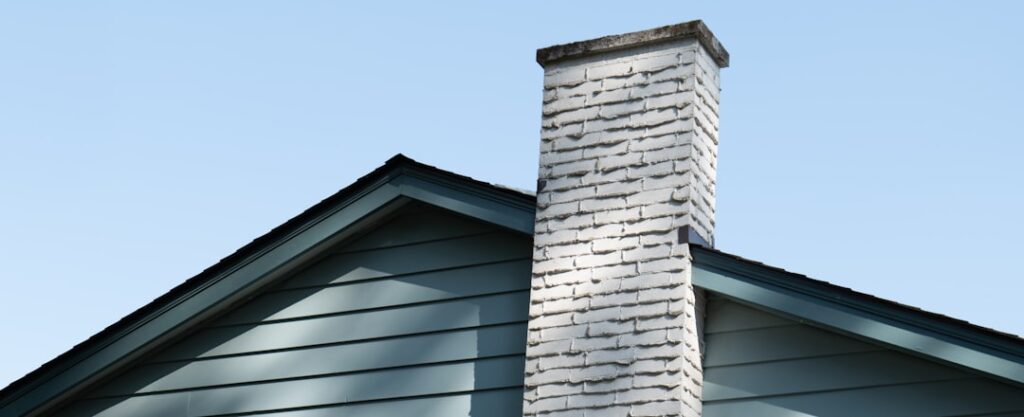
Chimney cap installation is one of the highest-value protective jobs on a house. A $40 to $300 cap keeps rain, snow, animals and burning embers out of a flue that would otherwise cost thousands to repair if water rots the liner or a squirrel builds a nest inside it. This guide covers cap types, sizing, tools, the install itself, and the roof-safety reality that makes this a job to take seriously.
Before anything else: this work happens on a roof, often near a ledge. Falls are the real danger here, not the cap. If your roof is steep, tall, or wet, or if you are not comfortable and properly secured, hire a chimney professional. No cap is worth a fall.
What a Chimney Cap Does
The cap sits on top of the flue and does four jobs at once. It sheds rain and snow that would otherwise pour down the flue and degrade the liner, mortar and damper. Its mesh screen blocks birds, squirrels, raccoons and bats from nesting in the warm, sheltered flue. That same mesh acts as a spark arrestor, catching hot embers before they land on your roof or a neighbor’s. And a well-designed cap improves draft by shielding the flue from downdrafts and crosswinds.
Skip the cap and you invite water damage, animal intrusion, and, with a wood fire, a genuine rooftop fire risk from escaping sparks. Most fire codes require a spark arrestor screen on a wood-burning chimney.
Types of Chimney Caps
- Single-flue cap: Fits over one exposed flue tile. The most common residential type, $40 to $120.
- Multi-flue cap: A large cap covering several flues and the whole crown at once, $150 to $500. Used on chimneys with multiple liners.
- Top-mount (outside-mount) cap: Covers the entire chimney crown and bolts to the masonry, giving the best water protection for the crown itself.
- Draft-increasing cap: A specialized cap that boosts draft in a chimney that smokes; more expensive and usually a fix for a specific problem.
For material, choose stainless steel or copper over galvanized. Galvanized caps rust within a few years and stain the masonry. Stainless is the value choice and often carries a lifetime warranty.
Measuring for the Right Cap
Getting the size right is the whole job. For a single-flue cap, measure the outside dimensions of the exposed flue tile, its length and width for a rectangular tile or the diameter for a round one, plus how far it protrudes above the crown. The cap must slip over the tile with at least an inch of overlap on each side and enough height to clear the flue opening for full airflow.
For a multi-flue or top-mount cap, measure the outside dimensions of the entire chimney crown so the cap’s skirt can wrap the masonry. When in doubt, size up slightly; a cap that is a hair large can be shimmed or clamped, while an undersized cap simply will not fit.
Tools and Materials
- Correctly sized stainless or copper chimney cap
- Cordless drill and masonry bits (for bolt-on styles)
- Nut driver or wrench for the cap’s set screws
- High-temperature silicone or chimney sealant
- Wire brush to clean the flue tile
- Sturdy ladder, roof harness and rope, non-slip footwear
- Tape measure and work gloves
Roof Safety Comes First
This step is the most important in the guide. Set your ladder on firm, level ground at the correct angle, one foot out for every four feet up, and have someone foot it. Wear a roof harness anchored to a secure point whenever the pitch is more than a gentle walk. Work only on a dry roof in calm weather; wet shingles and wind turn a routine task into an emergency. Keep your body away from the edge and never overreach. If any of this feels beyond your comfort, stop and call a pro; a chimney sweep will cap a flue for $200 to $500 including the cap and do it safely.
Step-by-Step Installation
- Inspect and clean. Once safely on the roof, clear the flue tile of debris and wire-brush any loose mortar so the cap seats cleanly. Check the crown for cracks; if it is crumbling, repair it before capping.
- Test-fit the cap. Slide the cap over the flue tile and confirm it seats squarely with even overlap on all sides.
- Mark and secure. For a friction-fit single-flue cap, position the built-in set screws or clamp band against the tile. For a bolt-on top-mount cap, mark the crown, drill for masonry anchors, and set the bolts.
- Tighten the fasteners. Snug the set screws or bolts evenly so the cap grips the tile firmly without cracking it. Do not overtighten against clay tile.
- Seal as needed. Apply a bead of high-temperature silicone where a top-mount skirt meets the crown to lock out water. Leave the flue opening itself unobstructed for airflow.
- Final check. Confirm the cap does not rock, the screen is intact, and nothing blocks the flue. Gather tools and descend carefully.
Cost and When to Hire Out
A DIY chimney cap installation costs just the price of the cap, $40 to $300, plus an hour of work if you already own a ladder and basic tools. A professional install runs $200 to $600 including the cap, and that premium buys you safe roof access and an expert eye on the crown and flue. Given the fall risk, hiring out is money well spent for tall or steep roofs.
Whichever route you take, inspect the cap once a year when you clean the gutters. Look for a bent or missing screen, rust streaks, or a loose fit, and clear any nesting debris. A sound cap protects a chimney for decades, and pairing it with an annual chimney sweep keeps your flue drafting cleanly and your home safe from both water damage and stray sparks.
Signs You Need a New or Replacement Cap
A missing or failing cap announces itself if you know the signs. Water stains on the ceiling or walls near the chimney, a damp or musty smell from the firebox, or rust flakes in the fireplace all point to rain getting down an uncapped or corroded flue. Scratching, chirping, or flapping sounds from the chimney mean an animal has moved into the warm, sheltered flue, which an intact screen would have prevented. On the roof itself, look for a bent or torn screen, rust streaks running down the masonry from a galvanized cap, or a cap sitting crooked or blown loose after a storm.
Any of these is a cue to inspect and replace. A cheap galvanized cap that’s rusting should be swapped for stainless before the rust stains the whole chimney and the screen fails, letting animals and sparks through.
Single-Flue vs. Multi-Flue Decisions
If your chimney has more than one flue, a common setup with a fireplace and a furnace sharing the same chimney, you can either cap each flue individually or install one multi-flue cap over the entire crown. Individual caps are cheaper per unit and simpler to replace, but a multi-flue cap does double duty by also protecting the masonry crown from water, which is often the first part of a chimney to crack and leak. On an aging chimney with a deteriorating crown, the multi-flue cap that covers the whole top is frequently the better long-term investment despite the higher price.
Maintenance Schedule
Fold the cap into your yearly roof routine. When you clean the gutters, look up at the cap from the ground with binoculars, then check it up close during your annual chimney sweep. Clear any nesting debris, brush lint and creosote off the spark-arrestor screen, and confirm the fasteners are still tight. A stainless cap with a lifetime warranty can serve for decades with this light attention.
Done right, chimney cap installation is a small job with an outsized payoff, keeping water, animals and sparks out of a flue that would cost thousands to repair. Just remember the order of priorities: personal safety on the roof first, a correctly sized stainless cap second, and a sound crown and swept flue underneath it all.