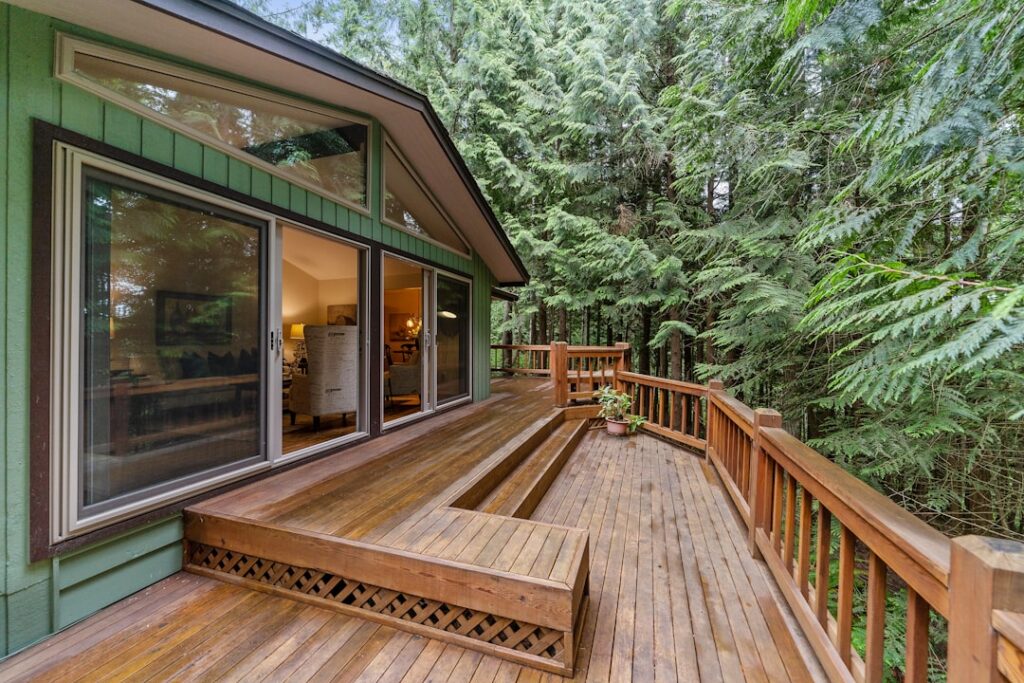
Deck building looks straightforward until you are standing in the backyard with a pile of lumber and no idea how deep your footings need to go. A deck is a structural addition that carries real loads, sits exposed to weather year-round, and has to meet building code, which means deck building rewards careful planning far more than raw speed. Get the layout, footings, and framing right, and the deck boards themselves are the easy part.
Part of our Decks & Outdoor guide — explore the full guide →
Planning and Permits Come First
Before you buy a single board, sketch the deck to scale and check your local code. Most jurisdictions require a permit for any deck over 30 inches above grade or attached to the house, and inspectors will want to see footing depth, joist spans, ledger attachment, and railing height. Residential railings are typically required at 36 inches high with baluster gaps no wider than 4 inches so a child cannot slip through.
Call 811 at least a few days before you dig to have underground utilities marked; hitting a gas or electric line is expensive and dangerous. Confirm your property setback lines too, since decks often must sit a minimum distance from the lot boundary. A typical mid-size deck runs 12 by 16 feet, or 192 square feet, which is large enough to hold a table and a small seating area comfortably.
Understanding Deck Costs
Materials and labor drive the budget more than size alone. A basic pressure-treated deck runs roughly $15 to $25 per square foot for materials and DIY labor, while a composite deck with quality railing lands between $30 and $60 per square foot installed. That 192-square-foot deck could cost $4,000 in pressure-treated lumber built yourself, or $9,000 to $12,000 in composite with a contractor.
Hidden costs add up fast. Concrete for footings, galvanized or stainless hardware, a ledger flashing kit, and stair stringers all matter. Budget an extra 10 to 15 percent for hardware and fasteners, which are easy to underestimate. If your deck sits more than a few feet off the ground, you will also need more substantial posts and possibly engineered beams, which raise the price.
Footings and the Foundation
Everything above ground depends on footings that reach below the frost line, which ranges from about 12 inches in the Deep South to 48 inches or more in northern states. If you pour footings too shallow, frost heave will lift and rack the deck over a few winters. Dig each hole, set a cardboard form tube, and pour concrete to support a post base bracket that keeps the wood off the ground.
Space footings according to your beam and joist spans, usually every 6 to 8 feet. Use a galvanized post base with a standoff so the post never sits in standing water, which is the single most common cause of premature rot. Let concrete cure at least 24 to 48 hours before loading it. For attached decks, the ledger board bolted to the house must use proper lag screws or through-bolts and flashing, because a failed ledger connection is the leading cause of catastrophic deck collapses.
Framing the Structure
The frame is where your deck earns its strength. A ledger board attaches to the house rim joist, the beam rests on the posts, and joists span between them, typically spaced 16 inches on center. For composite decking you may need to tighten joist spacing to 12 inches on center, especially on diagonal patterns, because composite is less stiff than wood. Use joist hangers rated for the lumber size and fasten them with the correct structural nails or screws, not deck screws.
Crown each joist so the natural upward curve faces up, keeping the surface flat over time. Install blocking or bridging between joists on longer spans to prevent twisting. Once the frame is square, measured by equal diagonals, and level, protect the top of every joist with self-adhesive butyl flashing tape. That single step dramatically extends frame life by keeping water out of screw holes.
Choosing Decking Material
Your decking choice shapes both cost and maintenance for the next 20 years. Pressure-treated pine is cheapest at around $2 to $5 per square foot but requires cleaning and re-staining every two to three years. Cedar and redwood cost more and resist rot naturally, offering a beautiful grain, though they still need periodic sealing. Composite and PVC boards from brands like Trex and TimberTech cost $4 to $13 per square foot but never need staining and resist fading and splinters.
Consider hidden fasteners for composite decking, which grip the board edges in grooves and leave a clean, screw-free surface. If you go with wood and face-screw, use coated deck screws or stainless in coastal areas, and pre-drill near board ends to prevent splitting. Whatever you choose, gap the boards about 1/8 to 3/16 inch to allow drainage and airflow, since trapped water is the enemy of any deck.
Stairs, Railings, and Finishing
Stairs demand precision because uneven risers are a trip hazard and a code violation. Aim for consistent risers around 7 inches and treads around 11 inches deep. Cut stringers carefully, attach them to a solid landing pad, and use a graspable handrail if you have more than a few steps. Railings must resist a 200-pound lateral load at the top, so bolt posts securely to the frame rather than just to the decking surface.
Finish wood decks after they dry out, which can take several weeks for fresh pressure-treated lumber. Apply a penetrating stain or sealer with UV protection on a dry, mild day between 50 and 90 degrees Fahrenheit. Composite decks need no finish, just an occasional wash with soap and water. A well-built deck should last 15 to 20 years for wood and 25 to 50 years for quality composite, so the upfront effort pays off for decades.
Knowing When to Hire a Pro
Ground-level and low decks are within reach of a confident DIYer with a circular saw, drill, and a free weekend or two. But once a deck sits more than a few feet off the ground, wraps around corners, or attaches to a multi-story home, the engineering and safety stakes climb quickly. A licensed contractor handles permits, structural calculations, and inspection sign-off, which is worth the cost for elevated or complex builds. If you are unsure whether your ledger connection or footing plan meets code, a one-hour consultation with a local building inspector can save you from an expensive rebuild later.
Common Deck Building Mistakes to Avoid
Even experienced DIYers repeat the same handful of errors, and knowing them upfront saves both money and frustration. The most dangerous is under-building the ledger connection, using nails or too few lag screws, which is responsible for the majority of catastrophic deck failures. Right behind it is setting footings above the frost line, which lets winter heave rack and twist the frame within a few seasons. Neither mistake shows up immediately, which is exactly what makes them so costly.
Smaller errors add up too. Installing wet pressure-treated boards tightly together leads to large, ugly gaps once they shrink, while installing bone-dry boards with no gap leaves no room for drainage. Using the wrong fasteners, standard steel instead of hot-dipped galvanized or stainless, causes black staining and premature corrosion because the copper in modern treated lumber eats ordinary metal. Forgetting to flash the ledger, skipping joist tape, and failing to seal cut ends of treated lumber all invite rot into the exact spots most likely to hold water.
Planning for the Long Haul
A deck is a 15-to-25-year investment, so decisions that seem minor during the build echo for years. Spend a little more on quality hardware and stainless or coated fasteners, because replacing corroded connectors later means tearing into finished work. Choose your decking with maintenance honesty: if you know you will never restain, pay upfront for composite rather than committing to a wood deck you will let gray and splinter. Finally, size the deck for how you actually entertain, leaving at least a 3-foot walkway around a dining table, so the finished space works as well in practice as it looked on paper.