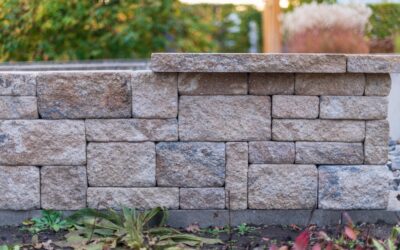
A failed retaining wall is one of the most expensive yard mistakes a homeowner can make. Replacing a 30-foot wall that bulged out after two winters runs $4,500 to $11,000 once excavation and drainage are redone. Smart diy retaining wall ideas start with material choice, drainage planning, and respect for the IRC code limit that caps unpermitted walls at 4 feet tall in most US jurisdictions. Build under that height with the right approach, and a homeowner with a strong back can hit professional results for $14 to $25 per square foot.
- The Height Rule Most People Get Wrong
- Segmental Retaining Wall Block
- Natural Stone Walls
- Pressure-Treated Timber Walls
- Poured Concrete and Concrete Block
- Drainage Is Half the Job
- Step-by-Step Build Outline
- Permits, Soil, and When to Hire Out
- Geogrid Reinforcement for Taller Walls
- Curves, Corners, and Steps
The Height Rule Most People Get Wrong
The International Residential Code, section R404, allows DIY construction of gravity retaining walls up to 4 feet measured from the bottom of the footing to the top of the wall. Anything taller in most US towns triggers an engineered design, soil testing, and a permit. Even at exactly 4 feet, terraced walls must be separated horizontally by twice the lower wall’s height to avoid being treated as one tall structure.
Ignoring the rule risks a stop-work order and forced demolition. Build two 3-foot terraces 6 feet apart rather than one 6-foot wall, and the project stays squarely in DIY territory.
Segmental Retaining Wall Block
SRW block, sold under brand names like Pavestone Anchor Diamond, Allan Block, and Belgard, is the dominant DIY material. Each block weighs 30 to 80 pounds, locks to the course below with a lip or pin, and comes in colors from buff tan to charcoal. Pricing runs $3 to $8 per block, which translates to roughly $12 to $20 per square foot of wall face installed.
The system forgives small leveling errors and tolerates frost heave better than mortared options. Most lines offer matching caps for $4 to $8 each, finishing the top with a clean horizontal line.
Natural Stone Walls
Dry-stack fieldstone walls, the kind seen on New England property lines, look timeless and last centuries when built right. Material costs run $20 to $40 per ton of stone, with a 30-foot by 3-foot wall consuming 5 to 7 tons. The labor is brutal, plan on 30 to 50 hours for a beginner, but the result has no plastic, no chemical bonding, and ages into the landscape.
Use a 6 to 8 degree batter, meaning the wall leans into the slope, so gravity pulls the wall toward the hillside rather than away. Skip mortared stone walls as DIY, they crack with freeze-thaw and require footings below the frost line.
Pressure-Treated Timber Walls
6×6 ground-contact pressure-treated lumber, rated 0.60 pcf retention or higher, makes a fast and budget-friendly wall at $4 to $9 per square foot of face. Stack timbers in a running bond, drill and drive 12-inch rebar at every other timber, and add deadmen, perpendicular timbers buried into the soil behind the wall, every 6 feet at the second course.
Expected life is 20 to 30 years if the timbers stay above the worst moisture, less in southern climates with insect pressure. Use stainless or hot-dipped galvanized hardware, regular fasteners corrode within five years from the copper preservative.
Poured Concrete and Concrete Block
Poured concrete walls hit the strongest result but demand the most skill. Forming, pouring, and tying rebar at 12-inch centers makes this a one-shot operation, and a missed call on a footing depth can ruin the project. Material cost is moderate, $12 to $18 per square foot, but labor jumps fast.
CMU concrete block walls fall between SRW and poured concrete. Stack blocks on a poured footing, fill cores with concrete and rebar at the corners and every 32 inches, then parge the face with stucco or veneer with stone. Total cost lands around $18 to $28 per square foot.
Drainage Is Half the Job
Every retaining wall fails for the same reason: water pressure behind the wall. Plan for 12 inches of 3/4 inch clean gravel behind the wall, a 4-inch perforated drain tile at the base wrapped in non-woven geotextile fabric, and weep holes or daylight outlets every 8 to 10 feet.
Skipping the drainage saves $300 in materials and costs $7,000 in repairs three years later. Buy the fabric, the gravel, and the drain pipe. They are non-negotiable.
Step-by-Step Build Outline
Dig a trench 6 inches below grade plus another 1 inch per foot of wall height. For a 3-foot wall, that is a 9-inch deep trench, 24 inches wide. Compact the base soil with a plate compactor rented from Home Depot at roughly $80 per day. Place 4 to 6 inches of crushed gravel, compact again, then level the first course of block obsessively. The first course determines the entire wall.
Backfill behind each course with clean gravel as you go, and step the wall back roughly 1 inch per course for batter. Top with caps adhered with construction adhesive like Loctite PL Premium.
Permits, Soil, and When to Hire Out
Check your local building department before starting. Some towns require permits for walls over 30 inches, others over 48. Sandy soils need different drainage strategies than clay. If the slope behind the wall feeds rainwater toward the house, hire an engineer regardless of height. Good DIY retaining wall ideas always start with respecting the soil first.
Geogrid Reinforcement for Taller Walls
Walls between 3 and 4 feet often benefit from geogrid, a polyester or polypropylene mesh laid horizontally into the backfill at specified courses. The grid ties the wall into the retained soil mass and dramatically reduces the chance of bulging. Manufacturers like Allan Block and Versa-Lok provide specification charts showing exactly which course to install the grid based on wall height and soil type.
Geogrid costs roughly $1 to $2 per square foot and adds maybe an hour to a typical DIY install. For walls in clay-heavy soil or on steeper slopes, it is cheap insurance against catastrophic failure. Skipping the geogrid on a tall wall is a common DIY mistake that shows up 2 to 4 years later.
Curves, Corners, and Steps
Straight walls are easier than curved ones, but curves add visual interest and follow natural contours better. Most SRW blocks include a tapered or notched design that allows tight inside and outside radius curves. Minimum radius varies by block, typically 8 to 12 feet on the outside curve and 4 to 6 feet on the inside.
For corners, plan the cuts during dry-fit before cutting any blocks. Inside corners are easier than outside, since outside corners require precise miters or full block returns. Step the wall up or down at slope transitions rather than running level, which gives the wall a more natural finished look and reduces the buried depth at the high end.