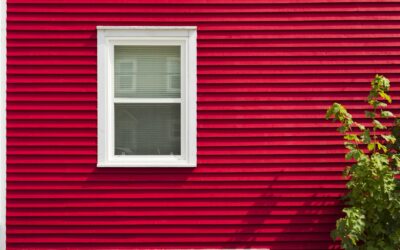
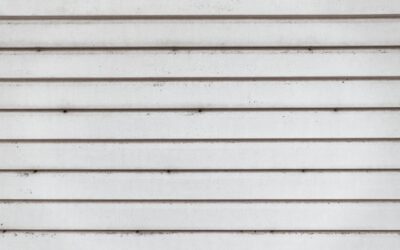
Drive through almost any American neighborhood and you will see it on countless homes, even if you never knew the name. Dutch lap vinyl siding is the profile with a small notched groove along the top of each course, creating a crisp shadow line that mimics the look of hand-carved wood siding from a century ago. It is one of the two most popular vinyl profiles sold today, and for good reason: it delivers visible depth and character that flat clapboard simply cannot match. Here is everything a homeowner should know before choosing it.
What Makes the Dutch Lap Profile Different
The defining feature is the concave bevel cut into the upper edge of each plank. Traditional clapboard, also called traditional lap, has a straight, even face. Dutch lap adds that decorative groove, which catches sunlight and casts a thin shadow across the wall. The result reads as more dimensional and slightly more ornate, echoing the craftsmanship of old Dutch Colonial homes where the style originated.
Functionally, both profiles install the same way and protect the home equally well. The choice between Dutch lap and clapboard is almost entirely about appearance. Dutch lap tends to suit traditional, colonial, and cottage-style homes, while flat clapboard leans cleaner and more contemporary.
Common Sizes and Panel Options
Manufacturers sell Dutch lap in single, double, and triple-course panels. The exposure, meaning the visible height of each board, usually falls between 4 and 5 inches per course.
- Single 8 or 8-inch: One wide course per panel, a bolder look.
- Double 4 or 4.5: Two courses per panel, the most common residential choice.
- Triple 3: Narrower courses for a more detailed, historic appearance.
Thickness matters too. Builder-grade vinyl runs around 0.040 inches, while premium siding reaches 0.044 to 0.046 inches. Thicker panels resist warping and feel more rigid, which pays off in wind and heat.
Cost Expectations
Vinyl remains the budget-friendly choice in siding. Materials for Dutch lap typically run a general range of $2 to $5 per square foot, with premium insulated panels pushing toward $6 to $8. Professional installation usually adds $3 to $7 per square foot in labor depending on your region and the complexity of the home. For an average 1,500-square-foot exterior, total installed costs often land somewhere in the range of $9,000 to $18,000. Insulated Dutch lap costs more up front but improves energy performance and stiffens the wall.
Pros and Cons
The strengths are why vinyl dominates the market.
- Low maintenance: No painting; color is molded through the panel.
- Affordable: Lower cost than fiber cement, wood, or engineered wood.
- Durable: Quality panels resist fading, moisture, and insects for 20 to 40 years.
- Curb appeal: The shadowed groove adds depth most buyers find attractive.
The drawbacks are worth weighing. Vinyl can crack in extreme cold if struck, lower grades may fade unevenly over decades, and dark colors can warp in intense direct sun unless engineered for heat. It also does not add the same resale prestige as fiber cement in higher-end markets.
Installation Basics
Vinyl siding must hang loosely so it can expand and contract with temperature swings. This is the single most common installation mistake homeowners and inexperienced crews make. Nails should be driven in the center of the slots, left about 1/32 inch loose, so panels float rather than buckle. Each course locks into the one below and is started from a level base strip.
Leave proper gaps at trim and J-channel to allow movement. On a hot day vinyl can grow noticeably, and siding nailed too tightly will ripple and wave by the following summer. Unless you are an experienced DIYer comfortable working at height, a professional crew will get cleaner lines and proper expansion clearances.
Color and Style Choices
Dutch lap comes in a deep palette, from crisp whites and soft neutrals to bold blues, greens, and rich earth tones. Lighter colors stay cooler and resist heat warping better, which matters in sun-baked southern climates. If you want a dark, dramatic exterior, choose siding specifically engineered with heat-reflective pigments, since standard dark vinyl can distort in intense direct sun. Pairing the shadow line of Dutch lap with contrasting white trim, board-and-batten accents in gables, or shake panels above a porch adds visual interest and breaks up large wall expanses.
Texture matters too. Many premium Dutch lap panels feature a low-gloss, wood-grain emboss that reads convincingly like painted cedar from the curb, while cheaper panels can look plasticky up close. Spending a little more on a quality finish pays off in how the home photographs and how it ages.
Insulated vs Hollow-Back Panels
You will face a choice between standard hollow-back Dutch lap and insulated panels backed with rigid foam. Insulated siding costs more, but the foam fills the gap behind the panel, making the wall more rigid, quieter, and more impact resistant while adding a modest boost to energy efficiency. Hollow-back panels are lighter and cheaper and perform perfectly well when installed correctly over a proper house wrap. For homeowners in extreme climates or those wanting the flattest, most solid-feeling wall, insulated Dutch lap is worth the upgrade.
Cleaning and Care
One of the biggest selling points is how little upkeep Dutch lap demands. Once or twice a year, wash the walls with a garden hose and a soft brush. For mildew or grime, mix one part household vinegar to four parts water, or use a dedicated vinyl siding cleaner, and scrub gently from the bottom up to avoid streaks. Rinse thoroughly.
Use a pressure washer cautiously if at all, keeping the nozzle below the siding seams and at low pressure so water does not get driven behind the panels. With nothing more than an annual rinse, Dutch lap vinyl holds its appearance for decades and remains one of the most practical exterior choices a homeowner can make.
Repairing and Replacing Panels
One underrated advantage of vinyl is that damaged sections can be swapped out individually without residing the whole house. If a panel cracks from impact or storm debris, a zip tool unlocks the course above, the damaged piece slides free, and a matching replacement clips in. Keep a few leftover panels from the original installation, since exact color matches become harder to find as product lines change and as the existing siding weathers slightly over the years.
For best results, address damage promptly so wind-driven rain cannot get behind the siding and reach the sheathing. Cracks are most likely in cold weather, when vinyl grows brittle, so save panel repairs for milder days when the material flexes more readily and is less prone to splitting during handling.