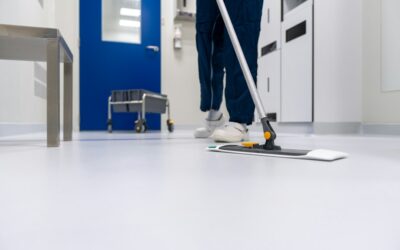
After spending years installing resinous systems in animal hospitals, boarding kennels, and surgical suites, I can tell you that few environments punish a floor like a busy veterinary clinic. Between constant hosing, pooled urine, chemical disinfectants, scrabbling claws, and rolling steel equipment, a standard commercial floor simply gives up within a couple of years. That is exactly why epoxy flooring for veterinary clinics has become the default specification for anyone serious about hygiene, longevity, and infection control.
Part of our Epoxy, Concrete & Garage Floors guide — explore the full guide →
Epoxy is a two-component thermosetting resin that cures into a dense, monolithic film bonded directly to the concrete slab. Done correctly, it produces a seamless surface with no grout lines, no cracks, and no crevices for bacteria, blood, or ammonia to hide in. In this guide I will walk through the specific system build-ups that hold up in animal-care settings, the antimicrobial and slip-resistance details that matter most, realistic costs, and the installation steps that separate a floor that lasts fifteen years from one that peels in eighteen months.
- Why Seamless Surfaces Matter in Animal Care
- Antimicrobial Additives and Infection Control
- Chemical and Urine Resistance
- Slip Resistance and Safety for Wet Floors
- Coved Bases and Integral Wall Transitions
- System Build-Ups That Work in Clinics
- Installation, Surface Prep, and Cure Times
- Cost Expectations and Return on Investment
Why Seamless Surfaces Matter in Animal Care
The single biggest reason clinics choose epoxy is seamlessness. A tile floor might look clean, but every grout joint is a porous reservoir that traps organic matter and moisture. In a facility that treats parvo, kennel cough, ringworm, and dozens of other transmissible agents, those joints become a genuine biosecurity liability. A properly applied epoxy floor eliminates them entirely, giving you one continuous plane from wall to wall that can be flooded, scrubbed, and disinfected without water finding a way underneath the coating.
That monolithic quality also protects the concrete itself. Untreated slabs are alkaline and porous; they wick urine and cleaning chemicals down into the pore structure where odor becomes permanent. I have walked into older clinics where the ammonia smell was baked into the slab and no amount of mopping would shift it. A resin membrane seals the concrete so contaminants stay on the surface where you can remove them. This is the foundation of why epoxy flooring for veterinary clinics consistently outperforms vinyl sheet goods and ceramic tile over the life of the building.
Seamlessness pays off in daily labor too. Cleaning crews move faster over a smooth, jointless floor, and there is far less scrubbing of grout with a brush. Over a decade, the reduced maintenance hours often exceed the original installation cost, which is a point I always raise with practice owners weighing the up-front price.
Antimicrobial Additives and Infection Control
Standard epoxy resists bacterial colonization simply because it is nonporous, but many veterinary specifications go a step further with antimicrobial additives blended into the topcoat. These are typically silver-ion or other EPA-registered biocidal agents that suppress the growth of bacteria, mold, and mildew on the coating surface between cleanings. They do not replace disinfection protocols, but they add a passive layer of defense that keeps the floor from becoming a reservoir when a spill sits unnoticed for a few hours.
It is worth being honest about what antimicrobial epoxy does and does not do. It reduces surface microbial load and helps control odor-causing organisms, but it will not sterilize a floor or substitute for a proper quaternary-ammonium or accelerated-hydrogen-peroxide cleaning regimen. When I spec antimicrobial topcoats, I frame them as insurance rather than a cleaning shortcut. For surgical suites, isolation wards, and intensive-care runs, that insurance is well worth the modest upcharge, usually a few dollars per square foot over a standard topcoat.
Chemical and Urine Resistance
Veterinary floors face a brutal chemistry cocktail. Pet urine is acidic and high in ammonia and urea; disinfectants swing to the alkaline and oxidizing end; and you add in blood, iodine, and the occasional spilled anesthetic agent. A quality epoxy or, better yet, an epoxy base with a chemically resistant urethane or novolac topcoat, shrugs off this exposure where a lesser coating would yellow, soften, or delaminate.
Urine resistance deserves special attention. Ammonia is aggressive, and dog runs that see repeated saturation will test a coating harder than almost any industrial process floor. I always recommend a novolac epoxy or a polyaspartic/urethane topcoat in kennel and run areas specifically because these chemistries hold their integrity against sustained ammonia contact. Cheaper builder-grade epoxies can discolor and lose gloss within a year in those zones. Matching the coating chemistry to the exposure of each room is one of the most important decisions in the whole project, and it is where an experienced installer earns their fee.
Slip Resistance and Safety for Wet Floors
A glass-smooth epoxy floor looks beautiful in a showroom and becomes a hazard the moment it gets wet, which in a vet clinic is more or less constantly. Slip resistance is non-negotiable. We build it in by broadcasting a fine aggregate, usually aluminum oxide or a graded silica, into the coating while it is still wet, then locking it under the topcoat. This creates a controlled texture that gives both staff and animals reliable traction on hosed-down surfaces.
The trick is calibrating the texture to the room. Surgical and exam areas want a lightly textured, easy-to-clean finish, because too aggressive a profile traps dirt and is hard to mop. Kennels, wet-prep rooms, and grooming stations warrant a heavier broadcast for maximum grip where water is always present. I typically target a coefficient of friction that meets or exceeds the recommended threshold for wet commercial floors, and I discuss the trade-off between grip and cleanability with the client for each space so we set expectations before the aggregate goes down.
Animal traction matters as much as human safety. Dogs recovering from anesthesia, or nervous cats being carried to a run, need a floor they will not skate across. The right aggregate profile prevents the splayed-leg slips that cause injury and stress, and it does so without shredding the mop or the pads on your cleaning machine.
Coved Bases and Integral Wall Transitions
If seamlessness is the headline benefit of epoxy, the coved base is the detail that makes it real. Instead of leaving a right-angle joint where the floor meets the wall, we build a curved cove that sweeps the resin several inches up the wall, forming an integral, one-piece transition with no seam at the floor-wall junction. That eliminates the single hardest spot in any facility to keep clean.
Coving is essential in kennels, surgical suites, isolation wards, and wash-down rooms because it allows you to hose or squeegee water right up to and onto the wall base without it seeping behind the coating. A four-to-six-inch cove is standard; I go taller in heavy wash-down areas. The cove is formed with an epoxy mortar, shaped by hand or with a coving trowel, then coated with the same system as the floor so the whole assembly cures as one continuous membrane. It is labor-intensive and adds cost, but skipping it in a veterinary environment defeats much of the reason you chose a seamless floor in the first place.
System Build-Ups That Work in Clinics
Not all epoxy floors are the same, and the right build-up depends on the room. For general clinic areas, exam rooms, and corridors, a decorative flake (broadcast vinyl chip) system over an epoxy base is my go-to. Chips are broadcast into a pigmented base coat to full refusal, the excess is scraped, and the floor is sealed with one or two urethane topcoats. The result hides dirt, adds slip texture, and gives a bright, professional appearance at a reasonable cost.
For the toughest zones, kennels, runs, and surgical wet areas, I move to a quartz-broadcast system: colored quartz aggregate troweled or broadcast in multiple layers for a thicker, more impact- and abrasion-resistant floor, finished with a chemically resistant topcoat. A quartz system typically runs a quarter-inch thick or more and handles rolling loads, dropped instruments, and constant moisture far better than a thin roll-coat. Matching the flake system to public and clinical spaces and the quartz system to the heavy wet zones gives you the best balance of cost and durability across the whole facility.
Installation, Surface Prep, and Cure Times
The coating is only as good as the concrete underneath it, and preparation is where most failures originate. We start by mechanically profiling the slab, usually diamond grinding or shot blasting, to open the pores and create the roughness the epoxy needs to bond. We then test for moisture, because a slab pushing vapor will blister a coating no matter how well it is applied. In older clinics I check for oil contamination and previously sealed areas that must be ground off completely. Skipping or rushing prep is the number-one cause of the peeling floors I get called in to repair.
Cure times matter for scheduling around a working practice. A typical epoxy base coat is walk-ready in twelve to twenty-four hours at normal temperatures, with full chemical cure taking five to seven days. Polyaspartic and urethane topcoats cure faster, sometimes returning a room to service in a day. Temperature and humidity swing these numbers, so I plan installs room by room to keep part of the clinic operational, and I always advise waiting the full cure before subjecting a new floor to disinfectants and heavy urine exposure.
Cost Expectations and Return on Investment
Pricing varies with system and site condition, but as a working range, a decorative flake epoxy system in a veterinary clinic generally runs about seven to twelve dollars per square foot installed, while a heavier quartz-broadcast system with coved bases and chemical-resistant topcoats lands closer to twelve to twenty dollars per square foot. Extensive concrete repair, moisture mitigation, or removal of a failed prior coating adds to that. These are ballpark figures; get a site-specific quote, because slab condition drives cost more than anything else.
The return comes over the lifespan. A well-installed veterinary epoxy floor commonly lasts ten to twenty years with only periodic topcoat refreshes, compared to sheet vinyl that may need replacement in five to seven years and tile that fails at the grout much sooner. Factor in the lower daily cleaning labor, the odor control, and the biosecurity benefit, and epoxy flooring for veterinary clinics is one of the few building investments that genuinely pays for itself. My advice to any practice owner is to spend on prep and topcoat chemistry rather than cutting corners to shave the up-front number, because the cheap floor is always the expensive one in the end.