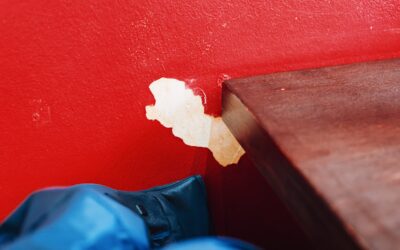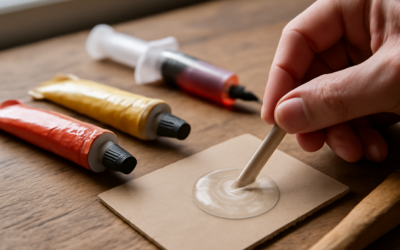
When a window sill, door frame, or porch column starts to rot, tearing it out and replacing it is often expensive and sometimes impossible without major demolition. Epoxy wood filler offers a different path: a two-part resin that bonds tightly to old wood, cures rock-hard, and can be sanded, drilled, and painted just like the surrounding material. For structural repairs and outdoor wood that takes a beating, it is far stronger and more durable than ordinary wood putty.
Part of our Epoxy, Concrete & Garage Floors guide — explore the full guide →
This guide explains where epoxy filler shines, how to apply it correctly, and the safety steps you should never skip.
What Epoxy Wood Filler Is
Epoxy wood filler is a two-component product: a resin and a hardener that you mix together right before use. The chemical reaction between them produces a rigid, waterproof material that bonds chemically to wood fibers rather than just sitting in the gap. Once cured, it does not shrink, crack, or fall out the way cheaper fillers can, and it holds screws and nails almost as well as solid wood.
This is different from single-part wood putty, which dries by evaporation, stays softer, and is meant for small cosmetic nail holes rather than load-bearing or weather-exposed repairs.
Best Uses for Epoxy Wood Filler
- Rotted exterior wood such as window sills, door jambs, fascia, and porch posts.
- Structural gaps where the filler needs to bear weight or hold fasteners.
- Outdoor furniture and railings exposed to rain and sun.
- Restoring trim and molding profiles that you can carve and sand to shape.
- Filling large voids that ordinary putty cannot bridge without cracking.
For tiny nail holes and minor indoor blemishes, a standard wood filler is faster and cheaper. Reach for epoxy when strength, water resistance, and longevity matter.
What You Will Need
- Two-part epoxy wood filler kit, and often a separate liquid epoxy consolidant for soft, rotted wood
- Disposable gloves and a respirator or mask rated for fumes
- Putty knife or plastic spreader
- A clean mixing surface and stir stick
- Coarse and fine sandpaper
- A chisel or scraper to remove loose, rotted material
How to Apply It Step by Step
Good preparation makes the difference between a repair that lasts and one that fails:
- Remove the rot. Dig out all soft, crumbling wood with a chisel or screwdriver until you reach solid material. Let the area dry completely.
- Apply consolidant. For soft or spongy wood, brush on a liquid epoxy consolidant first to harden the remaining fibers and improve adhesion.
- Mix the filler. Combine the resin and hardener in the ratio the manufacturer specifies. Mix only what you can use within the working time, which is often just a few minutes.
- Pack and shape. Press the filler firmly into the cavity, slightly overfilling, and smooth it with a putty knife. Work fast before it begins to set.
- Cure. Allow full cure time, which can range from a few hours to overnight depending on temperature and product.
- Sand and finish. Sand flush with the surrounding surface, then prime and paint. Most epoxy fillers accept paint well but are not meant to take stain like real wood.
Safety Precautions
Epoxy is a powerful chemical product, and treating it casually leads to skin irritation and headaches. Keep these precautions in mind every time:
- Wear gloves. Uncured epoxy can sensitize your skin, and repeated exposure can cause lasting reactions.
- Ventilate the area. Work outdoors or open windows and use a fan. Wear a respirator rated for organic vapors when working in tight spaces.
- Protect your eyes. Use safety glasses, especially while sanding the cured filler, which produces fine dust.
- Mind the cure. The chemical reaction generates heat, so do not mix large batches in a closed container where it can overheat. Let the repair cure fully before sanding or loading it.
- Dispose responsibly. Let leftover mixed epoxy harden before throwing it away, and follow local rules for any liquid waste.
Tips for a Lasting Repair
A few habits separate a professional-looking fix from a lumpy patch. Work in moderate temperatures, since cold slows the cure and heat shortens your working time. Build up deep repairs in layers rather than one thick mass, which cures more evenly and reduces heat buildup. For exposed exterior repairs, always prime and paint the finished filler to shield it from UV degradation over the years. And keep the resin and hardener tightly sealed between uses so they stay reactive.
Epoxy Filler vs. Other Repair Options
Epoxy is not always the right answer, so it helps to know the alternatives. Standard latex or solvent-based wood putty dries fast and costs little, but it stays softer, shrinks as it cures, and is meant only for cosmetic nail holes and small dents indoors. Polyester auto-body fillers cure hard and quickly, which is why some woodworkers use them on furniture, but they do not bond to or penetrate soft, rotted wood the way a two-part epoxy system does.
For active rot on exterior wood, epoxy stands alone because the liquid consolidant soaks into the punky fibers and re-hardens them before the paste filler goes on. That combination restores both strength and shape in a way putty simply cannot match. The tradeoff is cost and effort: a quality epoxy kit runs more than a tub of putty and demands careful mixing, so reserve it for repairs where durability and weather resistance genuinely matter.
How Long the Repair Lasts
A properly done epoxy repair can outlast the surrounding wood, often holding up for 10 to 20 years or more on exterior trim that is kept painted. The key word is painted. Cured epoxy is tough and waterproof, but ultraviolet light slowly degrades the surface if it is left bare, so a coat of primer and exterior paint is what protects the repair for the long haul.
Failures almost always trace back to prep rather than the product. If you leave wet or rotted wood in the cavity, trapped moisture keeps working and the repair eventually loosens. Take the time to remove all soft material, dry the area completely, and use consolidant on any remaining soft fibers, and the patch will stay locked in place for years.
The Bottom Line
Epoxy wood filler turns a rotted sill or damaged post into a solid, paintable repair that can outlast the original wood. It costs more and demands careful mixing and ventilation, but for structural and outdoor jobs nothing else matches its strength and durability. Prep thoroughly, follow the safety steps, and you will save yourself the far bigger expense of full replacement.