Shutters are one of the fastest ways to transform a bland facade into something with character and dimension. This exterior shutters guide breaks down every material, style, and installation method so you pick shutters that match your home’s architecture, survive your climate, and actually look proportionally correct. Too many homeowners bolt on undersized shutters that would never cover the window if closed — getting the details right makes the difference between polished and cheap.
Exterior Shutter Materials Compared
Wood shutters remain the gold standard for authenticity. Western red cedar and basswood are the most common species, offering natural rot resistance and excellent paint adhesion. Expect to pay $80-$200 per pair depending on size and panel style. The downside is maintenance — repainting or restaining every 3-5 years is non-negotiable, and wood warps in high-humidity climates without proper sealing.
Vinyl shutters dominate the budget market at $15-$50 per pair. They never rot, never need painting, and install in minutes with screws or shutter locks. However, vinyl fades in intense UV exposure, has a visibly plastic texture up close, and offers limited color-matching options. Thin vinyl also warps in extreme heat.
Composite and fiberglass shutters split the difference. Made from polyurethane foam, PVC board, or fiberglass-reinforced polymers, they mimic wood grain convincingly, resist moisture and insects, and hold paint well. Prices range from $60-$150 per pair. Brands like Fypon and Mid-America offer composite options that are nearly indistinguishable from painted wood at street distance.
Shutter Styles and When to Use Them
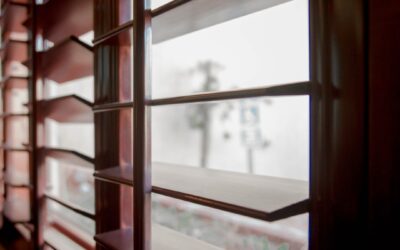
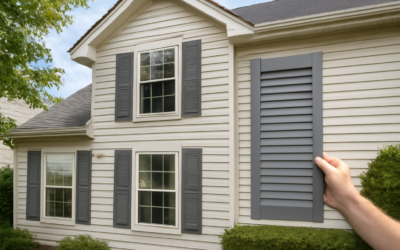
- Louvered: Angled slats that allow airflow. Best for Colonial, Cape Cod, and Southern-style homes. The most popular style by volume
- Raised panel: Solid panels with a framed inset. Suits Federal, Georgian, and traditional brick homes
- Board and batten: Vertical boards held together by horizontal cross-pieces. Fits farmhouse, cottage, and rustic aesthetics
- Bahama / Bermuda: Top-hinged louvered shutters that tilt outward. Common in coastal and tropical regions for storm protection and shade
- Combination: Louvered top half with a raised panel bottom. Works on taller windows for a formal, balanced look
Sizing Shutters Correctly
Properly sized shutters should appear as though they could close and fully cover the window. Each shutter panel should be exactly half the width of the window opening. A 36-inch-wide window needs two 18-inch shutter panels.
Height should match the window opening precisely — or extend to the sill if your architecture calls for it. Shutters that are too short or too narrow look obviously decorative in the worst way. Measure each window individually since older homes often have windows that vary by an inch or more between openings.
Installation Methods
Most decorative shutters mount directly to the wall beside the window using one of three methods.
Shutter locks (snap fasteners) are the fastest option for vinyl siding. These two-piece fasteners consist of a spike that goes through the siding into the sheathing and a cap that snaps into a hole in the shutter. Four locks per shutter panel is standard. No visible screws, no pilot holes in the shutter face.
Screws through pre-drilled holes work on wood siding, brick, and stucco. Use stainless steel or color-matched screws, pre-drill the shutter to prevent cracking, and use wall anchors on masonry. Place screws at the top, bottom, and middle of each panel.
Shutter hinges are the traditional method for functional shutters that actually open and close. Strap hinges, New England-style pintles, or hidden barrel hinges mount to the window casing. This approach requires a solid wood frame and adds $20-$50 in hardware per pair.
Painting and Finishing
If your shutters arrive unfinished or you want to change the color, prime with a high-quality exterior primer and apply two coats of 100% acrylic latex exterior paint. Dark colors like black, charcoal, and navy are perennial favorites because they create strong contrast against light siding. Hunter green and burgundy work well on earth-toned or natural-material facades.
Lay shutters flat on sawhorses for painting to avoid drips and ensure even coverage on louver slats. A 4-inch mini roller covers flat panels quickly, while a 1-inch angled brush works between louver blades. Allow 24 hours of cure time before mounting.
Shutter Colors That Work
Shutter color should coordinate with your front door and trim, not match your siding. Classic combinations include black shutters on white or gray siding, dark green shutters on cream or yellow, and navy shutters on red brick. A safe rule: choose a shutter color two to three shades darker than your primary siding color. When in doubt, black works on virtually every home style and siding color.
Maintenance and Replacement
Vinyl shutters need only an annual wash with a garden hose and mild detergent. Wood shutters should be inspected each spring for peeling paint, cracks, and rot — spot-prime and repaint problem areas before they spread. Composite shutters fall between the two, needing occasional cleaning and touch-up paint every 7-10 years.
Budget about $150-$400 in materials for a full shutter replacement on a typical home with 6-8 windows, or $500-$1,200 if hiring a handyman to install them. The project usually takes a professional one day and a homeowner a weekend.