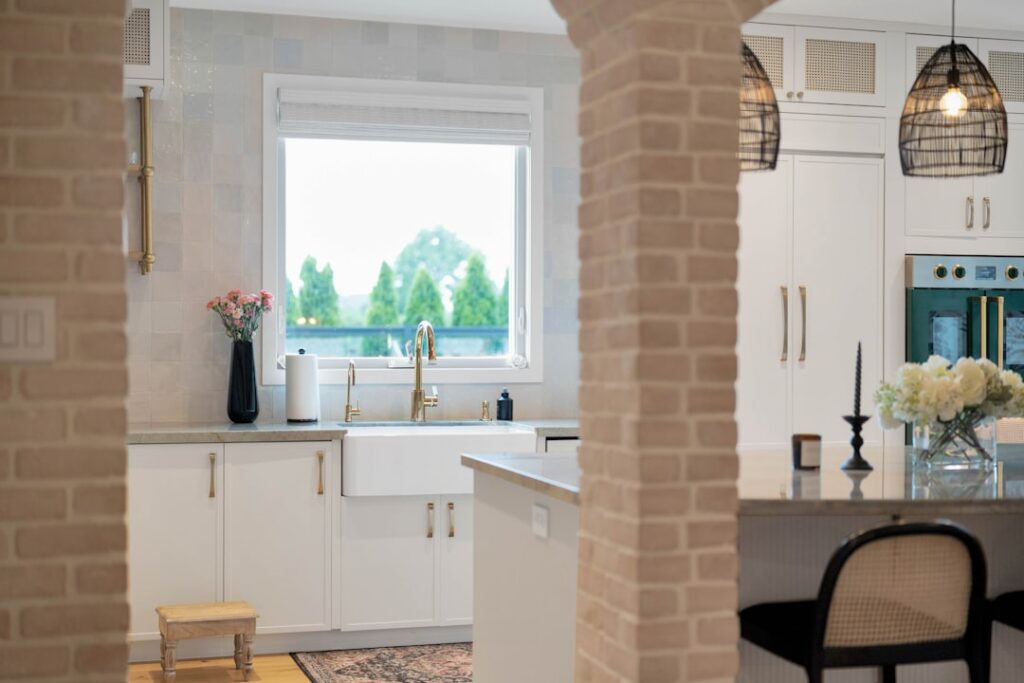
Every design current in the farmhouse world — modern farmhouse, French country, industrial-rustic — eventually arrives at the same wall: brick behind the range. A farmhouse kitchen brick backsplash delivers what tile alone struggles to fake: texture with actual shadows, color that varies brick to brick, and the sense that the wall was there before the kitchen was. I’ve built this look four different ways over the years — real thin brick, brick-look porcelain, whitewashed and German-schmeared finishes, and the occasional exposed original chimney — and each route has different money, maintenance, and mess attached. Here’s the full playbook, including the grease problem nobody mentions until you own one.
Part of our Kitchen Remodeling guide — explore the full guide →
The Four Ways to Get Brick on a Kitchen Wall
1. Thin brick veneer (the real thing, sliced)
Thin brick is genuine fired clay brick cut to 1/2 to 3/4 inch thick, sold flat-rate around $6 to $12 per square foot, with corner pieces ($3 to $6 each) that wrap edges so the wall reads as full-depth masonry. It installs like heavy tile: polymer-modified thinset over cement board or sound drywall (a splash’s worth of thin brick is well within drywall’s weight capacity), then mortar joints grouted with a grout bag and struck with a jointer. This is the authentic option — real clay color-range, real tumbled edges, real texture — and the one I recommend for committed farmhouse kitchens.
2. Brick-look porcelain tile
Porcelain “brick” tiles (2×8, 2.5×9.5, and similar) run $4 to $10 per square foot and print the clay look convincingly, with two enormous practical advantages: the glazed face is non-porous — grease wipes off — and the thickness is ordinary tile, so cuts, outlets, and edges behave normally. The trade: perfect prints repeat, edges are crisper than tumbled clay, and up close your eye can tell. For the wall behind a heavily used range, this is honestly what I steer most families toward.
3. Painted-finish treatments: whitewash, limewash, German schmear
Applied over real thin brick, these finishes are the modern-farmhouse signature. Whitewash (diluted paint or limewash brushed and ragged back) mutes the red while keeping variation; German schmear presses wet white mortar across the faces and joints, then partially wipes it, for that heavy, aged-European look. Materials cost is trivial — $30 to $80 of limewash or mortar — but they’re one-way doors: schmear especially is effectively permanent. Practice on a scrap board first.
4. Faux panels — the one I talk people out of
Polyurethane and MDF brick panels ($8 to $15 per square foot) photograph fine and fail in kitchens: they’re combustible-adjacent behind ranges (check listings and clearances), they can’t take heat or repeated degreasing, and the repeating mold pattern reads fake at conversation distance. Outside the splash zone — a dining nook accent wall — they’re defensible. Behind a cooktop, no.
Cost Comparison for a Typical 40 Sq Ft Splash
| Route | Materials | DIY total | Hired total |
|---|---|---|---|
| Thin brick veneer | $280–$480 + mortar/sealer | $400–$650 | $1,200–$2,400 |
| Brick-look porcelain | $180–$400 + thinset/grout | $300–$550 | $1,000–$1,800 |
| Thin brick + schmear/whitewash | add $50–$100 | $450–$750 | $1,400–$2,600 |
| Reclaimed antique thin brick | $12–$25/sq ft | $700–$1,200 | $1,800–$3,200 |
Reclaimed brick — sliced from demolished buildings, paint flecks and kiln marks intact — is the premium play and the only way to get true century-old patina. Suppliers sell it by the flat; budget extra waste because antique units chip.
The Grease Conversation (Read This Before You Buy)
Real brick and real mortar are porous — dramatically so. Behind a range, aerosolized cooking oil settles into that porosity and, unsealed, builds a darkening film you cannot scrub out of clay. This is the single biggest regret factor with authentic brick splashes, and it’s completely preventable:
- Seal it — properly and immediately. After the mortar cures (about 28 days for full cure; most sealer makers allow application at 14), apply a penetrating masonry sealer, or a low-sheen “wet look” acrylic sealer if you want easier degreasing at the cost of a slight sheen. Two coats, $30 to $60 a quart, covering a splash easily. Re-seal every 1 to 3 years behind the range.
- A strong hood earns its money twice here. A properly ducted range hood at 300-plus CFM intercepts most of the grease before it reaches the wall. Recirculating microwave hoods barely help; budget accordingly if you cook hard.
- Cleaning: warm water, a squirt of Dawn-type degreaser, and a soft brush on sealed brick. No wire brushes (they burnish clay), no oven cleaner (it eats sealers and can whiten mortar).
- Or dodge the issue entirely: glazed brick-look porcelain has no porosity to seal — the honest reason it wins my recommendation for serious cooks.
Getting the Farmhouse Look Right
Details that separate “charming old wall” from “1970s rec room”:
- Running bond, always. The classic 50 percent offset is the only pattern old walls were laid in. Herringbone brick reads European bistro — lovely, but a different accent. Stack bond reads modern and fights the farmhouse story.
- Fat, imperfect joints. Real masonry runs 3/8 to 1/2-inch joints. Tight tile-style 1/8-inch joints on thin brick instantly betray the veneer. Strike joints slightly concave or lightly smeared, not laser-crisp, and use a sanded mortar-toned grout — soft gray or buff, never bright white and never charcoal unless you’re going industrial.
- Mix your flats from multiple boxes. Clay color runs box to box; blending as you set is what creates that hand-laid variation. With porcelain, shuffle the print faces so repeats never land adjacent.
- Wrap the corners. On any exposed end — window returns, wall ends — corner units (real veneer) or mitered porcelain sell the depth. A flat brick face dying into paint at an outside corner breaks the illusion completely.
- Height strategy: counter-to-cabinet everywhere, then full-height behind the range up to the hood. That full-height panel is the postcard shot of every farmhouse kitchen you’ve pinned.
Installation Notes From the Field
Thin brick installs within reach of a patient DIYer: snap level lines (brick courses drift fast — check every third course), set in modified thinset with 3/8-inch joints on tile spacers or wood lath strips, then grout with a mortar bag and strike when thumbprint-firm. Two cautions earn their paragraph. First, weight and wall condition: 40 square feet of thin brick is roughly 250 to 350 pounds — fine on sound drywall, but degraded or previously wallpapered walls should get a skim of cement board. Second, clearances behind the range: brick and porcelain are noncombustible, which is exactly why this material is a great range wall — but confirm your specific range’s required clearance to the wall regardless, and never bury a receptacle or gas shutoff behind unbroken brick. Cut around boxes and use deep-set outlet extenders ($3 each) so receptacles finish flush with the new, thicker wall — it’s a code requirement, not a style point.
Longevity and Resale
A sealed thin-brick splash is effectively permanent — clay doesn’t fade, and a re-strike of tired mortar decades from now is a $200 refresh. Style risk is the fairer question: modern farmhouse has been the dominant American kitchen idiom for a decade-plus, and brick specifically predates the trend by about three centuries, which is good insurance. The whitewash and schmear finishes are the trendier layer; raw or lightly sealed natural brick is the version I’d bet stays timeless.
A note on pairing, since brick never acts alone in a farmhouse kitchen: it plays best against smooth, quiet neighbors. White or cream shaker cabinets, butcher block or honed stone counters, and open wood shelving all let the brick be the texture in the room; pairing it with busy granite or a second patterned tile makes the wall fight its surroundings. If your counters are dark, lean toward buff and blended-tan brick rather than deep red, which can close a kitchen down. And sample generously — most thin-brick suppliers sell flats or sample packs for $10 to $25, and taping a two-foot dry layout to the wall for a week under your actual kitchen lighting will tell you more than any catalog photo.
If I’m building this in my own kitchen tomorrow: real thin brick in a blended buff-and-red range, 3/8-inch gray struck joints, running bond counter to hood, penetrating sealer at week three, and a 600 CFM ducted hood standing guard. That wall will cost about $600 in materials, take two honest weekends, and be the thing every visitor touches on the way to the coffee pot. Brick is one of the few backsplash choices that gets better looking as the kitchen ages around it — as long as the sealer goes on before the first pan of bacon.