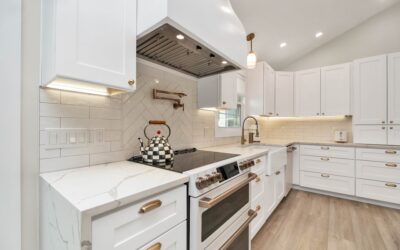
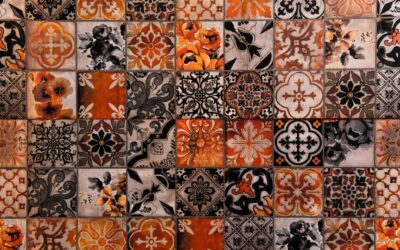
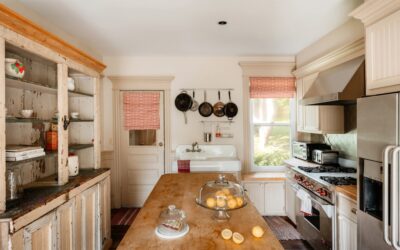
Nothing anchors a cozy, lived-in kitchen quite like the right wall tile behind the stove and sink. A well-chosen farmhouse tile backsplash kitchen design blends handcrafted texture, soft neutral color, and classic layouts to create that warm, timeless look everyone chases. Having tiled dozens of country-style kitchens, I can tell you the charm comes from the details: the tile shape, the grout color, and how it meets the counter and shelves.
Part of our Kitchen Remodeling guide — explore the full guide →
Below are the ideas, materials, and practical numbers you need to plan a backsplash that feels authentically farmhouse instead of like a builder-grade afterthought.
What Defines a Farmhouse Backsplash
Farmhouse style is about honest materials and gentle imperfection. Think handmade ceramic with slightly uneven edges, muted whites and creams, and simple, functional layouts. It leans on texture and warmth rather than glossy perfection. The best farmhouse backsplashes look like they could have been there for generations, softening a hard-working kitchen with a bit of soul.
The magic ingredient is contrast between rustic and clean. Pair a slightly irregular tile with crisp shaker cabinets, or a warm cream tile with a black cast-iron faucet and open wood shelving. That balance keeps the room from tipping into either sterile or cluttered.
Best Tile Types for the Farmhouse Look
Several tiles nail the aesthetic. Each brings a different level of texture and cost.
Classic Subway Tile
The 3-by-6-inch white subway tile is the farmhouse default for a reason: it’s clean, affordable, and endlessly versatile. Expect $2 to $10 per square foot for the tile itself. Hunt for a version with subtle undulation or a hand-glazed finish rather than a dead-flat gloss, since that slight variation reads far more rustic.
Zellige and Handmade Ceramic
Moroccan zellige tile, with its glossy, watery, uneven surface, has become a farmhouse favorite. Every piece catches light differently. It costs more, roughly $15 to $50 per square foot, and installation takes longer because the tiles vary in size, but the depth and movement are unmatched.
Beadboard and Shiplap-Look Tile
For a cottage feel, ceramic tile molded to mimic beadboard or shiplap gives you the paneled farmhouse look with the wipe-clean durability of tile. It’s a smart choice behind a range where painted wood would suffer.
Brick-Look and Terracotta
Thin brick veneer or brick-look porcelain adds rugged, aged warmth, perfect for a rustic or industrial-farmhouse kitchen. Terracotta and warm earth tones bring a Tuscan-country vibe if white feels too stark for you.
Layout Ideas That Feel Authentic
The pattern you set the tile in changes the whole mood. Here are layouts that suit the style.
- Classic offset (running bond): Each row shifted halfway, the timeless subway look. Foolproof and always in style.
- Stacked vertical: Subway tiles stood on end and stacked; a fresh, slightly modern farmhouse twist.
- Herringbone: Angled tiles that add movement and craftsmanship. Uses about 10 to 15 percent more tile for cuts.
- Full-height to the ceiling: Running tile all the way up behind a range or shelving wall makes a dramatic, custom statement.
Color and Grout: The Details That Matter
Color choices make or break the farmhouse feel. Soft whites, warm creams, sage green, pale blue-gray, and muted taupe all fit the palette. Avoid stark bright white if your cabinets are warm; a creamy off-white blends better.
Choosing Grout
Grout is the detail people underestimate. For a soft, blended look, match the grout to the tile. For a crisp, graphic look that highlights each tile’s shape, choose a contrasting gray. A common farmhouse move is white tile with light gray grout, which shows the pattern without the harsh look of black grout while hiding everyday kitchen grime. Always use a stain-resistant option and seal cement-based grout so grease near the stove wipes clean.
Real Cost to Install
Budgeting keeps the project on track. For a typical kitchen with 30 square feet of backsplash, here’s a realistic breakdown:
- Basic subway tile installed: $10 to $20 per square foot all-in, or about $300 to $600 total.
- Handmade or zellige tile installed: $25 to $60 per square foot, or roughly $750 to $1,800.
- DIY materials only: tile, thinset, grout, and tools often total $150 to $500 for a small backsplash.
Labor typically runs $8 to $15 per square foot on its own. Intricate layouts like herringbone and irregular handmade tile push labor higher because of the extra cutting and careful spacing.
Pairing the Backsplash With Cabinets and Counters
A backsplash never lives in isolation, so choose it in the context of your cabinets, countertops, and hardware. Classic white or sage shaker cabinets are the safest partners for cream and white tile. If your cabinets are warm oak or a moody green, a hand-glazed off-white tile bridges the tones better than a cold bright white.
Countertops set the second half of the equation. Butcher block reinforces the rustic farmhouse feel and pairs beautifully with simple subway tile. White or lightly veined quartz keeps things clean and lets a textured tile shine. Soapstone or honed granite leans traditional-country. As a rule, let one element be the star. If you choose a busy, high-variation zellige, keep the counter calm; if the counter has bold veining, keep the tile simple. Tie it together with fixtures in matte black, aged brass, or oil-rubbed bronze, which read distinctly farmhouse against light tile.
Open Shelving Considerations
Farmhouse kitchens love open wood shelves, and they change how much backsplash shows. When you swap upper cabinets for shelving, more of your wall becomes visible, so plan to tile the full height behind the shelves for a finished look. It costs a bit more tile but turns the wall into a feature rather than a partial afterthought.
Pro Tips for a Better Result
A few habits separate a clean install from an amateur one. Always dry-lay a section first to check your pattern and color mix, especially with variable handmade tile where you want to blend boxes so no cluster looks off. Start your layout from a focal point, usually centered behind the range, so cuts fall symmetrically at the edges. Use tile spacers sized to the look you want; thin 1/16-inch joints feel modern, while 1/8-inch reads more classic. And run a bead of caulk, not grout, where the backsplash meets the countertop so seasonal movement doesn’t crack the line.
Frequently Asked Questions
What is the most popular farmhouse backsplash tile?
Classic white subway tile in a 3-by-6-inch size, set in an offset running-bond pattern with light gray grout, remains the most popular and reliable farmhouse choice. It’s affordable, timeless, and pairs with nearly any cabinet color.
Should the backsplash go all the way to the ceiling?
Not necessarily. Standard backsplashes run from the counter to the underside of the upper cabinets, about 18 inches. Taking tile full height behind a range or an open-shelf wall creates a striking custom look, but it costs more and isn’t required.
What grout color looks best for farmhouse style?
Light gray grout with white or cream tile is the go-to. It gently defines each tile without the heavy, graphic contrast of dark grout, and it hides kitchen grime better than bright white.
Is zellige tile hard to maintain?
Zellige has a durable glazed surface that wipes clean, but its uneven finish and wider grout joints need sealing. Reseal the grout every year or two near the cooking zone to keep grease from staining.
The Bottom Line
A great farmhouse tile backsplash kitchen comes down to warm materials, a classic layout, and thoughtful grout. Whether you go budget-friendly with hand-glazed subway tile or splurge on shimmering zellige, keep the palette soft, the pattern honest, and the details tidy. Do that, and your backsplash will feel like the timeless heart of a country kitchen for years to come.
Prefer to explore on your own?
See how new flooring looks in your actual room in seconds — free, no signup.
Try the free Floor Studio →