Farmhouse style refuses to fade because it feels lived-in and welcoming, and the backsplash is where that warmth gets its texture. A rustic farmhouse backsplash leans on natural materials, handmade imperfection, and soft, weathered color rather than the glossy uniformity of a modern kitchen. Done right, it makes a brand-new kitchen feel like it has been gathering family for generations. Done wrong, it reads as a theme park. The trick is choosing materials with genuine character and letting a few of them carry the room.
What Defines the Farmhouse Look
Farmhouse design borrows from old working kitchens: brick, whitewashed wood, hammered metal, and hand-glazed tile. The palette runs warm and muted, think cream, soft white, sage, terracotta, and weathered gray. Surfaces show their making, with slightly uneven glazes, visible grain, and grout lines that feel handmade rather than machine-perfect. Against a farmhouse apron sink and shaker cabinets, the backsplash is the layer that supplies texture and history.
The goal is warmth without clutter. Pick materials that have depth and let the imperfections show, then keep the rest of the palette calm so the backsplash reads as intentional character.
Best Materials for the Job
- Handmade ceramic subway tile: the workhorse. Its wavy surface and uneven glaze catch light in a way flat printed tile never will. Expect $8 to $20 per square foot.
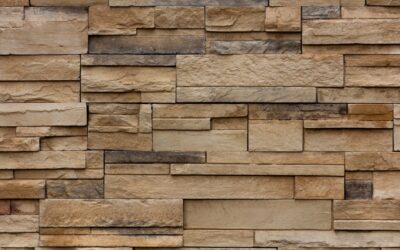
- Thin brick veneer: real reclaimed-look brick slips glued to the wall deliver instant age. Run $8 to $15 per square foot and pair beautifully with open shelving.
- Beadboard or shiplap: painted wood paneling behind the counter is the budget-friendly cottage move, $3 to $7 per square foot, though it needs sealing near the sink.
- Tumbled travertine or marble: soft-edged natural stone in a warm cream adds an old-world feel for $10 to $25 per square foot.
- Zellige-style tile: the glossy, variegated handmade look brings artisan depth, typically $15 to $40 per square foot.
Tile Layouts That Feel Authentic
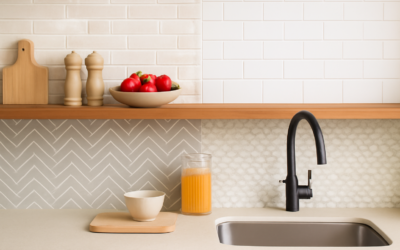
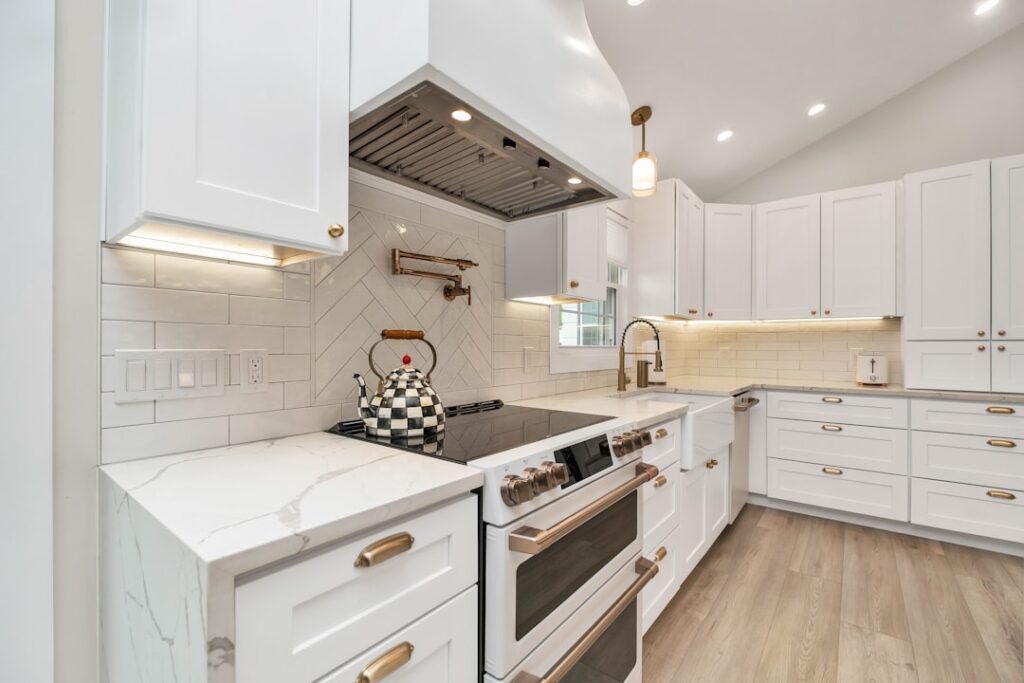
Layout carries as much weight as material. A classic running-bond (offset brick) pattern in handmade subway tile is the safest farmhouse choice and never looks dated. For more interest, try a herringbone in a warm white, which adds movement while staying humble. Stacked square tiles feel too modern for the style, so avoid a rigid grid unless you soften it with a heavily variegated glaze.
Grout choice matters more than most people expect. A warm gray or greige grout against cream tile mimics the aged mortar of an old kitchen, while stark white grout can look too crisp and new. Match the grout to the mood, not just the tile.
Color and Texture Pairings
Ground the backsplash with the rest of the kitchen. Creamy handmade tile sits beautifully against butcher-block or soapstone counters and unlacquered brass fixtures. Brick veneer loves black iron hardware and open wood shelving. If your cabinets are a moody sage or navy, a soft white textured tile keeps the room from getting heavy.
Layer textures rather than colors. A farmhouse kitchen usually stays within two or three hues but stacks up wood grain, stone, hammered metal, and glazed ceramic. That mix of tactile surfaces is what reads as authentic rather than a paint-by-numbers theme.
Where to Splurge and Where to Save
Handmade and zellige tiles cost more because each piece is genuinely different, and that variation is exactly what sells the look. If the budget is tight, splurge on a small feature zone, like the wall behind the range, in real handmade tile, and run an affordable machine-made subway with a wavy glaze everywhere else. The eye lands on the range wall, so that is where the character earns its keep.
Beadboard is the true budget hero. Painted a warm white and sealed with a satin polyurethane, it delivers cottage charm for a fraction of tile’s cost and installs in an afternoon. Just keep it a few inches above the counter or seal the seams well near the sink to fight moisture.
Installation and Maintenance Notes
Handmade tiles have irregular edges, so budget extra time for layout and use tile spacers as a guide rather than a strict rule; you’ll often eyeball joints to keep them looking natural. Order 15 to 20 percent overage because variation means you’ll cull a few pieces, and lot-to-lot color shifts make reordering risky.
Seal porous materials. Tumbled stone, brick veneer, and unglazed tile all need a penetrating sealer to resist grease and splatter, reapplied every year or two behind the range. Glazed ceramic only needs the grout sealed. Wipe spills promptly, since the same texture that gives farmhouse charm also holds onto splatters if you let them dry.
Bringing It Together
A successful rustic farmhouse backsplash comes down to restraint and honesty in materials. Choose one or two textured, imperfect surfaces, warm the grout, and echo the metals and wood tones already in the room. Skip the mass-produced “farmhouse” decals and faux-vintage signs and let real handmade tile, brick, or beadboard do the talking. The payoff is a kitchen that feels genuinely warm and timeless, the kind of space that looks better with every scuff and splatter it earns over the years.
DIY or Hire a Pro?
Some farmhouse backsplash materials are genuinely beginner-friendly, and others punish a first-timer. Standard subway tile in a running-bond pattern is a reasonable weekend DIY if you rent a wet saw and take your time; beadboard is even easier, since it’s essentially trim carpentry. Brick veneer and handmade zellige are trickier because the irregular pieces and mortar joints demand a practiced eye to look intentional rather than sloppy. Herringbone and tumbled-stone layouts also eat time with all their cuts.
Be honest about your patience and tolerance for cutting. A pro typically charges $8 to $15 per square foot in labor for a straightforward tile backsplash and more for intricate patterns and natural stone. If the wall behind your range is the showpiece, spending on professional installation there while DIYing simpler runs elsewhere is a sensible way to split the budget.
Sealing and Long-Term Care
Rustic materials reward a little upkeep. Behind the range, grease and steam are constant, so seal any porous surface, brick veneer, tumbled travertine, unglazed tile, and even the grout, with a penetrating sealer, and refresh it every year or two. A quick test tells you when it’s time: drop water on the surface, and if it soaks in rather than beading, it’s due for another coat.
Clean gently. Skip acidic cleaners like vinegar on natural stone, which etches calcium-based materials, and reach instead for a pH-neutral stone cleaner or mild dish soap and warm water. Wipe splatters before they bake on, especially on handmade glazes where dried grease dulls the sheen. Treated this way, a rustic farmhouse backsplash ages into exactly the warm, weathered character you were after in the first place. The best farmhouse kitchens look like they’ve been collecting stories for decades, and a well-chosen, well-cared-for backsplash is what gives a brand-new build that lived-in soul from the very first day you cook in it.