If you’ve got a dated fireplace surround and no budget for a full retile, fireplace tile stickers are the low-commitment upgrade that can transform the room in an afternoon. These peel-and-stick vinyl decals mimic Moroccan patterns, subway tile, marble, and hand-painted ceramics, and they cling right over your existing tile. I’ve watched homeowners talk themselves out of a $3,000 renovation because fireplace tile stickers gave them the look for well under $100.
Part of our Tile & Grout guide — explore the full guide →
That said, a fireplace is not a kitchen backsplash. Heat is the whole conversation here, and using the wrong product or placing it too close to the firebox is a real hazard. This guide covers where these stickers work, where they absolutely don’t, how to apply them so they last, and what to realistically expect.
What Fireplace Tile Stickers Actually Are
These are printed adhesive-backed decals, usually PVC vinyl with a protective laminate top layer. They come in two main styles: individual tile-sized squares (commonly 4×4, 6×6, or 8×8 inches) that you place one by one over existing tiles, and larger transfer sheets that cover a run of tile at once. The printed design sits under a matte or semi-gloss laminate that resists moisture and light scuffing.
The key distinction from regular wall decals is that quality fireplace-grade stickers are rated for higher temperatures and made to sit flush against a smooth, glazed surface. Cheap generic stickers will bubble, yellow, or peel when they get warm, so the label rating matters more than the pattern.
The Heat Question: Where They Can and Can’t Go
This is the part people skip and later regret. Vinyl has limits, and every fireplace has a heat gradient that drops the farther you get from the firebox opening.
- Safe zone: the decorative surround tiles that sit 6 inches or more from the firebox opening, where surface temperatures typically stay under 140°F to 160°F during normal use.
- Marginal zone: tiles within a few inches of the opening. Only use here if the maker explicitly rates the product for it, and expect a shorter lifespan.
- Never zone: the firebox interior, the hearth floor directly in front of a wood burner, or any surface that gets hot to the touch. Vinyl can soften, off-gas, and even scorch.
Most fireplace tile stickers are rated to around 140°F to 200°F continuous. Gas fireplaces with sealed fronts and electric inserts run cooler on the surround and are the best candidates. Wood-burning fireplaces get hotter and less predictable, so keep stickers well back from the opening. When in doubt, run a fire, then touch the tile; if you can’t hold your hand on it comfortably, don’t put a sticker there.
Pros and Cons of the Sticker Approach
What They Get Right
- Cost: a surround typically runs $30 to $90 in stickers versus $1,500 to $4,000 for a professional retile.
- Speed: most projects take one to three hours with no dust, mortar, or grout.
- Reversibility: ideal for renters or anyone testing a look before committing. They peel off, though they may leave adhesive residue.
- Waterproof surface: the laminate wipes clean with a damp cloth.
The Trade-offs
- They read as flat up close; you lose the depth and texture of real tile.
- Lifespan is limited near heat, generally 2 to 5 years before edges lift or color fades.
- They need a smooth, glazed base. They won’t stick well to rough stone, brick, or heavily textured grout.
- Removing them years later can pull paint or leave gummy residue.
How to Apply Fireplace Tile Stickers
Preparation is everything with any adhesive product. Follow these steps for a result that stays put:
- Clean thoroughly. Wipe the tile with a degreasing cleaner, then a pass of rubbing alcohol to strip all grease and dust. Let it dry completely.
- Measure and dry-fit. Lay the stickers out or mark a level starting line. Fireplaces are rarely perfectly square, so plan cuts for the edges.
- Peel and place from the top. Start at the top corner, align to your level line, and smooth downward.
- Squeegee out air. Use a plastic card or squeegee, working from the center outward to push bubbles to the edge.
- Trim edges. Cut around the firebox opening, mantel, and outlets with a sharp utility knife, leaving that safety gap from the hottest zone.
- Seal the edges if allowed. Some brands include or permit a clear edge sealer that helps resist lifting from heat and steam.
Work slowly, keep your hands clean, and don’t try to reposition a sticker more than once or twice, since the adhesive weakens each time you pull it up.
Cost Breakdown and What to Buy
Budget is where these really win. Here’s a realistic picture for an average surround of about 15 to 25 square feet:
- Tile stickers: $25 to $80 depending on brand and pattern complexity
- Cleaning supplies (alcohol, degreaser, cloths): $10 to $15
- Utility knife, squeegee, level: $15 to $25 if you don’t own them
Look for products specifically marketed as heat-resistant or fireplace/stove rated, not generic backsplash decals. Check the stated temperature rating on the listing, favor thicker vinyl with a laminate top coat, and read reviews that mention fireplace use specifically. Order one sample sheet first to test both the look and how it handles a couple of fires before you commit to the full surround.
Design Ideas That Actually Look Good
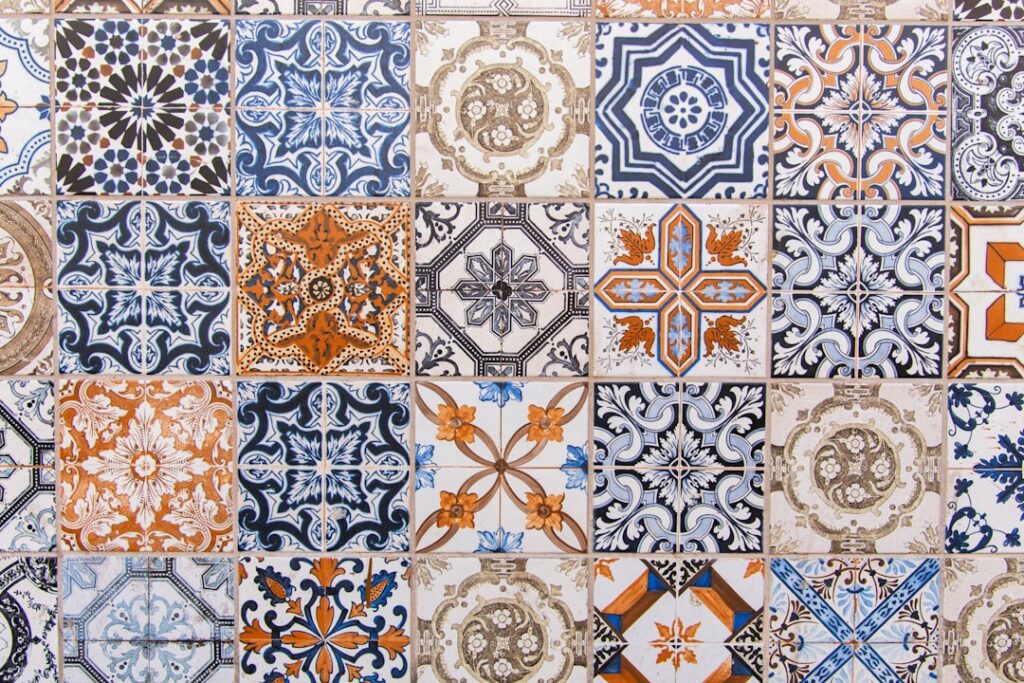
The trap with any peel-and-stick product is choosing a pattern that screams “sticker” from across the room. The looks that hold up are the ones that echo real tile. Encaustic-style Moroccan and Spanish patterns are the most popular for fireplaces because their busy geometry hides the flat, printed quality that plain marble prints reveal up close.
A few combinations I’ve seen work well: a black-and-white cement pattern against a white-painted mantel reads as a designer statement; a soft terracotta or sage geometric warms up a farmhouse room; and a subtle marble-look sheet paired with a modern gas insert can pass at a glance. Whatever you pick, keep the surrounding paint and mantel neutral so the tile pattern carries the room. If the existing grout lines are wide and dark, choose individual tile-sized stickers that sit inside each tile rather than a single sheet that ignores the grid, since aligning to the real grout sells the illusion.
Care, Longevity, and Removal
Once installed, upkeep is minimal: wipe with a damp cloth, skip abrasive scrubbers, and avoid harsh solvents that can dull the laminate. Watch the corners after the first heating season, because edges are always the first to lift. A dab of clear sealer or a careful re-press with a warm (not hot) iron over a cloth can buy more time.
Expect roughly 2 to 5 years of good looks on a cooler gas or electric surround, less on a wood burner. When it’s time to remove them, warm the vinyl gently with a hair dryer to soften the adhesive, peel at a low angle, and clean residue with an adhesive remover or rubbing alcohol.
Final Thoughts
Used within their limits, fireplace tile stickers are a genuinely smart, budget-friendly refresh, perfect for renters, quick sales prep, or anyone who wants to test a design before spending real money on tile. Just respect the heat: keep them back from the firebox, buy a product actually rated for the temperatures your fireplace produces, and prep the surface like a pro. Do that, and your fireplace tile stickers will give you a fresh, custom-looking surround for a tiny fraction of a full renovation.
Prefer to explore on your own?
See how new flooring looks in your actual room in seconds — free, no signup.
Try the free Floor Studio →