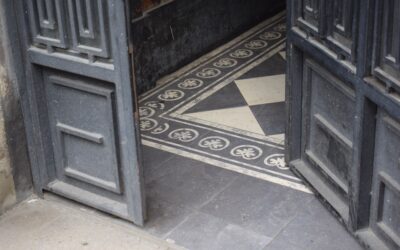
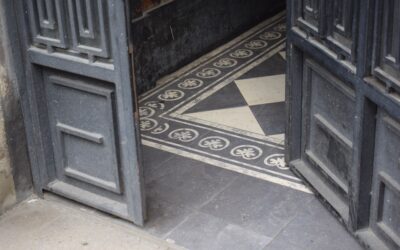
The finishing touch that makes a flooring installation look truly professional is often the piece people notice least: the edge. Floor border trim covers the gaps, transitions, and raw edges where flooring meets walls, doorways, and other surfaces, turning an unfinished-looking floor into a polished, cohesive room. Beyond looks, this trim protects flooring edges from damage, hides expansion gaps, and smooths the height differences that can trip you up. This guide covers the types, materials, costs, and installation of floor border trim.
- What Floor Border Trim Does
- Common Types of Floor Border and Transition Trim
- Choosing the Right Material
- What Floor Border Trim Costs
- How to Install Floor Border Trim
- Design Tips for a Cohesive Look
- Measuring and Estimating Your Trim Needs
- Common Mistakes to Avoid
- Finishing and Maintaining Your Trim
- Final Thoughts on Floor Border Trim
What Floor Border Trim Does
Border and transition trim serves several practical jobs at once. It conceals the expansion gap that floating floors like laminate and vinyl require around the perimeter, protecting the visible edge while allowing the floor to move with humidity. It creates a safe, clean transition where one flooring type meets another, such as tile meeting carpet in a doorway. It caps exposed edges at stairs, hearths, and thresholds so they cannot chip or lift. And it frames the room visually, giving the whole installation a deliberate, finished appearance rather than an abrupt raw edge.
Common Types of Floor Border and Transition Trim
Different situations call for different profiles, and knowing the vocabulary helps you order the right piece.
- T-molding: Bridges two floors of equal height, typically in a doorway between rooms.
- Reducer strip: Slopes down from a higher floor to a lower one, like hardwood meeting vinyl.
- Threshold or end molding: Caps the edge where flooring meets a doorway, sliding door, or exterior threshold.
- Stair nosing: Rounds and protects the front edge of each stair tread.
- Quarter-round and shoe molding: Covers the gap between the floor and the baseboard for a clean perimeter.
- Carpet transition strips: Join carpet to a hard surface with a secured, tapered edge.
Choosing the Right Material
Floor border trim comes in a range of materials, each with trade-offs.
- Wood: Classic and stainable to match hardwood floors, though it costs more and is less moisture-tolerant.
- Laminate and vinyl: Often color-matched to floating floors, affordable, and moisture-resistant.
- Metal: Aluminum or brass strips are durable and modern, ideal for tile edges and high-traffic transitions.
- Rubber and flexible PVC: Forgiving for uneven transitions and commercial or utility spaces.
Match both the material and the color to your flooring, and favor moisture-resistant options in kitchens, baths, and entryways.
What Floor Border Trim Costs
Trim is one of the more affordable parts of a flooring project, but costs add up across a whole house. Basic vinyl or laminate transition strips often run roughly $5 to $15 per piece or a few dollars per linear foot, while solid wood and metal profiles cost more, commonly $10 to $30 or more per piece depending on length and finish. Specialty items like stair nosing tend to sit at the higher end. If you hire a professional, installation labor is usually modest per transition, though intricate cuts around irregular openings take more time and cost.
How to Install Floor Border Trim
Most trim installs with basic tools and a bit of patience. The general approach follows a few key steps.
- Measure the opening or edge carefully and cut the trim to length with a miter saw for clean ends.
- Choose the fastening method appropriate to the trim: many T-moldings and reducers snap into a metal track screwed to the subfloor, while others glue or nail down.
- Respect the expansion gap; never fasten a floating floor’s trim so tightly that it pins the floor in place.
- Dry-fit the piece first to check the height and fit before committing adhesive or fasteners.
- Secure the trim, wipe away any excess adhesive, and check that transitions sit flush to prevent tripping.
For doorways, cutting the trim slightly long and trimming down gives a tighter final fit than cutting short.
Design Tips for a Cohesive Look
Trim is functional, but it also shapes how a room reads. Matching the trim color to your flooring makes transitions disappear for a seamless, spacious feel, while a contrasting metal strip can define zones deliberately in open-plan spaces. Keep the same trim style consistent throughout a home for a unified look, and choose low-profile transitions where possible to minimize visual interruption and tripping hazards. In doorways between very different floors, a clean, well-chosen transition strip is what keeps the change from looking accidental.
Measuring and Estimating Your Trim Needs
Ordering the right amount of trim the first time saves return trips and mismatched dye lots. Start by walking through your project and listing every transition and edge that needs covering.
- Measure the width of each doorway and opening where floors meet, and note whether the two floors are equal or different heights.
- Measure the length of any exposed edges at hearths, sliding doors, and thresholds.
- Count stair treads if you need stair nosing, measuring the width of each.
- Measure the full perimeter of rooms getting quarter-round or shoe molding, subtracting door openings.
- Add about ten percent extra for miter cuts, mistakes, and future repairs from the same lot.
Buying matching pieces together ensures consistent color and finish, since trim from different batches can vary noticeably.
Common Mistakes to Avoid
A few avoidable errors turn a clean install into an eyesore or a hazard. The most frequent is pinning a floating floor by fastening its trim too tightly, which prevents the natural expansion and contraction that laminate and vinyl require, leading to buckling. Another is choosing a transition that creates too abrupt a height change, producing a tripping hazard where a proper reducer would have sloped gently. Mismatched colors between trim and flooring stand out immediately, so always compare samples in the actual room light before committing. Finally, skipping the dry-fit step often results in gaps or overhangs that are hard to correct once adhesive is down. Taking a few extra minutes to plan and test-fit each piece prevents all of these problems.
Finishing and Maintaining Your Trim
Once trim is installed, a few finishing touches and simple upkeep keep it looking sharp for years. If you are using stainable wood trim, finish it before or shortly after installation, matching the stain and sealer to your flooring and filling any nail holes with color-matched putty. Painted trim benefits from a quality caulk along the top seam where it meets the wall or baseboard, giving a crisp, gap-free line, though you should skip caulking where a floating floor needs room to move. Metal transitions rarely need finishing but should be checked periodically to ensure fasteners stay snug under traffic. For ongoing maintenance, wipe trim during regular cleaning, watch for pieces that loosen over time, and re-secure them promptly before they become trip hazards or catch on feet. In moisture-prone areas, inspect trim occasionally for swelling or damage and reseal or replace as needed. Because trim takes constant abuse from vacuums, shoes, and furniture, treating it as part of your routine cleaning keeps those finished edges looking as clean and intentional as the day they went in, protecting both the appearance and the flooring beneath.
Final Thoughts on Floor Border Trim
Though it is often the last thing installed and the first thing overlooked, floor border trim is what separates a finished floor from an unfinished one. It hides expansion gaps, protects vulnerable edges, smooths height transitions for safety, and frames every room with a clean, intentional border. By choosing the right profile and material for each situation, matching colors thoughtfully, and installing with care around expansion gaps, you give your flooring the polished, professional edge it deserves, and one that will hold up beautifully for years.
Prefer to explore on your own?
See how new flooring looks in your actual room in seconds — free, no signup.
Try the free Floor Studio →