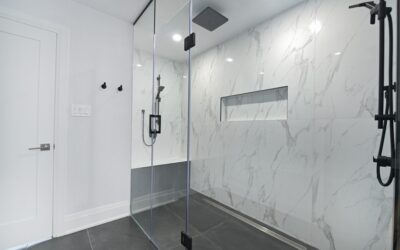
A well-placed tile border turns an ordinary floor into a deliberate design statement. Whether you want to frame a foyer, define an open-plan kitchen, or add a decorative edge to a bathroom, the right floor tile border ideas can elevate a space without a full renovation. Borders draw the eye, break up large tiled expanses, and create a sense of craftsmanship that plain field tile rarely achieves on its own.
Part of our Tile & Grout guide — explore the full guide →
This guide walks through border styles, material pairings, layout strategies, and practical cost and installation notes so you can plan a border that fits both your room and your budget.
- Why Add a Tile Border at All?
- Classic Border Styles That Never Date
- Modern and Minimalist Border Ideas
- Material Pairings That Work
- Layout Strategies and Placement
- Cost and Installation Considerations
- Room-by-Room Border Ideas
- Creating a Rug Effect With Tile
- Grout and Finishing Details
- Mistakes to Avoid With Tile Borders
- Choosing the Right Border for Your Room
Why Add a Tile Border at All?
Borders serve function as much as looks. In a large room, an uninterrupted grid of identical tiles can feel flat and institutional. A contrasting band along the perimeter, or an inset frame around a central area, adds rhythm and scale. Borders also help transition between two flooring materials, hide slightly uneven walls, and visually correct rooms that are long and narrow.
- Definition: outline a dining zone, an entry, or a shower threshold.
- Proportion: a border can make a cavernous room feel more intimate.
- Transition: a clean line where tile meets wood or carpet.
- Character: mosaic or patterned strips add handcrafted detail.
Classic Border Styles That Never Date
Some layouts have endured for a century because they simply work. A single contrasting band running parallel to the walls is the most versatile choice, reading as tailored in nearly any room. A double band with a thin accent stripe between two wider tiles feels more formal and suits traditional foyers and hallways.
For period homes, a Greek key or geometric fret border in black-and-white mosaic gives instant heritage charm. Basketweave and pinwheel mosaics also make elegant inset frames around a plain field, echoing Victorian and Edwardian floors.
Modern and Minimalist Border Ideas
Contemporary spaces call for restraint. Instead of ornate mosaics, a modern border might be a single row of the same tile turned 45 degrees, or a slim strip of a darker shade of the field color. Large-format porcelain floors look striking with a hairline metal trim, brass or matte black, dividing two tones.
Consider these understated approaches:
- A narrow charcoal band around light concrete-look porcelain.
- Brass Schluter trim used as a linear accent, not just an edge protector.
- A subtle change in grout color to imply a border without adding tile.
- Hexagon-to-plank transitions that fade rather than hard-frame a zone.
Material Pairings That Work
The most memorable borders mix materials thoughtfully. Marble or natural stone borders around ceramic field tile add luxury to bathrooms and entries. Wood-look plank tile paired with a stone or mosaic border bridges warm and cool textures. Terrazzo and encaustic cement tiles make bold, colorful frames that become the room’s focal point.
When pairing, keep tile thickness in mind. Different materials often have different depths, so your installer may need to build up the thinner tile with extra mortar to keep the surface flush. Always confirm the two materials share a similar wear rating if both sit in a high-traffic path.
Popular Border Material Combinations
- Porcelain field with a honed marble strip.
- Wood-look plank with a slate mosaic border.
- White subway-style floor tile with a black penny-round frame.
- Neutral limestone with an encaustic patterned band.
Layout Strategies and Placement
Where you place the border matters as much as the tile you choose. A perimeter border set a few inches off the wall reads like a picture frame and works beautifully in square rooms. A running border down the center of a hallway leads the eye toward a destination. In bathrooms, a border that traces the vanity or shower footprint quietly organizes the layout.
Before committing, dry-lay your tiles. Mark the border position with chalk lines and step back to judge the proportion. A good rule is to keep the border width between 3 and 6 inches for residential floors; anything wider can overwhelm a small room, while a thinner line may look accidental.
Cost and Installation Considerations
Borders add both material and labor cost. Decorative mosaic strips run anywhere from $8 to $40 per linear foot for the tile alone, and intricate cuts increase labor time. Expect a skilled installer to charge a premium for mitered corners and precise inlays, since these require careful measuring and patience.
- Simple contrasting band: modest upcharge, mostly extra material.
- Mosaic or patterned inset: higher labor for detailed setting.
- Mixed-material frame: plan for leveling and specialty trim.
To control costs, limit the border to one high-impact area such as an entry, and reuse your main field tile turned or cut for the accent. Buy 10 to 15 percent extra tile to cover cuts and future repairs.
Room-by-Room Border Ideas
Different rooms call for different border approaches, driven by traffic, moisture, and mood.
- Entryway/foyer: a framed border set in from the walls creates a welcoming rug-like effect and defines the transition into the home.
- Bathroom: a mosaic or stone border around the vanity or shower footprint adds detail in a small, contained space.
- Kitchen: a border can outline an island zone or run along the perimeter to frame an open floor.
- Hallway: a running border down the length draws the eye forward and makes a narrow corridor feel intentional.
- Sunroom or mudroom: a bold patterned border stands up to traffic and hides dirt while adding character.
Creating a Rug Effect With Tile
One of the most popular border applications is the tile “rug”, a framed inset of patterned or contrasting tile that mimics an area rug underfoot. This works beautifully in entries, kitchens, and bathrooms where a fabric rug would get dirty or slip. Encaustic cement tiles, mosaics, or a simple contrasting border around a plain field all create the effect. Because the tile rug is permanent and cannot bunch or stain, it offers the look of a rug with none of the upkeep. Center it under a table or in front of a sink for the most natural placement.
Grout and Finishing Details
The grout you choose shapes how a border reads. A grout color that matches the border tile makes the band appear as one continuous element, while a contrasting grout emphasizes each piece for a more detailed, handcrafted look. For mosaic borders, be prepared for more grout lines and slightly more cleaning maintenance. Sealing natural stone and cement borders protects them from staining, especially in kitchens and entries where spills and grime are common. Taking care with grout and sealing keeps a decorative border looking crisp for years.
Mistakes to Avoid With Tile Borders
A border succeeds or fails on restraint and execution. The most common mistake is making the border too wide, which shrinks the field and overwhelms the room; keep it proportionate. Another is choosing a border that clashes with the field tile in tone or style, a busy mosaic can fight an already patterned floor. Poorly planned layouts that leave awkward slivers where the border meets a wall look unfinished, so always dry-lay first. Finally, mixing materials of different thicknesses without leveling them creates trip hazards and uneven surfaces. Plan the border early, ideally before you buy your field tile, so the two work as a designed pair rather than an afterthought.
- Keep border width proportionate, usually 3 to 6 inches for floors.
- Coordinate border and field tile in tone and style.
- Dry-lay to avoid thin edge cuts and awkward corners.
- Level mixed-thickness materials for a flush, safe surface.
Choosing the Right Border for Your Room
Match ambition to the space. Small powder rooms and entries can carry a bold, colorful border because the area is contained. Large open floors usually look best with a quiet, tonal frame that organizes without shouting. If your walls are busy with pattern or your furniture is ornate, keep the floor border simple, and vice versa.
Ultimately, the best floor tile border ideas are the ones that feel intentional and suit how you live. Test samples in your own light, respect the room’s proportions, and let the border do one clear job, whether that is framing, dividing, or simply adding a note of craftsmanship underfoot.
Prefer to explore on your own?
See how new flooring looks in your actual room in seconds — free, no signup.
Try the free Floor Studio →