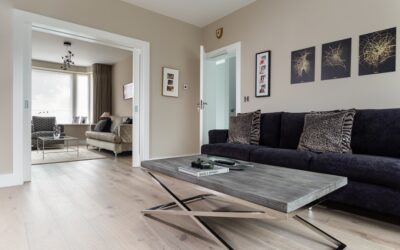
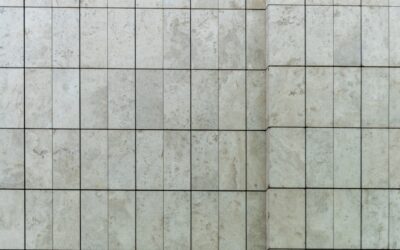
Walk into any flooring showroom and you will see the same trick: oversized vinyl plank samples mounted under flattering warm-white lighting that makes the wood-grain print look impossibly real. Then you see the same product installed under your kitchen’s daylight LEDs and the magic evaporates. Flooring pictures — the photos you see on manufacturer websites, Pinterest boards, and showroom walls — are powerful planning tools, but only if you know what they are leaving out. Used correctly, they save you from $8,000 mistakes.
Why Flooring Pictures Matter
You are spending $3 to $15 per sq ft on a product that will live in your house for 15 to 30 years. Choosing it from a 4-inch sample chip in a fluorescent showroom is statistical madness. Pictures of installed floors in real rooms — at scale, in natural light, with furniture nearby — give you the only reliable preview of how a product will actually feel underfoot.
The catch: most flooring pictures online are either professional staged photography (color-corrected and lit to flatter) or 3D renders (idealized). Neither matches what shows up in a 1996 ranch with north-facing windows in February.
The Pros of Photo-Driven Shopping
Scale is the first benefit. A 7-inch wide oak plank looks reasonable in a 24×36 sample but becomes overwhelming in a 9×10 powder room — you only realize this when you see actual room-sized photos. Color shifts are the second. Reactive stains like fumed white oak look amber-warm in pictures and gray-cool in person, depending on lighting. Pattern repeat is the third. Many LVP products have only 8 to 12 unique plank designs that repeat every 80 sq ft; manufacturer pictures rarely show this.
Browsing real installations on Houzz, Instagram (#hardwoodflooring tag has 1.2M+ posts), and customer review sections gives you the unvarnished view. Look for photos that include corners, transitions to other rooms, and edges near baseboard — that is where install quality and color uniformity actually show.
The Cons and Common Tricks
Manufacturer studio shots use diffused soft-box lighting that flattens contrast and richens color. Your living room has none of that. Renders — increasingly common on big-box and direct-to-consumer sites — are 100% computer-generated and hide every imperfection: micro-bevels, knot variation, end-joint visibility, and wear-layer texture.
Color reproduction varies wildly between monitors. A floor that looks rich amber on your iPhone OLED can look gray-brown on a budget LCD. Without a calibrated display, you are making decisions on imagery that may be 15% to 25% off the actual color.
How to Spot Renders
- Too clean — no dust, no transition strips, no visible seams
- Identical reflections — real wood scatters light unevenly
- Repeating grain — same plank appears 4-5 times in one shot
- Perfect lighting — no harsh shadows or color cast from windows
- Furniture floats — no contact shadows under chair legs
Reading Real Installation Photos
When you find authentic flooring pictures of installed product, focus on five specific things. Look at corners — that is where pattern alignment and seam quality become obvious. Check transitions to adjoining rooms — color shifts between batches show up here first. Examine baseboards — sloppy cuts and gaps reveal install quality. Note daylight versus artificial light shots — wood-look LVP often loses its realism under cool LEDs. Finally, scroll for two-year follow-ups in long-form reviews — real wear and color change tell you what the floor actually does over time.
Best Sources for Honest Pictures
Flooring forums like ContractorTalk and homeowner subs on Reddit (r/HomeImprovement, r/Flooring) post un-staged photos under real lighting. Houzz project pages from real designers include before/after and during-construction shots. Manufacturer YouTube channels — particularly Coretec, Mohawk, and Mirage — sometimes include “real customer install” walkthroughs that beat their own studio photography.
Big-box reviews on Home Depot and Lowe’s often include customer-uploaded photos. Sort by lowest rating first and you will see the products that look great in studio but disappoint in living rooms.
Using Pictures to Order Samples Smarter
Flooring pictures should drive your sample list, not replace it. Once you narrow to three or four products from photos, order full-size samples — most manufacturers ship 12×12 or even 12×36 for $5 to $20. Place samples in the actual room, against your existing walls and trim, and live with them for at least three days. Look at them in morning light, afternoon sun, and evening artificial light.
Sample Workflow
- Browse Houzz, Instagram, and forums for inspiration photos
- Save 10 to 15 favorites; identify product names from captions or comments
- Narrow to four contenders based on price, durability, and visual fit
- Order full-size samples direct from manufacturer or local distributor
- Place samples in target room for 72 hours minimum
- Photograph samples in your space at three times of day
- Compare your photos against the inspiration photos
Specific Photo Categories Worth Browsing
For hardwood, search “white oak natural finish” plus your room type — you will see the spread of pale Scandi to amber traditional. For LVP, search by manufacturer and product line plus “real install” — Coretec Plus HD Greystone Contempo Oak shows up dramatically different in different homes. For tile, search “12×24 porcelain bathroom” plus your color (greige, cream, charcoal) — grout color shifts the entire look.
Avoid picture-perfect Pinterest boards as your only reference. They are aspirational mood boards, not accurate previews. Mix them with messy real-room shots and you will avoid surprises.
Where Pictures Cannot Help
Flooring pictures cannot show you how a floor sounds underfoot, how cold it feels in February, or how slippery it gets when wet. They cannot tell you about dust visibility (dark floors show every speck), pet hair contrast, or how long the finish takes to develop a patina. For these, you need installer references, in-store walking tests, and review-site research.
Combine flooring pictures with samples, reviews, and a showroom visit, and you have the complete picture. Skip any of those three steps and you are gambling on five-figure decisions.
Prefer to explore on your own?
See how new flooring looks in your actual room in seconds — free, no signup.
Try the free Floor Studio →