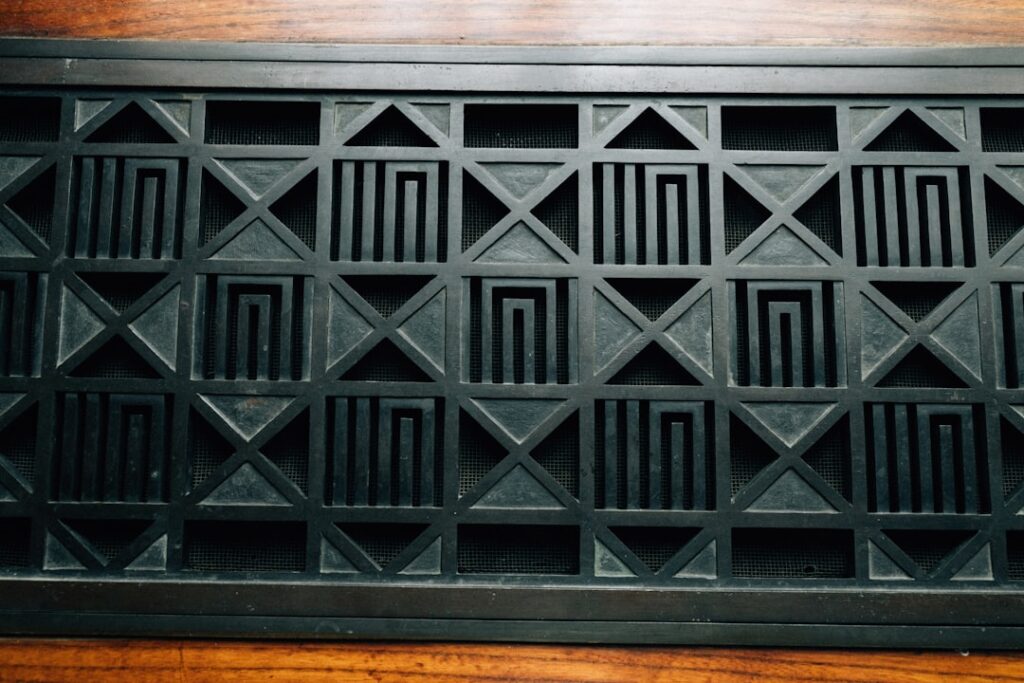
A flush mount floor register is the detail that separates a floor that looks builder-basic from one that looks finished by a craftsman. Instead of a stamped metal grille perched on top of your flooring collecting dust and stubbing toes, a flush-mounted register sits level with the floor surface, so air still flows freely while the vent nearly disappears into the wood, tile, or vinyl around it. I’ve installed hundreds of these, and once a homeowner sees one done right, they never go back to the bulky drop-in grilles.
The trouble is that “floor register” covers two very different mounting styles that get confused constantly, and buying the wrong one means either a lip you trip on or a hole that won’t hold the grille. Add in a range of materials, damper choices, and a sizing system that trips up nearly every first-timer, and it’s worth understanding the whole picture before you order. This guide covers the types, materials, dampers, sizing, and the actual installation into different flooring.
What “Flush Mount” Actually Means
Every floor register drops into a rectangular duct opening in the subfloor, but how it sits relative to the finished floor is the key distinction. A standard drop-in register has a wide face flange that rests on top of the finished floor, so the grille body sits slightly proud of the surface — you can feel the edge with a bare foot and a vacuum will bump over it. It’s easy to install and easy to swap, which is why it’s the default in most homes.
A true flush mount, or self-rimming, register is designed so the top of the grille finishes level with the surrounding floor. Achieving this usually means the register is recessed into a routed or built-up opening, or it’s a “frame-in” style where a frame is set into the flooring and the flooring material itself butts right up to it. Some flush systems even accept a piece of your actual flooring dropped into the register face so the vent is nearly invisible. The payoff is a clean, trip-free, easy-to-clean surface — the tradeoff is that flush mounting requires more precise fitting and often a slightly recessed opening.
Register Materials
Material affects durability, appearance, and price, and there’s a right choice for each setting. Steel is the economical workhorse — powder-coated steel registers are strong enough to walk on, come in many finishes, and cost the least, though they can rust in damp locations and dent under heavy point loads. Aluminum is lighter, naturally corrosion-resistant, and a smart pick for bathrooms, basements, and anywhere moisture is a concern; it won’t rust like steel.
For higher-end work, brass and bronze registers bring a solid, substantial feel and an upscale look that suits traditional and transitional interiors, and they patina attractively over time. Wood registers are the go-to for hardwood floors — you can order them in oak, maple, walnut, and other species, then stain and finish them to match your flooring so the vent blends in seamlessly. Some homeowners even have registers made from the same flooring lot. Wood looks fantastic but needs a bit more care and shouldn’t sit in wet areas. Match the material to both the room’s moisture level and the look you want.
Damper Options
A register’s damper lets you throttle or shut off airflow to individual rooms, and it’s worth deciding up front whether you want one. Most floor registers come with an integral steel damper — a hinged plate below the grille operated by a small lever or sliding tab on the face. Closing it in an unused guest room or balancing airflow between floors is genuinely useful for comfort and can nudge energy bills down.
That said, dampers aren’t always the right call. In some flush installations the low-profile design leaves little room for a damper mechanism, and a few purists prefer damperless grilles for the cleanest possible look and unrestricted flow. If you rely on room-by-room balancing, order registers with functional dampers and confirm the lever is accessible once the grille is seated. If your system is balanced elsewhere or you value simplicity, a damperless flush register is perfectly fine. Just know which you’re buying, because retrofitting a damper later means replacing the whole register.
Sizing by Duct Opening
Here’s where almost everyone goes wrong: floor registers are sized by the duct hole they cover, not by their overall outside dimensions. When a register is labeled 4×10, that means it fits a duct opening 4 inches by 10 inches — the metal faceplate is larger, typically an inch or so bigger on each side, but the “4×10” refers to the hole. Common residential sizes include 4×10, 4×12, 6×10, 6×12, and 2×12, with 4×10 and 4×12 being far and away the most frequent in homes.
To size correctly, measure the actual duct opening in your subfloor, not the old register’s outer edge. Put a tape across the rough rectangular hole where the duct terminates, measuring width first then length, and round to the nearest standard size — a hole roughly 4 by 10 inches takes a 4×10 register. If you order by the old grille’s outside dimension, you’ll get a register whose duct opening is too big and it’ll rattle in the hole. When in doubt, pull the existing grille and measure the raw duct; that number is the size you order.
Installing Into Hardwood, Tile, and LVP
Installation technique depends on your flooring. In hardwood, the cleanest flush results come from planning the register into the floor during installation — the boards are cut to frame the opening and the register (or a frame) drops in level with the wood. For a retrofit, you can rout a shallow recess around the duct opening so a self-rimming register’s flange sits flush, then bed it carefully so it’s dead level with the boards. Wood registers finished to match make the transition nearly invisible.
In tile, the register opening should be planned so full or cut tiles frame the duct hole cleanly, with the register’s top sitting level with the tile surface; a self-rimming metal or matching frame register works well here, seated in place before or as the surrounding tile is set. With LVP and laminate, the floating floor is cut around the duct opening and a flush or drop-in register set into the gap — because these floors are thinner, low-profile flush registers designed for the material give the best result. In every case, dry-fit first, confirm the grille sits flush and the damper operates, and make sure fasteners or a snug friction fit hold it without wobble before you call it done.
Measuring and Ordering Tips
Before you order a single flush mount floor register, take a few minutes to gather accurate numbers. Measure every duct opening in the home, since they’re often not uniform — a house may have several 4x10s in bedrooms and a 6×12 in the living room. Note the flooring thickness too, because flush systems have a limited depth range and a thick engineered plank needs a deeper register frame than a quarter-inch of vinyl.
Decide on finish and damper for each location, then order a sample or a single register first to confirm fit and color before buying for the whole house — finishes photograph differently than they look in person, and wood stain matching almost always needs a test piece. Keep in mind lead times on custom wood or specialty brass registers can run weeks. A little measuring and one test fit up front saves the frustration of a floor full of vents that don’t quite sit right, and it’s the difference between a flush register that looks custom and one that looks like an afterthought.
Prefer to explore on your own?
See how new flooring looks in your actual room in seconds — free, no signup.
Try the free Floor Studio →