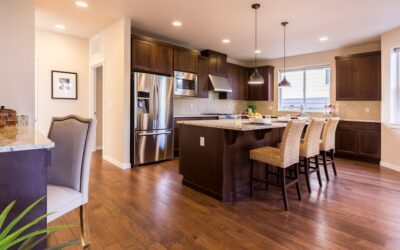
Hard floors, bare drywall, and big windows look great in listing photos, but they turn a room into an echo chamber the moment you start a video call or turn on a speaker. Free standing acoustic panels tackle that problem without a single hole in the wall. You set them on the floor, angle them where the sound is bouncing, and move them when the room changes. For renters, open-plan homes, and anyone who hates patching drywall, they are one of the most flexible ways to calm a noisy space.
- What Free Standing Acoustic Panels Actually Do
- Where Free Standing Panels Make the Most Sense
- Key Specs to Compare Before You Buy
- How Many Panels Do You Need?
- Placement Tips That Make a Real Difference
- DIY Free Standing Panels vs. Store-Bought
- Styling Panels So They Look Like Furniture
- Care, Cleaning, and Safety
- Bottom Line
What Free Standing Acoustic Panels Actually Do
Sound in a room behaves a lot like light in a mirrored box. It leaves the source, hits the nearest hard surface, and bounces back, stacking up as reverberation. Hardwood, tile, luxury vinyl plank, glass, and painted drywall all reflect most of the sound energy that strikes them. The result is that hollow, slightly metallic quality you hear in a freshly renovated room with no rugs or curtains.
An acoustic panel is a porous absorber. Sound waves travel into the fibers, and friction converts part of that energy into a tiny amount of heat. Less energy comes back out, so the room sounds tighter and speech becomes clearer. A free-standing version does the same job as a wall-mounted panel, but it sits on feet, casters, or a weighted base.
It is important to be clear about what panels do not do. Absorption reduces echo inside a room. It does not soundproof the room, meaning it will not stop your neighbor’s television or traffic noise from coming through the walls. Blocking sound transmission requires mass, decoupled framing, and sealed gaps, which is a construction project rather than a furniture purchase.
Where Free Standing Panels Make the Most Sense
- Home offices: A pair of panels behind or beside your desk cuts the reflections that make you sound distant on video calls.
- Open-plan living areas: Panels double as room dividers, creating a quieter reading nook or work zone without building a wall.
- Home recording and podcasting: Panels placed around the microphone position create a drier vocal booth that can be folded away afterward.
- Home theaters and music rooms: Portable panels let you experiment with placement before committing to permanent treatment.
- Rentals and historic homes: When you cannot drill into plaster, tile, or a landlord’s walls, a floor-standing panel is the obvious answer.
- Rooms with hard flooring: Kitchens, great rooms, and basements finished with tile or LVP benefit quickly because the floor is contributing so much reflection.
Key Specs to Compare Before You Buy
NRC Rating
The Noise Reduction Coefficient summarizes how much sound a material absorbs across speech frequencies, on a scale from 0 to roughly 1. A bare drywall surface sits near 0.05. Decent acoustic panels usually land between 0.70 and 1.00. Look for a published NRC from lab testing rather than a vague claim like “absorbs 90% of noise.” When a panel is absorptive on both faces, the effective performance in the room is generally better than a one-sided wall panel of the same size.
Thickness
Thickness controls how low in pitch a panel can absorb. A 1-inch panel handles high-frequency chatter, keyboard clicks, and sibilance. A 2-inch panel covers most of the speech range well and is the practical sweet spot for offices. Panels 3 to 4 inches thick start working on lower voices and some music content. Deep bass is a different challenge that usually needs dedicated corner bass traps.
Size and Height
For a seated desk, a panel around 4 feet tall covers the ear height of a seated person. For standing conversations or dividing a room, look for panels 5 to 6 feet tall. Widths typically run 2 to 4 feet. Multi-panel folding screens with hinged sections cover more area and stand more stably than a single slab.
Core Material and Covering
Common cores include mineral wool, fiberglass board wrapped in fabric, PET felt made from recycled plastic, and open-cell foam. Fabric-wrapped fiberglass and mineral wool usually deliver the best absorption per inch. Foam is lightweight but often underperforms at the same thickness. Check for a fire rating such as a Class A flame spread rating, particularly for panels going into shared or commercial-style spaces.
Base and Stability
Panels ship with splayed feet, T-shaped stands, locking casters, or weighted plates. Casters make it easy to reposition panels on hard floors. Felt pads under steel feet protect hardwood and LVP from scratches. If you have pets or small children, choose a wide base or a folding design that cannot be tipped by a bump.
How Many Panels Do You Need?
There is no perfect formula for a living space, but a practical starting point is to cover about 15% to 25% of the room’s wall area with absorptive surfaces for a noticeable improvement. A 12 by 12 foot home office with 8-foot ceilings has about 384 sq ft of wall. That points to roughly 60 to 90 sq ft of treatment. Two 4 by 6 foot free-standing panels give you 48 sq ft per face, and because they absorb on both sides when pulled off the wall, the effective coverage is closer to what you need.
Rugs, upholstered furniture, bookshelves full of books, and heavy curtains all count toward that total. Start with two panels, listen, and add a third only if the room still rings when you clap your hands.
Placement Tips That Make a Real Difference
Where you put a panel matters as much as which panel you buy. The goal is to intercept the strongest early reflections before they reach your ears or your microphone.
- Use the mirror trick. Sit in your listening or working position while a helper slides a small mirror along the side walls. Anywhere you can see a speaker or your own mouth in the mirror is a first-reflection point. Put a panel there.
- Treat the wall behind your screen. Sound from your voice hits the wall in front of you and comes straight back to the microphone. A panel behind the monitor, or a folding screen just behind the desk, is often the single biggest upgrade for video calls.
- Pull panels off the wall. Leaving a gap of 4 to 6 inches between the panel and the wall improves absorption at lower frequencies. Free-standing designs make this effortless.
- Break up parallel surfaces. Two bare walls facing each other create a fluttering echo. A panel on one side is usually enough to break it.
- Angle for dividers. When using panels as room dividers, angle them slightly rather than setting them perfectly parallel to the nearest wall.
DIY Free Standing Panels vs. Store-Bought
Building your own is a popular weekend project. A basic frame of 1×4 lumber, a 2-inch rigid mineral wool or fiberglass board, breathable fabric, and a pair of wooden feet can produce a 2 by 4 foot panel for roughly $40 to $70 in materials. Wear gloves, long sleeves, eye protection, and a dust mask when cutting mineral wool or fiberglass, and fully wrap the core so fibers cannot shed into the room. Choose an acoustically transparent fabric; if you can easily breathe through it, sound can pass through it too.
Store-bought panels cost more but come with tested NRC data, finished edges, stable bases, and fire ratings. Expect roughly $80 to $200 for a single consumer-grade free-standing panel, $200 to $500 for a multi-section folding divider, and more for office-grade systems with tackable surfaces and casters. If the panel will sit in a visible spot in the main living area, the cleaner finish of a manufactured unit is often worth it.
| Type | Typical Price | Best Use |
|---|---|---|
| DIY framed panel | $40-$70 each | Studios, budget offices |
| Single store-bought panel | $80-$200 | Desk and reflection points |
| Folding divider screen | $200-$500+ | Open-plan zoning |
Styling Panels So They Look Like Furniture
Nobody wants a living room that looks like a radio booth. Choose fabric colors that pull from your rug, sofa, or flooring tones. Warm grays and oatmeal fabrics blend with oak and walnut floors. Charcoal and navy disappear against darker walls. Many manufacturers offer printed fabric faces, so a panel can double as large-format artwork.
Folding screens with wood frames read as furniture rather than equipment. Tall panels flanking a bookcase frame the shelving and quietly handle reflections. In a bedroom used as an office, a panel behind the desk can also serve as a pinboard if you choose a tackable face. The goal is a room that sounds better without announcing that it has been treated.
Care, Cleaning, and Safety
Vacuum fabric faces every month or two with an upholstery brush on low suction. Spot-clean stains with a barely damp cloth and mild soap, blotting rather than rubbing so moisture does not soak into the core. Keep panels at least a few feet away from space heaters, fireplaces, and wood stoves, and never drape anything over heat registers.
Check that tall panels cannot tip toward a walkway, especially around children. If you add hinges, lights, or integrated power strips to a DIY panel, keep the wiring simple and use listed components. For any hardwired lighting or outlet changes near a panel installation, hire a licensed electrician.
Bottom Line
For most homes, two or three well-placed free standing acoustic panels are enough to transform a harsh, echoey room into one that is comfortable for calls, conversation, and music. Pick panels at least 2 inches thick with published NRC ratings, place them at the first reflection points and behind your desk, and let rugs and soft furniture carry the rest of the load. Because nothing is screwed to the wall, you can keep adjusting until the room sounds right.