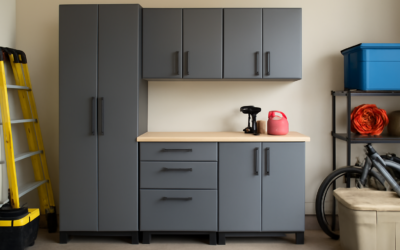
Most two-car garages lose roughly 30 percent of their usable footprint to clutter that never had a home in the first place. A well-planned garage closet storage system fixes that by giving seasonal gear, cleaning supplies, and overflow pantry items a defined, dust-free place to live. Unlike open shelving, an enclosed closet hides the mess behind doors, protects contents from grime, and keeps a garage looking finished. Done right, it pays for itself in reclaimed space and fewer duplicate purchases of things you already own but can’t find.
- Why an Enclosed Closet Beats Open Shelving
- Types of Garage Closet Systems
- Planning the Layout Before You Buy
- Materials That Survive a Garage Environment
- DIY Build vs. Buying Prefab
- Keeping Moisture and Pests Out
- Organizing the Interior for Real Life
- Budgeting Your Garage Closet Storage Project
- Maximizing Vertical and Overhead Space
- Creating Zones Around the Closet
- Common Mistakes to Avoid
Why an Enclosed Closet Beats Open Shelving
Open wire racks are cheap and fast, but they collect a surprising amount of airborne dust, exhaust residue, and pollen. Anything you store there needs regular wiping. An enclosed closet with doors solves that problem outright and adds a layer of security for pricier tools or chemicals you’d rather keep out of a child’s reach.
There’s a design payoff too. A row of matching cabinet doors reads as intentional, while a wall of mismatched totes reads as chaos. If you ever finish the garage into a gym, workshop, or hangout, enclosed storage is what makes the room feel like part of the house rather than a dumping ground. Resale appraisers routinely note built-in garage storage as a value-add.
Types of Garage Closet Systems
Not every “closet” needs to be framed drywall. The term covers several approaches, each with a different price and permanence.
- Prefab storage cabinets: Steel or thermofused laminate units, 24 to 36 inches wide, that stand against a wall. Expect $150 to $600 per cabinet. Fastest path to a clean look.
- Full-height utility lockers: Tall, narrow cabinets ideal for rakes, brooms, and a shop vac. Great for corners.
- Framed walk-in closet: A stud-framed enclosure with a door, drywall or plywood walls, and interior shelving. The most involved build but the most flexible.
- Track-and-panel systems: Rail-mounted cabinets and hooks that keep everything off the floor for easy sweeping.
For most homeowners, a run of prefab cabinets delivers 80 percent of the benefit for a fraction of the labor. Reserve a framed build for when you need a lockable, climate-buffered space for paint, documents, or valuables.
Planning the Layout Before You Buy
Measure the wall length, then subtract clearances. You want at least 30 inches in front of any cabinet run for a person to stand and open doors, and more if a car parks nearby. A common mistake is buying deep 24-inch cabinets for a wall that leaves no room to walk past a parked SUV.
Sketch your zones. Group like with like: a cleaning zone near the door to the house, a lawn-and-garden zone near the overhead door, and a seasonal zone up high where access is rare. Store heavy items between knee and shoulder height, the range where lifting is safest. Reserve the top 18 inches for lightweight, infrequently used bins.
Sizing for Common Items
Standard 12-inch-deep shelving handles paint cans, cleaning bottles, and small tools. Bump to 16 inches for a shop vac or bulky totes. If you plan to hang a broom, rake, and leaf blower inside a utility closet, budget a clear vertical bay of at least 60 inches so long handles don’t jam.
Materials That Survive a Garage Environment
Garages swing through heat, cold, and humidity, and untreated particleboard fails fast in those conditions. It swells at the edges and sags under load. Choose materials rated for the abuse.
- Powder-coated steel: The most durable option. Shrugs off moisture and impacts.
- Thermofused laminate (TFL) over MDF: A good middle ground if the garage is reasonably dry; the sealed surface resists moisture better than raw wood.
- Marine-grade or sanded plywood: Best for DIY framed closets. Seal the edges with primer to block humidity.
Skip bare particleboard “ready-to-assemble” furniture meant for bedrooms. It rarely lasts more than a couple of seasons against a concrete wall.
DIY Build vs. Buying Prefab
A capable weekend DIYer can frame a 4-foot-wide storage closet from two-by-fours and 3/4-inch plywood for roughly $250 to $400 in materials. It takes a day to frame and a second day to shelve and hang a door. The reward is a unit sized exactly to your wall and load needs.
Buying prefab costs more per linear foot but removes the guesswork. Assembly runs one to three hours per cabinet with a drill and a helper. If you value your weekends or lack a chop saw, prefab wins. Whichever route you take, anchor tall units to wall studs with L-brackets. A loaded cabinet that tips is a genuine hazard, especially around kids.
Keeping Moisture and Pests Out
Concrete floors wick moisture, and a closet sitting flat on the slab traps it. Raise cabinets on adjustable feet or a treated 2×4 base to create an air gap. In humid climates, toss a couple of rechargeable desiccant packs inside cabinets that hold tools, and check them monthly during summer.
Weatherstripping the closet door slows dust and discourages insects. Store anything food-adjacent, including pet kibble and birdseed, in sealed metal or heavy-duty plastic containers rather than the original bags. Rodents chew through cardboard and paper overnight.
Organizing the Interior for Real Life
The best system is the one you’ll actually maintain. Clear bins with printed labels beat opaque totes because you can see contents at a glance. Standardize on one or two bin sizes so shelves stay tidy and stackable.
Adjustable shelves are worth the small upcharge. Your storage needs change, and fixed shelves force you to waste space around tall items. Add a pegboard to the inside of a cabinet door to hold small hand tools, and mount a slim strip of hooks for keys, gloves, or a headlamp. Keep a step stool nearby so high shelves stay usable instead of becoming a black hole.
Budgeting Your Garage Closet Storage Project
Costs scale with materials and scope. Here’s a realistic range so you can plan.
- Basic: Two prefab cabinets and a wall of hooks, roughly $350 to $700.
- Mid-range: A full cabinet wall with countertop workspace, $1,200 to $2,500.
- Custom framed closet: Professionally built and finished, $2,500 to $5,000-plus depending on size and finishes.
Phase the work if the budget is tight. Start with the cabinets that solve your worst clutter, then add shelving, a pegboard wall, or a work surface over the following months. A thoughtful garage closet storage setup doesn’t have to happen in one weekend, and building it in stages lets you refine the layout as you learn how you actually use the space.
Maximizing Vertical and Overhead Space
Floor space in a garage is precious, so the smartest storage plans build upward. A closet system doesn’t have to stop at cabinet height. Extend shelving to within a foot of the ceiling and reserve that top tier for the lightest, least-used items: holiday decorations, camping gear, and empty luggage. A sturdy folding step stool or a short library ladder keeps those upper shelves genuinely usable rather than dead zones you forget about.
Consider pairing an enclosed closet with overhead ceiling racks for bulky seasonal bins. Suspended platforms mounted to the ceiling joists can hold several hundred pounds and clear the floor entirely, freeing the closet for the things you reach for weekly. Just verify the joists and hardware are rated for the load, and keep the racks positioned so they don’t interfere with the garage door’s travel or the springs above it.
Corners are another overlooked opportunity. A tall utility locker tucked into a corner captures space a standard cabinet run would leave awkward and empty. Lazy-Susan-style shelving or pull-out wire baskets inside a deep corner cabinet turn a hard-to-reach void into fully accessible storage. Little moves like these can add 20 to 30 percent more capacity to the same footprint without expanding the closet at all.
Creating Zones Around the Closet
A storage closet works best as the anchor of a broader organized system rather than a solitary island. Flank it with complementary storage suited to what won’t fit inside: a magnetic tool strip and pegboard for hand tools, a slat-wall panel for hanging bikes and ladders, and a wall-mounted rack for long-handled yard tools. Grouping these around the closet keeps everything for a given task in one place, so you’re not crossing the garage mid-project.
Label the outside of closet doors or add a small dry-erase note listing what’s inside each section. In a busy household where several people grab and stash gear, a quick visual index keeps the system from unraveling within a month.
Common Mistakes to Avoid
Homeowners routinely overload upper shelves, forget to anchor tall cabinets, and buy cabinets too deep for the walking path. Another frequent misstep is storing gasoline, propane, or oily rags in an enclosed cabinet near an ignition source; keep flammables in a code-compliant, ventilated container away from the water heater or furnace. Finally, resist the urge to fill every inch on day one. Leave 15 to 20 percent empty so the system can absorb the next season’s gear without spilling back onto the floor.
Nail these fundamentals and your garage closet will stay organized for years, turning a cluttered catch-all into one of the most functional rooms in the house.