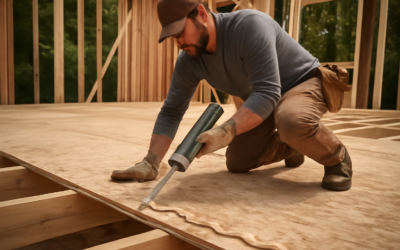
Garage gym flooring is one of the most important investments you will make when setting up a home gym. The right flooring protects your concrete slab from dropped weights, reduces noise, provides traction for lifting, and cushions your joints during cardio and bodyweight exercises. Skipping this step or choosing the wrong product can lead to cracked concrete, damaged equipment, and injury.
This guide breaks down every garage gym flooring option, from budget-friendly horse stall mats to premium interlocking tiles, so you can choose the best solution for your training style and budget.
Why You Need Dedicated Garage Gym Flooring
Protect Your Concrete Slab
Bare concrete is surprisingly vulnerable to damage from dropped barbells, dumbbells, and kettlebells. Even a moderate drop from waist height can chip, crack, or crater a concrete garage floor. These repairs are expensive and compromise the structural integrity of the slab. Quality gym flooring absorbs impact and distributes force across a wider area.
Reduce Noise and Vibration
Dropping weights on bare concrete creates significant noise and vibration that travels through the slab into your home and neighboring properties. Thick rubber gym flooring dramatically reduces both impact noise and vibration transfer, making your training sessions more neighbor-friendly.
Protect Your Equipment
Barbells, plates, and dumbbells last longer when dropped on resilient surfaces rather than hard concrete. Rubber gym flooring absorbs the shock that would otherwise be transferred back into your equipment, reducing wear on bar knurling, plate edges, and dumbbell handles.
Improve Safety and Comfort
Concrete is unforgiving on joints, especially during exercises that involve jumping, lunging, or extended standing. Gym flooring provides cushioning that reduces fatigue and joint stress. The textured surface of most gym flooring products also provides better traction than smooth concrete, reducing the risk of slipping during sweaty workouts.
If you’re running out of room even with a clean garage floor, a backyard shed takes the overflow — seasonal gear, tools, lawn equipment. And if you’re parking outside while the garage doubles as a workshop, a carport keeps your car covered without needing a second garage.
We may earn a commission when you purchase through our links.
Best Garage Gym Flooring Options
Rubber Stall Mats
Horse stall mats from farm supply stores are the most popular budget garage gym flooring option, and for good reason. These 4×6-foot mats are 3/4 inch thick, made from dense vulcanized rubber, and cost approximately $40 to $60 each. They are virtually indestructible and can handle the heaviest deadlifts and Olympic lifts without flinching.
The main drawbacks of stall mats are their weight (approximately 100 pounds each), strong rubber odor when new, and slightly uneven seams between mats. The odor dissipates within a few weeks, especially in a ventilated garage. For pure value, stall mats are hard to beat at roughly $1.50 to $2 per square foot.
Interlocking Rubber Tiles
Interlocking rubber gym tiles offer a cleaner, more finished appearance than stall mats. They puzzle-piece together to create a seamless-looking surface and are available in various thicknesses from 3/8 inch to 1 inch. Many options come in colors beyond basic black, allowing you to customize your gym’s look.
Quality interlocking tiles cost $3 to $8 per square foot. They are lighter and easier to handle than stall mats, and the interlocking edges minimize gaps between tiles. However, they are generally not as dense as stall mats and may compress under heavy loads over time.
Rubber Rolls
Rubber roll flooring provides the most uniform, seamless gym floor surface. Rolls are available in widths of 4 to 6 feet and lengths up to 50 feet, allowing you to cover large areas with minimal seams. Thicknesses range from 1/4 inch for light cardio areas to 1/2 inch for general gym use.
Rubber rolls cost $2 to $5 per square foot and are the preferred choice for commercial gyms. For a garage gym, they provide a professional appearance and easy cleaning. Installation requires careful measuring and cutting, and the rolls should be adhered to the concrete for best results.
Foam Tiles
EVA foam interlocking tiles are an affordable option for bodyweight exercises, yoga, stretching, and light cardio. They provide excellent cushioning and are very lightweight, making them easy to install and remove. However, foam tiles are not suitable for weightlifting as they compress permanently under heavy loads and do not provide enough stability for barbell training.
Foam tiles cost $1 to $3 per square foot and work best as supplementary flooring in stretching or cardio zones within a larger gym space.
Epoxy Coatings
Epoxy flooring creates a durable, easy-to-clean surface on concrete, but it does not provide shock absorption or impact protection. Epoxy is best used as a base coat beneath rubber mats or in areas of the garage that are not used for heavy training. It protects the concrete from moisture, oil, and stains while creating a professional appearance.
Choosing the Right Thickness
3/8 Inch (8mm)
Suitable for cardio equipment areas, light dumbbell work, and general fitness. Provides basic protection against dropped light weights and reduces noise from equipment like treadmills and exercise bikes.
1/2 Inch (12mm)
Good all-around thickness for mixed-use gym areas. Provides moderate shock absorption and adequate protection for dumbbell training and machine exercises. Not recommended for heavy Olympic lifting or deadlifts.
3/4 Inch (19mm)
The sweet spot for most garage gyms. This thickness handles heavy barbell training, protects concrete from dropped weights, and provides excellent shock absorption. Horse stall mats at this thickness are the standard for home gym flooring.
1 Inch or Thicker
Recommended for dedicated Olympic lifting platforms and areas where heavy weights are regularly dropped from overhead. Some gyms build lifting platforms by sandwiching plywood between layers of 3/4-inch rubber for maximum protection.
Garage Gym Flooring Layout Strategies
Full Coverage
Covering the entire garage floor is the cleanest approach and protects the concrete everywhere. For a standard two-car garage of approximately 400 square feet, full coverage with stall mats costs $600 to $800 and provides uniform protection and appearance.
Zone Coverage
If budget is a concern, focus your flooring investment on the areas that need it most. Place the thickest, densest flooring under your squat rack, bench press, and deadlift area. Use thinner rubber or foam in cardio and stretching zones. Leave parking areas uncovered if you still use the garage for vehicles.
Lifting Platform
A dedicated lifting platform provides premium protection in the area where you perform your heaviest lifts. A typical platform is 8 feet wide by 8 feet deep and consists of two to three layers of plywood topped with rubber on the sides and bare wood in the center for stable footing during lifts.
Installation Tips
Preparing the Concrete
Clean the garage floor thoroughly before installing gym flooring. Sweep up all debris, degrease any oil stains, and fill significant cracks with concrete patching compound. The floor does not need to be perfectly level, but large bumps or depressions should be addressed.
Managing Moisture
Garage floors can develop moisture issues from groundwater seeping through the concrete. Before installing rubber flooring, test for moisture by taping a plastic sheet to the concrete and checking for condensation after 24 hours. If moisture is present, consider applying a concrete sealer or using a moisture barrier beneath your gym flooring.
Dealing with Rubber Odor
New rubber flooring has a noticeable odor that can be strong in an enclosed garage. Air out stall mats and rubber tiles outdoors in the sun for several days before installation. After installation, keep the garage well-ventilated with open doors or fans for the first few weeks.
Preventing Movement
Loose-laid rubber mats and tiles can shift during intense workouts. While the weight of thick rubber keeps it mostly in place, you can prevent movement by butting mats tightly against walls and each other. Double-sided carpet tape along seams provides additional stability without permanent adhesion.
Maintenance and Cleaning
Garage gym flooring is low-maintenance compared to most flooring types. Sweep or vacuum regularly to remove dust and chalk. Mop with warm water and a mild detergent weekly. Disinfect periodically with a diluted bleach solution or gym-specific cleaner. Avoid harsh solvents that can break down rubber.
Inspect your flooring periodically for excessive wear, compression, or lifting at seams. Rotate mats in high-wear areas to even out use, and replace sections that show significant deterioration.
Cost Breakdown for a Standard Garage Gym
For a typical two-car garage gym space of 400 square feet, here are approximate flooring costs. Horse stall mats run $600 to $800 for full coverage. Interlocking rubber tiles cost $1,200 to $3,200. Rubber rolls cost $800 to $2,000. A combination approach using stall mats for the lifting area and thinner rubber elsewhere typically costs $700 to $1,200.
These costs represent one of the best value investments in your garage gym. Quality flooring protects thousands of dollars worth of equipment and concrete, while making every workout more comfortable and safer.
Final Thoughts
Garage gym flooring is a foundational investment that you will use during every single workout. For most home gym owners, 3/4-inch horse stall mats provide the best combination of performance, durability, and value. If aesthetics matter more, interlocking rubber tiles offer a polished look with similar performance.
Match your flooring thickness to your training intensity, prioritize the area under your heaviest lifts, and do not overlook moisture management in your garage. With the right gym flooring in place, you can train with confidence knowing your concrete, your equipment, and your joints are all protected.
Prefer to explore on your own?
See how new flooring looks in your actual room in seconds — free, no signup.
Try the free Floor Studio →