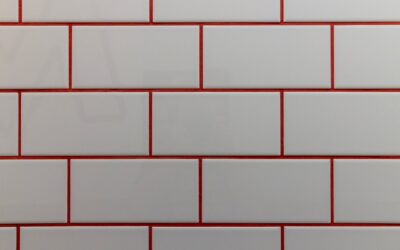
The tiles are set, the thinset has cured, and now the job that actually decides how your wall looks is in front of you. Grouting wall tile is where a careful installation either comes together or falls apart, because grout defines every joint line the eye follows across the surface. Get the mix, the timing, and the cleanup right and the wall reads as one clean field; rush any of the three and you get haze, pinholes, and cracked joints within a season.
Part of our Tile & Grout guide — explore the full guide →
This guide covers grout selection, mixing, application technique, haze removal, and sealing, with the specific numbers and timings professionals rely on. The process is not difficult, but it is unforgiving of impatience.
- Choosing the Right Grout for Wall Tile
- Tools and Materials You Need
- Mixing Grout to the Right Consistency
- Grouting Wall Tile: The Application Technique
- Cleaning and Haze Removal
- Corners, Edges, and Movement Joints
- Sealing and Curing
- Fixing Common Grouting Problems
- Final Thoughts on Grouting Wall Tile
Choosing the Right Grout for Wall Tile
Grout is not a single product. Picking the wrong type is the most common reason a first grouting job disappoints.
Sanded vs. Unsanded
Joint width drives this choice. Use unsanded grout for joints 1/16 to 1/8 inch, which covers most wall tile including standard 3×6 subway. The sand in sanded grout will not compact into a narrow joint and can scratch glossy or polished glazes. Use sanded grout for joints 1/8 inch and wider, where it resists shrinkage and cracking.
Cement vs. Epoxy
- Cement-based grout (MAPEI Keracolor, Custom Building Products Polyblend) is the affordable standard at $15 to $25 per bag. It is porous and must be sealed.
- Epoxy grout (Laticrete SpectraLOCK, MAPEI Kerapoxy) costs $60 to $100 per unit but is stain-proof, waterproof, and never needs sealing. It sets faster and is stickier to work, so it demands quicker cleanup.
- Single-component pre-mixed grout (like Fusion Pro) skips mixing entirely and resists stains, a good middle ground for backsplashes.
For a shower, epoxy or a high-performance cement grout pays for itself in reduced maintenance. For a dry kitchen backsplash, a sealed cement grout is perfectly adequate.
Tools and Materials You Need
- Grout (calculate coverage from the bag chart using your tile size and joint width)
- Rubber grout float
- Two clean buckets and a large tile sponge
- Margin trowel or drill with a mixing paddle for cement grout
- Microfiber cloths for haze removal
- Grout sealer (for cement grout) and a small applicator bottle
- Utility knife or grout saw to clear any thinset from joints
- Nitrile gloves and eye protection
Before you start, run a knife along the joints and dig out any thinset that squeezed up during setting. Grout needs a joint at least two-thirds of the tile’s depth to hold properly. High thinset ridges telegraph through as weak, thin grout that crumbles.
Mixing Grout to the Right Consistency
Cement grout should reach the texture of smooth peanut butter or thick toothpaste — firm enough to hold a peak, wet enough to spread. Add powder to water gradually, not the reverse, and mix to full color saturation. Then let it slake (rest) for 5 to 10 minutes so the polymers activate, and remix briefly before use.
Resist adding extra water to loosen a stiff batch. Overly wet grout shrinks as it dries, leaving concave, weak joints and washed-out color. Mix only what you can install in about 30 minutes, since cement grout begins to firm in the bucket. Epoxy has an even shorter working window, often 45 minutes to an hour, so mix smaller batches.
Grouting Wall Tile: The Application Technique
Work top to bottom on a wall so falling crumbs land on ungrouted tile you will clean anyway. Divide the wall into sections of roughly 10 to 15 square feet so no area cures before you can clean it.
Loading and Spreading
Scoop grout onto the float and spread it diagonally across the joints, holding the float at a 45-degree angle. Working diagonally keeps the rubber edge from dipping into and scooping out the joints. Make several passes from different directions to pack every joint completely full, with no voids or air pockets.
Striking Off the Excess
Once a section is packed, turn the float to a steeper 60- to 90-degree angle and sweep diagonally to scrape off the surface excess. Again go diagonally so the edge glides over the joints rather than digging in. The tile faces should be nearly clean, leaving grout only in the joints.
Cleaning and Haze Removal
Timing here is everything. Wait until the grout firms to a thumbprint-hard state — usually 15 to 30 minutes depending on humidity and grout type. Too soon and your sponge pulls grout out of the joints; too late and the haze cements onto the tile.
- Dampen a sponge in clean water and wring it nearly dry. A dripping sponge floods the joints and dilutes the color.
- Wipe in gentle circles, then a final straight diagonal pass, rinsing the sponge after every pass or two.
- Use the shaping edge of the sponge to tool each joint to a uniform, slightly concave profile.
- Change the rinse water frequently — dirty water just spreads haze around.
A light haze film will reappear as the surface dries. Once the grout has cured for 24 hours, buff it off with a dry microfiber cloth. For stubborn epoxy haze, use the manufacturer’s haze remover within the recommended window, because cured epoxy haze is extremely difficult to remove.
Corners, Edges, and Movement Joints
Do not grout inside corners, the joint where tile meets a countertop or tub, or where two different planes meet. These are movement joints, and rigid grout will crack there as the building flexes and materials expand. Instead, fill them with a color-matched silicone or siliconized caulk. Many grout brands sell matching caulk so the transition is invisible. Let grout cure before caulking, and tool the caulk line with a wet finger for a clean bead.
Sealing and Curing
Cement grout needs to cure fully before sealing — 48 to 72 hours is standard, longer in cool or humid conditions. Apply a penetrating sealer with an applicator bottle or brush directly onto the joints, wipe any that lands on the tile immediately, and apply a second coat after the first absorbs. Reseal cement grout every one to two years in wet areas.
Epoxy and most pre-mixed urethane grouts skip sealing entirely, which is a large part of their appeal in showers and heavily used backsplashes. Keep the newly grouted area dry for the full cure period; running a shower on 24-hour-old cement grout washes out uncured color and weakens the joints.
Fixing Common Grouting Problems
Even careful jobs hit snags, and most are fixable if you catch them early. Knowing the cause saves you from tearing out tile you could rescue.
- Patchy or blotchy color: Usually caused by inconsistent water in the mix or cleaning too wet, which pulls pigment unevenly. Prevent it by mixing to one consistency and wringing your sponge nearly dry. Minor cases even out after a grout sealer or a color-matched grout refresh.
- Pinholes and voids: The result of underpacking. Regrout the affected joints while the surrounding grout is fresh, or dig out and refill once cured.
- Cracked joints: Almost always at corners or plane changes that should have been caulked, or from adding too much water. Rake out the crack and refill with caulk at movement joints.
- Efflorescence: A white crystalline haze from mineral salts migrating through cement grout, common in showers. Wipe with a specialty efflorescence cleaner rather than more water, which feeds it.
If grout has fully cured wrong — the color is off or the joints are failing — you can remove it with an oscillating multi-tool fitted with a grout blade and start that section over. It is tedious but far cheaper than replacing tile.
Final Thoughts on Grouting Wall Tile
Grouting wall tile comes down to three disciplines: matching the grout to your joint width and location, mixing to a firm peanut-butter consistency and letting it slake, and cleaning at the exact moment the surface firms. Honor the cure times, caulk the movement joints instead of grouting them, and seal cement grout once it has set. Do that and your joints will stay crisp, uniform, and crack-free for years, framing your tile exactly the way it was meant to look.
Prefer to explore on your own?
See how new flooring looks in your actual room in seconds — free, no signup.
Try the free Floor Studio →