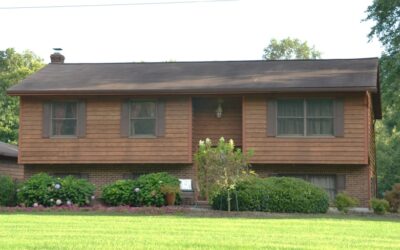
When homeowners start planning a fiber cement siding project, one of the first practical questions is dimensions, and getting the hardie plank siding sizes right up front saves money, cutting time, and a lot of confusion at the lumberyard. James Hardie’s HardiePlank lap siding comes in a defined set of widths, lengths, and thicknesses, and each width delivers a specific exposure once it is installed with the required overlap. Knowing those numbers lets you estimate coverage accurately and choose a board that suits your home’s scale.
I have hung a lot of fiber cement over the years, and the biggest mistake I see is people assuming HardiePlank works exactly like wood clapboard. It is heavier, the standard plank length is longer than most wood siding, and the exposure is fixed by the width you select. Once you understand how the sizing system works, ordering becomes straightforward and your walls line up cleanly the first time.
Standard HardiePlank Widths
HardiePlank lap siding is sold in several nominal widths, and each width defines how much of the board shows once it is lapped over the course below. Common widths run from roughly 5.25 inches up to 12 inches. Typical offerings include 5.25 inch, 6.25 inch, 7.25 inch, 8.25 inch, 9.25 inch, and 12 inch boards, though availability varies by region and product line.
The width you choose is largely an aesthetic decision. Narrower boards around 5.25 and 6.25 inches suit cottages, bungalows, and traditional homes where a tighter reveal looks appropriate. Wider 8.25 and 12 inch planks give a bolder, more contemporary or farmhouse look and cover walls faster because each course spans more height. Matching the reveal to the architecture is one of the details that makes a finished job look designed rather than accidental.
Exposure: What Actually Shows
Exposure is the visible face of each plank after installation, and it is always less than the full board width because siding must overlap. James Hardie specifies a minimum overlap of 1.25 inches for HardiePlank, which means the exposure equals the board width minus that overlap. A 6.25 inch board yields about 5 inches of exposure, a 7.25 inch board gives roughly 6 inches, an 8.25 inch board shows about 7 inches, and a 12 inch board delivers a broad 10.75 inch reveal.
These exposure figures matter for two reasons. First, they drive your material takeoff, because the exposure, not the full width, determines how many courses you need to reach a given wall height. Second, they keep the installation code-compliant. Cutting the overlap below the specified minimum voids weather performance and warranty coverage, so plan your course layout around the published exposure rather than trying to stretch coverage.
Plank Length and Coverage
Standard HardiePlank boards are 12 feet long. That length is one of the practical advantages of fiber cement over shorter wood siding, since fewer end joints mean fewer seams to caulk and flash and a cleaner-looking wall. A 12 foot plank also lets you stagger butt joints generously so no two adjacent courses line up in the same spot.
To estimate coverage, multiply the exposure by the 12 foot length. A single 7.25 inch board at 6 inches of exposure covers about 6 square feet of wall. Divide your total wall area, minus openings, by that figure to get a rough board count, then add roughly 10 percent for cuts, waste, and future repairs. Because the boards are long and heavy, most crews hang HardiePlank with two people, which is worth remembering when you plan labor.
Thickness and Weight
HardiePlank lap siding is 5/16 inch thick. That thickness is consistent across the width range and gives the board its characteristic rigidity and impact resistance. Fiber cement is dense, so a 12 foot plank is noticeably heavier than a comparable piece of wood or vinyl siding, which affects how you handle, stage, and fasten it.
The 5/16 inch profile is thick enough to hold a crisp shadow line at each lap and to accept blind nailing through the top of the board, where the nail is hidden by the course above. It also resists the denting and cracking that plague thinner claddings. When you order, confirm you are getting genuine 5/16 inch HardiePlank rather than a lighter competitor board, because the thickness is part of what earns fiber cement its long service life.
Primed Versus ColorPlus Finishes
HardiePlank ships two main ways, and the choice affects ordering more than sizing. Primed boards arrive with a factory primer and are meant to be field-painted after installation, giving you unlimited color freedom but adding a paint step. ColorPlus Technology boards come with a baked-on factory finish in a curated palette, which resists fading and skips the on-site painting.
The dimensions are identical between the two, so widths, lengths, exposures, and thickness do not change based on finish. What changes is handling: ColorPlus boards require care to protect the factory coating during cutting and nailing, and you order color-matched touch-up and trim to match. Deciding between primed and ColorPlus early helps you order the right accessories alongside your planks.
Trim, Corners, and Accessories
Sizing a HardiePlank job is not only about the field boards. You also need to account for HardieTrim boards at corners, windows, doors, and bands, plus starter strips, flashing, and color-matched sealant and fasteners. Trim comes in its own set of widths and thicknesses, and coordinating those with your plank exposure keeps reveals and corner details consistent around the house.
Plan your outside and inside corner treatment before you order, since it influences how many trim pieces you need and how your first and last courses land. Getting the accessory list right at the same time as the plank order prevents the classic problem of running short on a corner board halfway through a wall and stalling the job.
Choosing the Right Size for Your Home
With the numbers in hand, matching hardie plank siding sizes to your project comes down to proportion and budget. For a modest single-story home, a 5.25 to 7.25 inch board keeps the reveal in scale with the architecture. For larger two-story facades, farmhouse designs, or homes where you want a strong horizontal statement, an 8.25 or 12 inch plank reads better and covers more wall per course.
Order a sample or two, hang them on the wall, and step back to the curb before committing, because exposure looks different at full scale than on a spec sheet. Confirm regional availability of your chosen width, since not every size stocks everywhere, and always build in that 10 percent waste factor. Nail down widths, exposures, the 12 foot length, and the 5/16 inch thickness up front, and your HardiePlank project will go together predictably from the first course to the last.
How Sizing Affects Your Estimate
Understanding the sizes is what makes an accurate material estimate possible, and the exposure figure does most of the work. To find how many courses a wall needs, divide the wall height by the exposure of your chosen board; a 10 foot wall covered in 7 inch exposure boards needs roughly 18 courses. Multiply that by the wall’s length, account for the 12 foot board length, and you arrive at a board count that reflects real coverage rather than a rough guess.
The width you pick therefore has a budget effect beyond looks. Wider planks cover more wall per course, so you handle fewer boards and create fewer horizontal seams, but each board costs more and the material total is often similar. Narrower boards mean more courses and more labor time. Running the numbers on two or three candidate widths before you order lets you weigh the appearance you want against the amount of material and labor each choice implies.
Blind Nailing and Course Layout
The sizes also connect directly to how the siding fastens. HardiePlank is designed for blind nailing, where each nail goes through the top edge of the board and is then hidden by the bottom edge of the course above. The required overlap that defines your exposure is exactly the zone where that nailing happens, which is another reason honoring the minimum 1.25 inch overlap matters, it keeps fasteners in the right spot and fully concealed.
Good course layout starts at the bottom with a starter strip and works up, checking level every few courses so small errors do not accumulate into a visibly crooked reveal near the top. Because the exposure is fixed, any drift shows up as uneven gaps at windows and corners. Snapping layout lines for your course spacing, based on the chosen board’s exposure, and dry-fitting around openings keeps the reveals consistent and the finished wall looking straight and professional.