
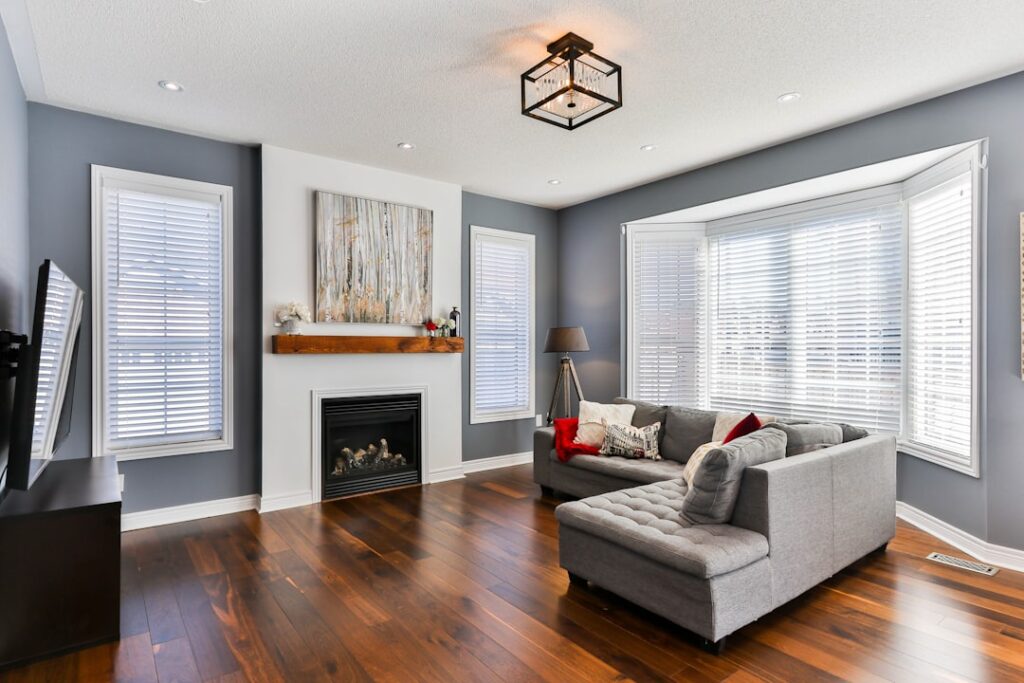
Whether you are designing a room, staging a photo, or just trying to picture how a floor will set the tone of a space, the hardwood floor background you choose shapes everything above it. The grain pattern, color, and texture of a wood floor act like a backdrop that makes furniture, walls, and decor pop or fall flat. The same idea applies in photography and video, where a hardwood surface is one of the most popular backgrounds for product shots, flat-lays, and even virtual meeting backdrops. This guide covers how to choose a hardwood floor look as a background, both for real rooms and for the screen.
- Why the Floor Functions as a Background
- Grain Patterns and What They Convey
- Species and Stain Looks
- Texture and Finish as Background Detail
- Hardwood Floors in Photography and Video
- Virtual and Digital Backgrounds
- Plank Width and Direction as Background Cues
- Keeping a Floor Background Camera-Ready
- Choosing the Right Hardwood Background for You
Why the Floor Functions as a Background
A floor is the single largest continuous surface in most rooms, so it sets the visual foundation, the literal and figurative background, for everything else. A pale, uniform oak floor reads light and airy and lets bold furniture stand out. A dark walnut floor feels rich and dramatic and demands lighter decor to balance it. A rustic, knotty floor adds warmth and character but competes with busy patterns. Thinking of your floor as a background helps you choose a look that supports your overall design rather than fighting it.
Grain Patterns and What They Convey
The grain is the texture of the background, and different cuts and species produce very different effects:
- Plain-sawn (flat grain): The most common and economical, with bold, wavy cathedral patterns that read lively and traditional.
- Quarter-sawn: Straight, tight, parallel grain with subtle ray flecks, giving a refined, uniform, craftsman look.
- Rift-sawn: Very straight, even grain with no flecking, the calmest and most modern background.
- Character grade: Knots, mineral streaks, and color variation for a rustic, busy backdrop full of personality.
For a quiet background that lets other elements shine, lean toward rift or quarter-sawn. For a floor that is itself a feature, character grade delivers drama.
Species and Stain Looks
Color is the most powerful background variable. Species and stain combine to set the mood:
- Light tones (white oak, maple, ash, blond stains): Make spaces feel larger and brighter; a versatile, contemporary backdrop.
- Medium tones (red oak, hickory, natural walnut, honey stains): Warm and forgiving, hiding dust and minor wear while complementing most decor.
- Dark tones (espresso, ebony, dark walnut): Elegant and dramatic, but they show dust and footprints and can shrink a small room visually.
- Gray and weathered looks: Modern and neutral, pairing well with cool palettes and minimalist styling.
Stain also interacts with the wood’s natural grain; the same stain looks different on oak versus maple because of how each species absorbs color.
Texture and Finish as Background Detail
Beyond color and grain, the surface treatment changes how a floor reads as a background:
- Smooth, glossy finishes: Reflect light and feel formal and clean, but show scratches more readily.
- Matte and satin finishes: Soft, natural, low-glare, and increasingly popular; they hide wear and photograph beautifully without harsh reflections.
- Wire-brushed and hand-scraped textures: Add tactile depth and a rustic, lived-in background that disguises everyday scuffs.
For photography especially, matte and lightly textured surfaces are usually the most flattering because they avoid hot spots and glare under lights.
Hardwood Floors in Photography and Video
Hardwood is a go-to background well beyond interior design. Product photographers, food bloggers, and content creators love wood surfaces because they add warmth and a natural, premium feel without distracting from the subject. A few practical tips when using a hardwood floor as a shooting background:
- Choose a medium or light tone for flat-lays so the subject stands out; very dark floors can swallow detail.
- Favor matte finishes to control glare from studio or window light.
- Shoot with the grain running in a consistent direction for a clean, intentional look.
- Portable wood-look backdrop boards or vinyl photography backgrounds mimic real hardwood when you cannot shoot on the floor itself.
Virtual and Digital Backgrounds
Hardwood looks also show up as digital backgrounds, in video-call backdrops, design mockups, and 3D renderings. When selecting a hardwood image as a virtual background, pick one whose color temperature and grain scale look realistic at the size it will be displayed, and avoid overly repetitive tiling that gives away the digital trick. For interior design mockups and room planners, using an accurate hardwood floor texture lets you preview how a real floor would set the background of a space before you buy.
Plank Width and Direction as Background Cues
Beyond color and grain, the physical layout of the boards shapes how a hardwood background reads. Plank width sends a clear stylistic signal: narrow strips feel traditional and classic, while wide planks read modern, casual, and expansive. Wide boards also show off the natural grain and character of each piece, making the floor a stronger background element, whereas narrow strips create a busier, more uniform field.
Direction matters too. Running planks along the longest dimension of a room makes the space feel longer and larger, an effect photographers and designers both exploit. Laying boards toward the main light source or the primary sightline draws the eye in a deliberate direction. For a feature background, patterned layouts like herringbone or chevron turn the floor itself into a focal point, while a simple straight lay keeps the floor quietly supportive. Choosing width and direction intentionally lets you fine-tune how prominent the floor is in the overall composition.
Keeping a Floor Background Camera-Ready
If you regularly use your hardwood floor as a photography or video background, a little upkeep keeps it looking its best on camera. Dust and lint show up dramatically under lighting, so a quick clean before each shoot pays off. Position lights to rake gently across rather than glaring straight down, which minimizes hot spots even on satin finishes. For consistent results, note the time of day and lighting setup that flatters your particular floor tone, since the same surface can look warm and inviting or flat and dull depending on the light. When the real floor is impractical, high-quality wood-look backdrop boards give you a portable, controllable stand-in that mimics the grain and color you want.
Choosing the Right Hardwood Background for You
Start by deciding what role you want the floor to play. If it should recede and let your furniture, art, or photographed subjects take center stage, choose a calm grain, a light-to-medium tone, and a matte finish. If you want the floor itself to be a statement, reach for character-grade grain, a dramatic dark or weathered tone, or rich texture. Always view large samples in the actual light of the room or studio, since wood tones shift dramatically between daylight and artificial light. Thought of as a background, your hardwood floor becomes a deliberate design tool, the foundation that makes everything you place on top of it look its best.
Prefer to explore on your own?
See how new flooring looks in your actual room in seconds — free, no signup.
Try the free Floor Studio →

