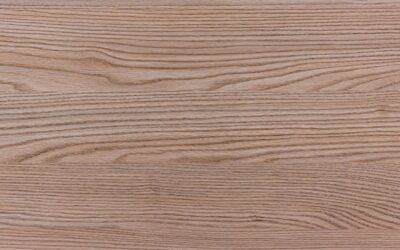
Homeowners keep asking for the warmth of hardwood in bathrooms, laundry rooms, and basements where real wood would swell and cup within a season. Wood style tile answers that request by printing convincing grain onto dense porcelain planks that shrug off water, scratches, and pets. From a few feet away it reads as oak or reclaimed barnwood; underfoot it behaves like the toughest tile you can buy. This guide covers how it is made, how it performs against real wood, and how to pick and lay it so the illusion holds.
Part of our Tile & Grout guide — explore the full guide →
What Wood Style Tile Actually Is
These planks are porcelain tile that use high-definition inkjet printing to reproduce wood grain, knots, and color variation. Because the pattern runs through a glaze fired at over 2,000°F, the look does not wear off the way a laminate photo layer can. You get the density and water resistance of porcelain with the visual character of a plank floor.
Quality separates the convincing products from the obvious fakes. Better lines use a dozen or more unique face patterns so you rarely see two identical planks, plus subtle surface texture that follows the printed grain. Cheaper tiles repeat the same three or four faces across a room, and the eye catches the repeat fast.
Before you commit to a line, ask the showroom how many unique faces the tile has and run your palm across a sample. The best products register texture directly over the printed knots and grain, so your fingers feel the wood the eye sees. That surface texture also adds slip resistance, which is why wood-look porcelain earns high DCOF ratings that make it safe in a wet entry or bathroom.
Wood Style Tile Versus Real Hardwood
Both have a place, but they solve different problems. Hardwood can be sanded and refinished, feels slightly warmer, and appeals to some buyers on resale. Porcelain plank wins almost everywhere moisture and abuse are concerns.
- Water resistance: Porcelain is waterproof and safe in bathrooms, kitchens, and basements; solid hardwood is not.
- Scratch and dent resistance: Fired porcelain resists dog nails and dropped pans that would gouge oak.
- Maintenance: No refinishing, waxing, or resealing; just sweep and damp-mop.
- Comfort and sound: Wood is warmer and quieter underfoot; tile is hard and cold unless you add radiant heat.
- Refinishing: Hardwood can be renewed for decades; tile cannot be sanded, but it rarely needs to be.
If you want one floor that runs continuously from a mudroom through a kitchen and into a bath without transition strips, wood style tile lets you do it because moisture is never a worry.
Plank Sizes and Grain Styles
Wood-look planks come in sizes that echo real lumber. Common widths are 6 and 8 inches, with lengths from 24 up to 48 inches; some premium lines reach 9 by 60 inches for a true plank proportion. Narrower, longer planks read most like a hardwood strip floor, while wider planks suit a modern, European look.
Grain styles range from clean, uniform species like maple and hickory to heavily distressed reclaimed and weathered gray looks with saw marks and nail holes printed in. Pick a texture that matches the mood of the room. Matte, low-sheen finishes hide dust and footprints far better than glossy faces, which is why most designers steer homeowners toward them.
Grout Matching and Joint Width
Nothing gives away a wood-look tile floor faster than wide, contrasting grout lines, because real planks butt tight. The fix is a narrow joint and a closely matched grout color.
- Joint width: Keep it to 1/8 inch or the minimum the tile allows; rectified edges let you go tighter for a near-seamless look.
- Grout color: Match it to the mid-tone of the plank, not the lightest or darkest streak, so the lines disappear.
- Grout type: A stain-resistant urethane or epoxy grout keeps thin joints looking clean in traffic.
Manufacturers set a minimum grout width because plank tiles have a slight bow, called warpage, along their length. Trying to butt them tight with no joint forces lippage at the ends. Respect the recommended minimum and your floor stays flat and flush.
Sanded grout is the usual choice at 1/8 inch, but a color-matched urethane grout resists staining and stays flexible, which helps in kitchens where spills are constant. Whatever you pick, grout a small test area first and let it dry fully; grout almost always dries a shade or two lighter than it looks wet, and matching to the wet color leaves you with lines that read too dark once cured.
Layout Patterns That Sell the Look
Layout is where installs go right or wrong. Long planks tempt people into a 50 percent brick offset like a subway wall, but that maximizes lippage because the highest point of one plank’s bow meets the end of its neighbor. Follow these guidelines instead.
Use a random or one-third (33 percent) offset rather than a straight 50 percent stagger. This scatters the seams the way a real wood floor looks and keeps plank crowns from lining up with adjacent ends. For a formal room, a herringbone or chevron layout in shorter planks makes a striking pattern, though it adds cutting time and 15 to 20 percent more waste. Always dry-lay a few rows first, mixing planks from several boxes to blend the printed faces and avoid clusters of the same pattern.
Installation and Subfloor Notes
Wood style tile installs like any porcelain floor, with a couple of plank-specific cautions. Flatten the subfloor to within 1/8 inch over 10 feet; long tiles punish any dip. Use a large-and-heavy-tile mortar, back-butter each plank, and set with a leveling clip system to control lippage across those long edges.
Over a wood subfloor or a slab prone to cracking, add an uncoupling membrane before you set tile so seasonal movement does not telegraph into the joints. If you want to beat tile’s one real drawback, its coldness, lay electric radiant mats in the mortar bed; a bathroom floor at a steady 78°F to 82°F feels like a luxury upgrade for a modest wiring cost.
Plan your movement joints, too. Any tiled area over 20 to 25 feet in one direction, or a floor that runs over radiant heat, needs a flexible caulk joint rather than grout every 8 to 12 feet and at every wall perimeter. Long plank tile is especially sensitive to expansion because a single run can cover a lot of distance, so a soft joint at each doorway keeps the field from tenting when the slab warms up.
Cost and Value
Wood style tile sits in the mid-range of flooring budgets and rewards it with a long service life. Typical US pricing looks like this:
- Wood-look porcelain planks: $2.50 to $7 per sq ft for the tile.
- Installation labor: $6 to $12 per sq ft, more for herringbone or chevron.
- Uncoupling membrane: add $1.50 to $3 per sq ft.
- Electric radiant heat: add $8 to $15 per sq ft including the mat.
Figure $10 to $20 per square foot installed for a straightforward run. Since the floor is waterproof and effectively refinish-free, the cost per year of service often undercuts hardwood. Choose a plank with plenty of unique faces, keep the grout tight and matched, stagger the seams naturally, and your wood style tile will fool guests while quietly outlasting the real thing.
Prefer to explore on your own?
See how new flooring looks in your actual room in seconds — free, no signup.
Try the free Floor Studio →