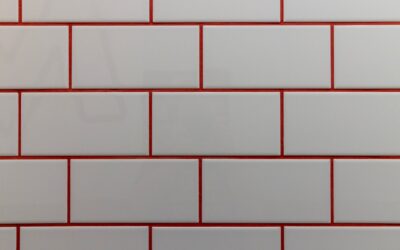
The same box of subway tile can read as builder-basic or custom-designer depending entirely on how you lay it. A herringbone backsplash subway tile takes the most affordable, widely available tile in the store and arranges it into a dynamic zigzag that draws the eye up the wall and adds instant sophistication to a kitchen. The pattern costs nothing extra in materials; it only asks for a little more layout precision. If you want a backsplash that looks tailored without a designer price tag, herringbone is one of the best moves you can make. Here are the ideas, grout choices, and installation steps to pull it off.
Part of our Kitchen Remodeling guide — explore the full guide →
- Why Herringbone Works So Well
- Horizontal vs. Vertical Herringbone Orientation
- Color and Grout Combinations That Pop
- What a Herringbone Subway Backsplash Costs
- Tools and Materials You'll Need
- Step-by-Step Installation
- Design Ideas to Elevate the Look
- Common Mistakes to Avoid
- Pro Tips for a Flawless Result
Why Herringbone Works So Well
Herringbone arranges rectangular tiles at opposing 45- or 90-degree angles so each piece points into the next, creating a broken zigzag of interlocking Vs. The classic 3-by-6-inch subway tile is ideal for it because its 2:1 length-to-width ratio fits the pattern cleanly and the seams line up in a satisfying rhythm.
The result adds movement and depth to a flat wall. Where a standard horizontal running-bond backsplash reads calm and expected, herringbone reads intentional and crafted. It also draws the eye diagonally, which can make a small kitchen feel taller and more open. That visual payoff from ordinary tile is exactly why designers keep specifying it.
Horizontal vs. Vertical Herringbone Orientation
You have two main directions to choose from, and each changes the feel of the room:
- Traditional 45-degree herringbone: tiles run diagonally, giving the most classic, energetic zigzag. Best for a focal wall or behind a range.
- Vertical (90-degree) herringbone: the Vs point straight up and down, drawing the eye upward and emphasizing ceiling height. A modern, calmer take.
- Horizontal herringbone: the pattern runs sideways along the wall, widening the visual space, good for a long, low backsplash run.
For a standard 18-inch-high backsplash between counter and upper cabinets, vertical herringbone often frames the space best. Behind a hood or on a full wall, the classic 45-degree layout has more drama.
Color and Grout Combinations That Pop
Grout choice defines how much the pattern shows. High contrast makes each tile pop and emphasizes the herringbone geometry; low contrast blends the tiles into a soft field of texture.
- White tile, dark gray grout: crisp and graphic, showcases every angle of the pattern.
- White tile, white or light gray grout: subtle and timeless, lets the shape whisper rather than shout.
- Green, navy, or black glossy tile with contrasting grout: a bold statement wall behind a range.
- Handmade or zellige-look tile with matching grout: organic, high-end texture with visible depth.
Glossy tile bounces light and keeps a kitchen feeling bright, while a matte or handmade finish adds an artisan look. Order a few tiles and grout samples and dry-lay them on the counter before committing.
What a Herringbone Subway Backsplash Costs
The tile itself is budget-friendly; the labor for the pattern is where the cost lives. As a working guide:
- Basic ceramic subway tile: $2 to $6 per sq ft.
- Handmade or specialty subway tile: $8 to $25 per sq ft.
- Professional installation, running bond: $8 to $15 per sq ft.
- Professional installation, herringbone: $12 to $25 per sq ft due to extra cuts and layout time.
A typical 30-square-foot kitchen backsplash in basic tile runs roughly $300 to $900 installed in herringbone. Doing it yourself cuts the labor entirely, leaving mostly the cost of tile, thinset, grout, and a few tools, often under $200 for materials.
Tools and Materials You’ll Need
Gather everything before you start, because herringbone moves slowly and you do not want to stop mid-row. You will need subway tile plus 10 to 15 percent extra for cuts, thinset mortar or a premixed adhesive rated for backsplashes, a 1/4-inch notched trowel, tile spacers (1/16 or 1/8 inch), a wet saw or a snap cutter with nippers, a level, a pencil, grout, a grout float, sponges, and painter’s tape. A wet saw is strongly recommended for herringbone because of the many angled and partial cuts.
Step-by-Step Installation
Precision at the start pays off across the whole wall. Follow this order:
- Prep the wall: clean it, patch holes, and lightly sand glossy paint so the thinset bonds.
- Find your center and lay out: measure to find a vertical centerline, then dry-lay tiles on the counter to establish your herringbone angle and where cuts will fall.
- Mark guide lines: use a level to draw reference lines on the wall matching your pattern; herringbone is unforgiving without them.
- Spread thinset: apply adhesive to a small section, no more than you can tile before it skins over.
- Set the tiles: place tiles at the herringbone angle, pressing firmly and using spacers to keep joints even.
- Cut the edges: fill the perimeter and outlets with cut pieces, measuring each individually.
- Let it cure, then grout: after 24 hours, spread grout diagonally across the joints, wipe the excess, and clean the haze once it dulls.
- Seal and caulk: seal cement grout after it cures, and caulk the seam where tile meets the countertop instead of grouting it.
Keep checking your angle with a speed square every few rows; herringbone drifts quickly if you let one tile wander off-line.
Design Ideas to Elevate the Look
A herringbone field is a strong starting point, but a few design moves take it further. Frame the pattern with a thin metal or tile edge trim (a Schluter strip) for a clean, finished border where the tile meets the counter or ends mid-wall. Behind the range, extend the herringbone all the way to the hood or ceiling to create a floor-to-cabinet focal wall that anchors the kitchen.
Mixing tile finishes adds subtle interest: pair a matte field with a single row of glossy accent tiles, or run the herringbone in a slightly different tone behind open shelving. For a warmer, artisan feel, choose handmade or zellige-look subway tile whose slight color and surface variation makes the pattern shimmer under undercabinet lighting. Even a change in grout color from bright white to warm greige shifts the entire mood of the wall.
Common Mistakes to Avoid
Herringbone punishes sloppy layout more than any running-bond pattern, so a few errors show up fast. The biggest is starting without accurate guide lines; even a fraction of a degree off multiplies across the wall into a visibly crooked pattern. Always snap level reference lines and check your angle with a speed square every few rows.
- Skipping the dry layout: not planning where cuts fall leaves awkward slivers at the edges and outlets.
- Grouting the counter joint: the seam where tile meets the countertop should be caulked, not grouted, so it flexes without cracking.
- Rushing the thinset: spreading more adhesive than you can tile before it skins over ruins the bond.
- Forgetting outlet spacers: covers will not sit flush over the new tile thickness without them.
Slow down at the layout stage and the installation itself goes smoothly.
Pro Tips for a Flawless Result
Start from the center and work outward so any cut tiles land symmetrically at the edges rather than lopsided on one side. Cut outlet openings carefully and use outlet spacers so covers sit flush over the new tile thickness. Wipe grout haze before it fully hardens, because dried haze on textured tile is miserable to remove.
Finally, buy all your tile in one lot to avoid color shifts, and keep a few spares. A herringbone backsplash subway tile rewards patience with a wall that looks custom and current, and because the tile itself is inexpensive, it is one of the highest-impact upgrades you can make in a kitchen for the money.
Prefer to explore on your own?
See how new flooring looks in your actual room in seconds — free, no signup.
Try the free Floor Studio →