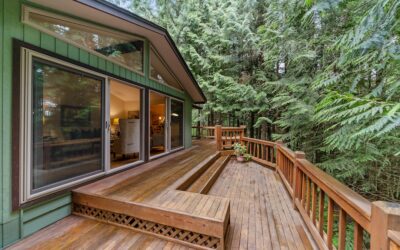
Building a porch is one of the most rewarding DIY projects a homeowner can tackle — a 10-by-12 foot covered porch adds roughly $15,000 to $25,000 in property value and costs $4,500 to $9,000 in materials if you do the labor yourself. Understanding how to build a porch from the footings up requires grasping permits, framing, roof tie-ins, and finishing in a logical sequence. Skip a step or sequence them wrong and you will be tearing things out before the ribbon cutting.
Here is the full process, with material lists and realistic timelines for a weekend DIYer with solid carpentry skills.
- Step 1: Plan, Permit, and Design
- Step 2: Footings and Foundation
- Step 3: Ledger Board and Posts
- Step 4: Beams and Floor Joists
- Step 5: Decking and Subfloor
- Step 6: Porch Roof Structure
- Step 7: Ceiling, Posts, and Trim
- Step 8: Railings, Steps, and Final Touches
- Realistic Budget Summary
- Frequently Asked Questions
Step 1: Plan, Permit, and Design
Every attached porch over 30 square feet or higher than 30 inches off grade typically requires a building permit. Unpermitted porches can void homeowners insurance and cause title issues during a future sale. Expect $150 to $450 in permit fees, plus potential architectural review if you are in an HOA.
Key design decisions to make up front:
- Footprint (common sizes: 8×10, 10×12, 12×16)
- Attached to house or freestanding
- Roof style: shed, gable, or hip
- Floor material: pressure-treated decking, composite (TimberTech, Trex), or tongue-and-groove (5/4 x 6 mahogany or fir)
- Ceiling height: 8 feet minimum, 9 feet preferred
- Railing and step requirements per local code
Draw a simple plan with dimensions, framing layout, and roof pitch. Most inspectors will accept a clean hand-drawn plan on graph paper for simple porches.
Step 2: Footings and Foundation
Footings must reach below the local frost line — typically 24 to 48 inches deep in most US climates. Use 10-inch or 12-inch Sonotube forms filled with concrete, with a Simpson post base embedded on top. For a 10-by-12 porch, plan on 4 to 6 footings depending on post spacing.
- Mark post locations using batter boards and string lines. Square with the 3-4-5 triangle method
- Call 811 for utility locates before any digging. Free, mandatory, and can save your life
- Dig footing holes to the required depth. A rented two-person auger ($90/day) saves hours over hand digging
- Set Sonotubes and backfill around them. Keep 2 to 3 inches above grade
- Pour concrete (roughly 3 to 4 bags of 80-pound Quikrete per footing)
- Set galvanized post bases while concrete is still wet, perfectly aligned with strings
- Let cure 48 to 72 hours before loading
Step 3: Ledger Board and Posts
For an attached porch, the ledger board bolts to the house rim joist and carries half the floor load. This is the single most important structural connection on the entire porch.
- Use pressure-treated 2×10 or 2×12 lumber matching the floor joist depth
- Attach with 1/2-inch galvanized lag bolts or structural screws (SDS or LedgerLok) every 16 inches, staggered
- Install flashing over the top edge — aluminum Z-flashing tucked under the siding prevents water damage to the house
Set 6×6 pressure-treated posts on the Simpson post bases, plumbed in both directions. Brace temporarily with 2×4 scraps until the beam is installed.
Step 4: Beams and Floor Joists
The beam carries the floor load from the posts back to the ledger. Typical construction is a built-up beam of three 2x10s or 2x12s bolted together, resting on post caps at each post.
Install floor joists 16 inches on center between the ledger and the beam. Use pressure-treated 2×8 or 2×10 lumber depending on span. Hang joists with Simpson LUS joist hangers ($3 each). For a 10-by-12 porch, expect 8 to 10 joists.
Add blocking mid-span to prevent joist twisting and improve stiffness. Check everything for square and level before decking.
Step 5: Decking and Subfloor
Pressure-treated 5/4-inch or 2×6 decking is the cheapest durable option at $1.50 to $3 per linear foot. Composite decking like TimberTech Edge runs $3 to $6 per linear foot. Run boards perpendicular to the joists with a 1/8-inch gap between boards for drainage.
Fasten with hidden clip systems (for composites) or stainless/coated deck screws for wood. Pre-drill any end-screw to prevent splitting.
For a finished painted porch, use 1×4 tongue-and-groove porch flooring (usually fir or mahogany) installed over a solid subfloor. Leave a 1/4 inch expansion gap at all edges and prime end cuts before installation.
Step 6: Porch Roof Structure
A simple shed roof is the easiest to build, sloping away from the house at 2:12 to 4:12 pitch. Frame rafters from 2×6 or 2×8 lumber. For a gable roof, you will need ridge board, collar ties, and often engineered trusses.
- Attach a second ledger for the roof, 7.5 to 9 feet above the porch floor
- Cut rafters with a plumb cut at the ridge and a birdsmouth at the beam
- Install rafters 16 to 24 inches on center
- Add hurricane ties (Simpson H2.5A) at every rafter-to-beam connection
- Sheathe with 1/2-inch CDX plywood
- Install drip edge, ice and water shield at the house wall, then roofing felt
- Shingle or panel to match the house roof
Step 7: Ceiling, Posts, and Trim
A beadboard or tongue-and-groove porch ceiling finishes the underside. Pine or PVC beadboard runs $1.50 to $3 per square foot. Install perpendicular to joists with a brad nailer, then trim edges with crown or cove molding.
Wrap posts in 1×6 pine or cellular PVC trim for a finished look, and cap with square or decorative post caps. Stain or paint pressure-treated lumber only after 3 to 6 months of drying — sooner and the finish will not adhere.
Step 8: Railings, Steps, and Final Touches
Code requires railings on any porch more than 30 inches above grade. Standard railing height is 36 inches residential. Balusters must be spaced so a 4-inch sphere cannot pass between them.
Step stringers are cut from 2×12 stock with 7-inch rises and 11-inch treads. For a porch 24 inches off grade, three steps work; higher porches need 4 or more. Install Simpson strong-tie stair connectors for code compliance.
Realistic Budget Summary
- Concrete, footings, hardware: $300 to $600
- Framing lumber: $800 to $1,800
- Decking (wood): $400 to $900, or $1,200 to $2,400 composite
- Roof framing, sheathing, shingles: $700 to $1,500
- Ceiling, posts, trim: $500 to $1,200
- Railings, steps, fasteners: $400 to $900
- Permit and inspection: $150 to $450
Total DIY: $3,500 to $8,000 for a 10-by-12 covered porch. Professional build on the same footprint runs $12,000 to $22,000. Expect 4 to 8 weekends of work if you are methodical, plus a few weeknights for finish work. Take the time to get the footings and ledger right — every other step depends on those two being square, level, and solid.
Frequently Asked Questions
How do you screen in a porch?
Frame each opening between the posts with treated 2x4s to create panels no wider than about 4 feet, then stretch fiberglass or aluminum screen across them. Fasten the screen with a spline channel or staples and cover the edges with wood or vinyl trim strips. Add a kick plate along the bottom to protect the mesh and finish with a self-closing screen door.
Can you build a porch on an existing concrete slab?
Yes, if the slab is sound, level, and drains away from the house. Pressure-treated sleepers laid on the slab with shims support a wood floor, with gaps left so water can run off underneath. Roof posts are different: a thin slab may not carry concentrated roof loads, so posts often need their own footings below the frost line. An inspector or engineer can confirm.
How do you build a porch for a mobile home?
Most porches for manufactured homes are built freestanding, with their own footings and posts instead of a ledger bolted to the home, because the home’s rim and siding are not designed to carry porch loads. Leave a small gap between the porch and the home so the two can move independently. Check local code, park rules, and the home’s anchoring requirements before building.