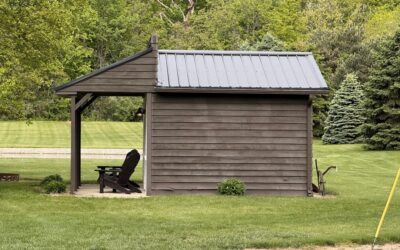
Adding a roof over your porch turns an exposed slab into usable, shaded living space and protects your entry from rain and sun. But learning how to build a porch roof means understanding that this is structural work, not a weekend decorating project. A porch roof carries dead load, wind uplift, and in many regions snow load, and it ties directly into your home’s framing. Because of that, this project almost always requires a building permit, and the structural tie-in (the ledger, attachment, and flashing) should be confirmed against your local code. For anything beyond the simplest cover, having a contractor or structural engineer review your plan is money well spent. This guide explains the process so you can plan intelligently and communicate clearly with the pros.
Part of our Roofing guide — explore the full guide →
Start With Permits and Codes
Before you buy a single board, contact your local building department. A porch roof attaches to your house and affects its structure, so nearly every jurisdiction requires a permit and at least one inspection. The permit process forces you to document footing depth, post size, beam span, rafter spacing, and how the roof attaches to the home.
Codes vary widely by region. Snow country demands heavier framing and steeper pitch; high-wind and hurricane zones require specific tie-downs and uplift connectors. Pulling a permit is not red tape for its own sake. It is the process that confirms your roof will not sag, leak, or pull away from the house in a storm.
Plan the Design and Pitch
Most porch roofs use one of two simple forms. A shed roof slopes in a single direction away from the house and is the easiest to build. A gable roof peaks in the center and sheds water to both sides, offering a more finished look at greater complexity.
Pitch matters for drainage. A shed porch roof typically needs a minimum slope of about 2:12 (2 inches of fall per 12 inches of run) for shingles, though metal roofing can go lower. Match the new roof’s style and pitch to your house so it looks intentional rather than tacked on, and make sure the finished height clears your doors and windows.
The Ledger Board: The Critical Connection
The ledger is the horizontal board fastened to your house that supports the upper end of the porch roof, and it is the single most important and most failure-prone connection in the whole project. A poorly attached ledger can pull loose under load, so this is where local code and professional review matter most.
- The ledger must fasten into solid framing (the rim joist or studs), never into siding alone.
- Use approved structural fasteners (lag screws or structural screws) sized and spaced per code.
- Install proper flashing behind and over the ledger to keep water out of the wall.
- Confirm the wall behind it is structurally sound and free of rot.
Footings, Posts, and Beams
The outer edge of the porch roof rests on posts, which transfer the load to footings below the frost line. Skipping proper footings leads to heaving, settling, and a roof that racks out of square.
- Dig footings to your local frost depth, often 12 to 48 inches depending on climate.
- Set concrete piers with post bases that anchor the posts and keep wood off the ground.
- Install posts (commonly 4×4 or 6×6) plumb and braced.
- Attach a beam across the post tops to carry the rafters, sized for your span.
- Tie posts to beams and footings with metal connectors rated for uplift.
Framing the Rafters
With the ledger and beam in place, you install rafters spanning between them. Rafter size and spacing depend on the span and your load requirements, but residential porch roofs commonly use 2×6 or 2×8 rafters spaced 16 or 24 inches on center. Each rafter is cut with a “bird’s mouth” notch so it seats cleanly on the beam, and the upper end fastens to the ledger with approved hangers or connectors. Verify everything stays square and the rafters sit on a consistent plane before you sheathe, because corrections get expensive once the deck is on.
Sheathing, Flashing, and Roofing
Once framing passes inspection, cover the rafters with plywood or OSB roof sheathing. Then comes the weatherproofing, which is where most leaks originate if rushed. Install underlayment over the deck, and pay special attention to flashing where the new roof meets the house wall. Step flashing and a counterflashing or apron tucked under the siding are what keep water from running down the wall and into the structure. Finish with your chosen roofing, shingles, standing-seam metal, or panels, following the manufacturer’s installation specs and your roof pitch.
Gutters and Finishing Touches
A finished porch roof needs to manage the water it collects. Add a gutter along the low edge and a downspout that directs runoff away from the foundation, especially important since the roof channels water right beside your entry. Wrap the fascia and soffit for a clean look, install any decorative brackets or columns, and paint or stain exposed wood to match the house. Proper drainage protects both the new structure and your foundation for the long haul.
When to Call a Professional
Be honest about scope. A small shed cover over a stoop is within reach of an experienced DIYer who pulls a permit and follows code. A larger porch roof with significant span, a gable design, structural tie-in to a complex roofline, or any uncertainty about load and attachment calls for a licensed contractor and often a structural engineer’s sign-off. The cost of professional review is small compared to a roof that leaks, sags, or detaches in a storm. Use this guide to understand the process, then match the work to your real skill level and local requirements.
Final Thoughts
Knowing how to build a porch roof starts with respecting it as structural work: pull the permit, confirm the ledger attachment and flashing against local code, set proper footings, and frame to spec. Whether you build it yourself or hire out the structural tie-in, doing it right gives you a durable, weathertight roof that adds comfort, curb appeal, and value to your home for decades.