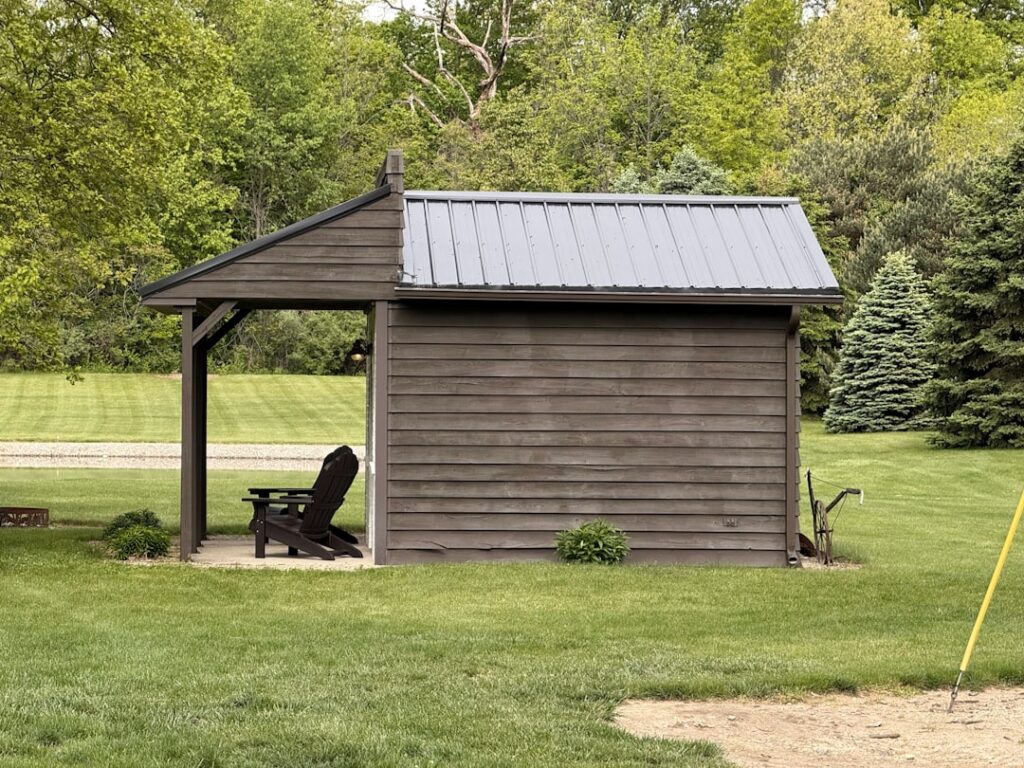
A single-slope roof, also called a mono-pitch or skillion roof, is the simplest roof you can frame, which is exactly why it is the standard for backyard sheds, lean-tos, and modern additions. Learning how to build a single slope shed roof comes down to understanding one idea: you make the front wall taller than the back wall, and the rafters bridge the two at a consistent slope so water runs off one edge. There are no ridge boards, no complicated hip cuts, and no valleys to flash. If you can cut a birdsmouth and swing a hammer, you can frame this roof over a weekend. This guide covers pitch, rafter sizing, and a full step-by-step for a 10-by-12-foot shed.
Part of our Roofing guide — explore the full guide →
- Understanding Pitch and Minimum Slope
- Calculating Rise and Wall Height Difference
- Sizing and Spacing the Rafters
- Ledger Board vs. Top-Plate Connection
- Cutting the Birdsmouth
- Sheathing, Underlayment, and Roofing
- Framing a 10×12 Shed Roof Step by Step
- Overhangs, Fascia, and Managing Runoff
- Materials Checklist and Rough Cost
Understanding Pitch and Minimum Slope
Pitch is the roof’s steepness, written as rise over run, meaning inches of vertical rise per 12 inches of horizontal run. A 3:12 pitch rises 3 inches for every 12 inches you travel horizontally. Pitch is not just about looks; it decides what roofing you are allowed to use and how well the roof sheds water and snow.
- Asphalt shingles need a minimum 3:12 pitch (2:12 is allowed only with a doubled underlayment). Below that, wind-driven rain works under the shingles and leaks.
- Metal panels can go much lower, down to about 1:12 for standing-seam and many exposed-fastener panels, which makes metal the better pick for a nearly flat modern look.
- In snow country, steeper is better. A 4:12 or greater slope sheds snow load instead of holding it.
For a typical shed, 3:12 is the sweet spot: steep enough for shingles, gentle enough to keep the tall wall from towering.
Calculating Rise and Wall Height Difference
The whole trick to a single-slope roof is the height difference between the two walls. That difference equals the pitch multiplied by the span.
Say your shed is 10 feet deep front to back and you want a 3:12 pitch. The rafters run across the 10-foot depth, so the run is 10 feet, or 120 inches. At 3 inches of rise per foot of run, the total rise is 3 × 10 = 30 inches. That means the top plate of the front wall needs to sit 30 inches higher than the top plate of the back wall. Build the back wall at, say, 7 feet (84 inches) and the front wall at 7 feet plus 30 inches, or 9 feet 6 inches, and the rafters spanning between them automatically create a clean 3:12 slope.
Adjust to taste. A gentler 2:12 over the same 10-foot depth needs only a 20-inch height difference; a 4:12 needs 40 inches. Sketch it on paper first so you cut your wall studs to the right length.
Sizing and Spacing the Rafters
Rafter size depends on span, spacing, snow load, and wood species, so check your local code, but these rules of thumb cover most sheds.
- For a 10-foot span with light loads, 2×6 rafters at 16 inches on center are a safe, common choice.
- Going to 24 inches on center saves lumber and works for spans up to about 8 to 10 feet with lighter roofing, but step up to 2×8 rafters if you have real snow load or a wider span.
- Tighter 16-inch spacing gives a stiffer roof and a better nailing surface for the sheathing, and it is what I use whenever the shed will store heavy loads overhead.
For a 10-by-12 shed with rafters running the 10-foot depth and spaced 16 inches on center along the 12-foot wall, you will need roughly ten rafters plus the two end rafters.
Ledger Board vs. Top-Plate Connection
How the rafters attach at the high side depends on whether the shed is freestanding or leaning against the house.
Freestanding Shed
The rafters simply bear on the top plates of both walls. You cut a birdsmouth notch at each bearing point so the rafter sits flat and solid on the plate, then toenail or use metal hurricane ties to lock it down. This is the standard for a standalone shed.
Lean-To Against a House
For a lean-to, bolt a ledger board to the house wall into the framing, flash it carefully so water cannot get behind it, and hang the high ends of the rafters from the ledger with joist hangers. The low ends bear on the shed’s front wall top plate. Proper flashing at the ledger is the single most important detail; a poorly flashed ledger will rot the house wall.
Cutting the Birdsmouth
The birdsmouth is the notch that lets a sloped rafter sit flat on a level wall plate. It has two cuts: a horizontal seat cut that rests on top of the plate and a vertical plumb cut against the outside face.
- Set a framing square or a speed square to your 3:12 pitch and mark the plumb cut at the top end of the rafter.
- Mark the seat cut where the rafter crosses the wall plate, keeping the notch depth to no more than one-third of the rafter’s depth so you do not weaken it. On a 2×6 (5.5 inches deep), keep the seat cut under about 1.8 inches deep.
- Cut one rafter, test-fit it on both walls, and if it sits tight, use it as a template to mark all the others so every rafter is identical.
Leave a tail overhanging the walls, typically 8 to 12 inches, to form the eave that keeps runoff away from the siding.
Sheathing, Underlayment, and Roofing
With the rafters up, deck the roof and dry it in.
- Sheathing: Cover the rafters with 7/16-inch OSB or 1/2-inch plywood, laid with the long dimension across the rafters and staggered joints, leaving a 1/8-inch gap between panels for expansion.
- Underlayment: Roll out synthetic underlayment or 15-pound felt, overlapping courses 3 to 4 inches, working from the low edge up.
- Drip edge: Install metal drip edge along all edges, under the underlayment at the eave and over it at the rakes and high side, to shed water off the sheathing.
- Roofing: For 3:12 and up, three-tab or architectural asphalt shingles work fine. For a lower pitch or a cleaner look, screw down metal panels with gasketed screws into the sheathing and rafters.
Framing a 10×12 Shed Roof Step by Step
Here is the full sequence for a freestanding 10-foot-deep by 12-foot-wide shed at 3:12 pitch:
- Build the walls at different heights. Frame the two 12-foot side walls and the two 10-foot end walls so the front wall top plate sits 30 inches higher than the back. The side walls will have a sloped top to match.
- Add a header over the door. Frame a doubled 2x header over any wide door opening in the front wall to carry the roof load across the span.
- Cut the pattern rafter. Lay out one 2×6 with a 3:12 plumb cut at the top, a birdsmouth at each wall, and a 10-inch tail. Test-fit and adjust.
- Mark and cut the rest. Trace the pattern onto the remaining rafters and cut them all identically. You need about twelve for 16-inch on-center spacing across the 12-foot walls.
- Set the rafters. Lay them across the two top plates on your 16-inch marks, seat the birdsmouths, and fasten each with hurricane ties or by toenailing three 16d nails.
- Sheathe the roof. Nail down 7/16-inch OSB with 8d nails every 6 inches on the edges and 12 inches in the field.
- Dry it in. Install drip edge, underlayment, then shingles or metal panels from the low edge up.
Overhangs, Fascia, and Managing Runoff
A single-slope roof dumps all of its water off one low edge, so plan for that concentrated runoff before it erodes a trench along the back of the shed. Carry the rafter tails out 8 to 12 inches to form an eave that throws water clear of the siding and foundation. Close the tails with a 1x fascia board, then run a gutter along the low edge and drain it to a splash block or a short length of buried drain pipe leading away from the shed. On the high side and rakes, a small overhang of 6 to 8 inches keeps wind-driven rain off the walls.
Because the entire roof drains to one side, size the gutter generously. A single-slope roof on a 10-by-12 shed sheds the same volume as a gable roof of the same footprint, but it all arrives at one edge, so a standard 5-inch K-style gutter with one downspout handles it well in most climates. In heavy-rain regions, add a second downspout.
Materials Checklist and Rough Cost
For a freestanding 10-by-12 shed roof at 3:12 pitch, budget roughly the following:
- Rafters: about twelve 2x6x12 boards, $10 to $16 each.
- Sheathing: four to five sheets of 7/16-inch OSB at $15 to $25 each.
- Roofing: two to three squares of architectural shingles at $100 to $140 per square, or metal panels at $150 to $250 total.
- Trim and finish: drip edge, underlayment, fascia, and fasteners, roughly $100 to $200.
All in, a single-slope roof for a shed this size runs about $500 to $900 in materials, and one motivated DIYer with a helper can frame, sheathe, and dry it in over a weekend.
Knowing how to build a single slope shed roof gives you a repeatable system you can scale to a lean-to, a chicken coop, or a firewood shelter simply by changing the span and the wall-height difference. Sketch the pitch, do the rise-over-run math, cut one perfect pattern rafter, and the rest is repetition. Take your time on the wall heights and the birdsmouth template, because everything downstream depends on those two numbers being right.