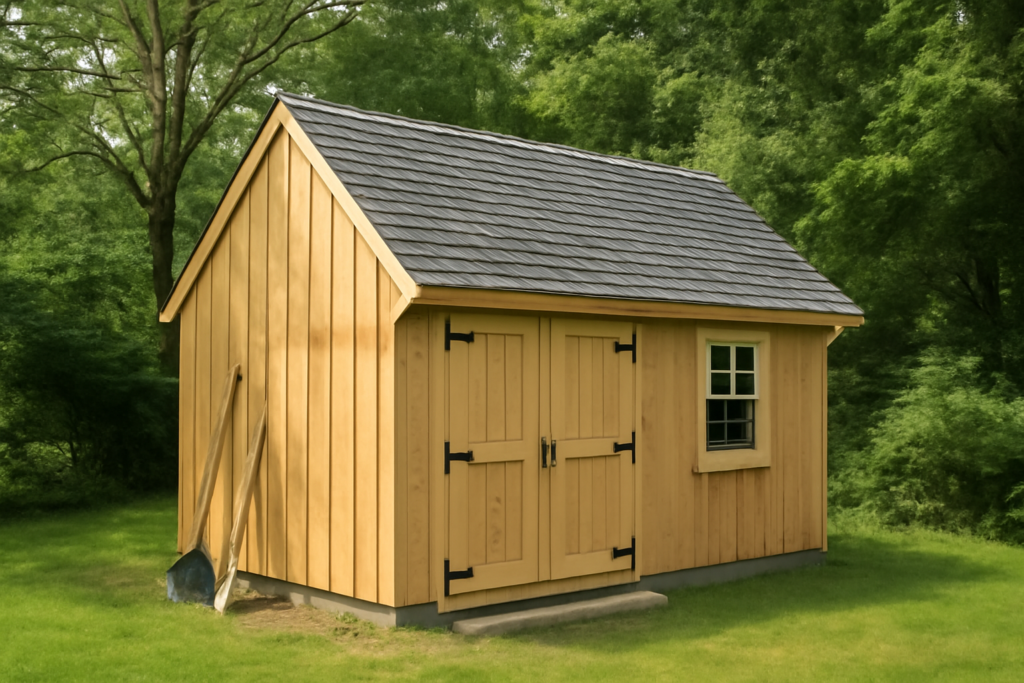
A gable shed with a lopsided roof might look like a framing mistake, but on a saltbox shed that asymmetry is the whole point. One side of the roof is short and steep, the other long and gentle, giving the building a tall front wall with room for doors and windows and a sloping back that sheds rain and snow. The shape comes from colonial New England houses, and it translates beautifully to backyard storage buildings, workshops and even detached garages.
If you are deciding whether the form suits your project, here is the summary. A saltbox roof offers more usable headroom and loft space than a standard gable of the same footprint, it looks good from the street, and it handles weather well when the long slope faces prevailing wind. The tradeoff is slightly more complex framing, because the two roof planes use rafters of different lengths and often different pitches.
- Saltbox Shed Basics: What Makes the Shape
- Choosing a Roof Pitch
- Common Saltbox Shed and Garage Sizes
- Siding and Trim Choices
- Planning Loft Space
- Tools and Materials
- Step-by-Step Build Outline
- Troubleshooting Saltbox Framing
- Typical Cost Ranges
- Safety and When to Call a Pro
- Frequently Asked Questions
Orientation matters as well. Facing the tall wall toward the house or yard puts doors and windows where you use them, while the long back slope faces the property line, which can help with height limits near setbacks. On a sloped lot, the tall front wall can also hide a raised foundation.
Saltbox Shed Basics: What Makes the Shape
A saltbox shed has a ridge that sits off center. Instead of meeting in the middle, the two roof planes meet closer to the front wall, commonly about one-third of the way back from the front. The front wall is usually taller than the rear wall, which pushes the eaves up and creates the characteristic profile.
There are two common ways to build the asymmetry:
- Equal pitch, unequal length: both planes share the same pitch, but the rear wall is shorter so the back slope runs longer. This is the simplest version to cut.
- Different pitches: the front plane is steep (for example 10/12 or 12/12) and the back is shallower (for example 5/12 or 6/12). This gives the most traditional look and more loft headroom.
Many people searching for a saltbox style shed are drawn to the second version because it reads as authentically colonial, especially with a centered door, small paned windows and narrow trim boards.
Choosing a Roof Pitch
Pitch affects appearance, headroom, material choice and snow performance.
| Front / back pitch | Look | Best for |
|---|---|---|
| 8/12 and 4/12 | Subtle, modern | Low-profile sheds near property lines |
| 10/12 and 5/12 | Classic saltbox | Most storage sheds and workshops |
| 12/12 and 6/12 | Dramatic, traditional | Lofts, snowy climates, larger garages |
Asphalt shingles generally need a minimum pitch of 4/12 (some allow 2/12 with extra underlayment). Metal roofing works at lower pitches and sheds snow faster. In heavy snow areas, steeper pitches and stronger rafters help, but local snow load ratings decide rafter size and spacing, not appearance.
Common Saltbox Shed and Garage Sizes
- 8 x 10 or 8 x 12: garden tools, mower and bikes. Often small enough to avoid a permit in many areas.
- 10 x 12 or 10 x 14: the most popular size, with room for a workbench and shelving.
- 12 x 16 or 12 x 20: workshops, hobby studios or storage with a full loft.
- 16 x 24 to 24 x 24: single or double-car saltbox style garage territory.
Permit thresholds vary widely, often somewhere between 100 and 200 square feet for accessory buildings, and setback rules apply regardless. Check with your building department and HOA before buying materials. A garage-sized building will almost always need a permit, engineered or prescriptive foundation, and inspection.
Siding and Trim Choices
Siding sets the personality of the building. Board-and-batten gives a farmhouse look and goes up quickly over plywood sheathing. Lap siding or clapboard with narrow corner boards echoes the colonial houses where the saltbox form began. Cedar shingles weather to silver gray and suit coastal properties, though they take longer to install. Engineered panel siding with a grooved face is the budget choice and installs fast, but seal every cut edge and keep the bottom edge at least 6 inches above grade.
Trim details sell the style. Use wide fascia and rake boards, a simple frieze board under the eaves, and paned windows with flat casing. Painting trim in a contrasting color sharpens the asymmetric roofline, which is the feature everyone notices first.
Planning Loft Space
The tall front wall and steep front plane make saltbox buildings ideal for storage lofts. Place the loft over the front portion where headroom is greatest. On a 12-foot-deep shed with a 10/12 front pitch and an 8-foot front wall, you can often gain 3 to 4 feet of usable height at the loft’s deepest point.
- Size loft joists for the load you plan to store, typically 2×6 or 2×8 depending on span.
- Keep the loft open on the side facing the door for easy loading.
- Add a sturdy ladder or pull-down stair rather than climbing shelving.
- In a garage, a loft can double as a ceiling tie, but have the framing reviewed if it carries heavy loads.
Tools and Materials
- Pressure-treated skids or concrete piers, or a slab for garages
- 2×4 or 2×6 lumber for walls; 2×6 or 2×8 rafters depending on span and snow load
- Ridge board or ridge beam, collar ties and hurricane ties
- Sheathing (OSB or plywood), roofing underlayment, drip edge and shingles or metal panels
- Siding: board-and-batten, clapboard, cedar shingles or engineered panel siding
- Circular saw, miter saw, speed square, framing square, chalk line, level
- A pneumatic framing nailer speeds up wall and rafter assembly considerably
- Safety glasses, hearing protection, gloves and a stable ladder or scaffold
Step-by-Step Build Outline
- Check rules and call 811. Confirm permits, setbacks and HOA rules. Call 811 a few days before digging for piers or footings so buried utilities are marked.
- Build the foundation. Level gravel pad with treated skids for small sheds; concrete piers or a slab for larger buildings and garages. Make sure it is square by measuring diagonals.
- Frame the floor. Treated joists at 16 inches on center, sheathed with tongue-and-groove plywood.
- Frame the walls. Build the tall front wall and shorter rear wall, then the side walls with top plates following the roof line, or square side walls with gable-end framing added later.
- Lay out rafters. Draw the profile full scale on the floor or a sheet of plywood. Cut one pattern rafter for each side, test fit, then cut the rest.
- Set the ridge and rafters. Install the ridge board at the offset position, then rafters in pairs. Add collar ties and fasten rafters to plates with hurricane ties.
- Sheathe and dry in. Install roof sheathing, drip edge, underlayment and roofing. Sheathe the walls and wrap with house wrap.
- Install siding, trim, doors and windows. Flash windows properly and leave a gap between siding and the ground.
- Ventilate. Add soffit and ridge vents or gable vents to limit condensation.
Troubleshooting Saltbox Framing
- Ridge not level: usually caused by unequal wall heights or out-of-square plates. Check wall heights before setting rafters.
- Rafters do not meet cleanly: cut angles are off. Recheck the plumb cut for each pitch, since the two sides need different angles when pitches differ.
- Walls bowing outward: rafters are pushing the walls. Add collar ties, rafter ties or a structural ridge beam.
- Water staining at the ridge: uneven planes can leave gaps in ridge cap. Use proper ridge vent or cap shingles and flashing.
- Snow pile-up on the long slope: add snow guards on metal roofs or upgrade rafters per local load.
Typical Cost Ranges
A DIY saltbox shed in the 10 x 12 range often costs a few thousand dollars in materials, depending on siding, roofing and lumber prices. Kits run from roughly the same range to more for premium wood. Professionally built sheds commonly cost several thousand dollars to over ten thousand. A saltbox garage with a slab, permits, electrical and an overhead door can range from the mid five figures upward. Metal roofing and cedar siding raise costs but extend lifespan.
Safety and When to Call a Pro
Roof framing happens at height, so work from a stable ladder set at the correct angle (about 1 foot out for every 4 feet up), extend it 3 feet above the landing, and never stand on the top rungs. Scaffolding is safer for setting ridges and sheathing. If the roof is two stories high or you are uncomfortable working on a steep pitch, hire a pro. Anchor the building to its foundation, follow local wind and snow load requirements, and use hurricane ties at every rafter. Larger buildings, garages and anything with electrical service need permits and inspections; a licensed electrician should run any wiring, and an engineer or experienced builder should review long rafter spans or lofts carrying heavy storage.
Frequently Asked Questions
What is the difference between a saltbox and a gable shed?
A gable shed has a centered ridge with equal roof planes, while a saltbox shed has an off-center ridge with a short steep front slope and a long gentle back slope.
What roof pitch is best for a saltbox shed?
A front pitch of 10/12 with a back pitch of 5/12 is a popular balance of looks and headroom, but 12/12 and 6/12 suits snowy climates and lofts.
Does a saltbox shed need a permit?
It depends on size and location. Many areas exempt small sheds under a set square footage, but setbacks still apply and garages almost always need permits.
Can I build a saltbox style garage myself?
Experienced DIYers can, but garages need engineered foundations, permits and inspections. Many owners hire pros for the slab, framing review and electrical work.
Which way should the long roof slope face?
Point the long slope toward prevailing winter winds or the rear of the property, which sheds weather and keeps the taller front wall facing the yard.