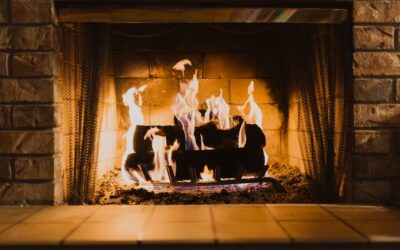
An open masonry fireplace is one of the least efficient ways to heat a house. Much of the warm air it creates goes straight up the chimney, and on cold nights it can pull already-heated room air out with it. Knowing how to choose a fireplace insert turns that drafty hole in the wall into a controlled, sealed heater that actually warms the room. The decision comes down to four things: which fuel fits your home and habits, whether the unit physically fits your firebox, how much heat you need, and what your chimney requires to vent it safely.
How to Choose a Fireplace Insert: Start With the Basics
A fireplace insert is a firebox built from steel or cast iron that slides into an existing masonry or factory-built fireplace. It has a sealed glass door, its own combustion air control, and in most cases a blower that pushes heated air into the room. The insert connects to a new chimney liner running the full height of the chimney, which is what makes it so much safer and more efficient than burning in the original firebox.
Before you shop brands or finishes, answer three questions. First, do you want primary heat for a large area or supplemental warmth and ambiance for one room? Second, what fuel is realistic where you live, based on cost, supply, and local burn restrictions? Third, what kind of fireplace do you have? Masonry fireplaces accept the widest range of inserts. Factory-built, or zero-clearance, fireplaces only accept inserts specifically listed for use in that model, and some cannot accept one at all.
Comparing Fuel Types
Every fuel type involves trade-offs in heat output, convenience, operating cost, and installation complexity. There is no universally correct answer, only the right one for your home.
| Fuel | Strengths | Drawbacks |
|---|---|---|
| Wood | High heat, works in power outages, real fire | Hauling, storage, ash, frequent tending |
| Gas | Push-button, clean, thermostat control | Needs gas line, fuel cost varies |
| Pellet | Automated feed, steady heat, low emissions | Needs electricity, bag storage, mechanical parts |
| Electric | Cheapest install, no venting | Modest heat output, ambiance-focused |
Wood-Burning Inserts
Wood inserts deliver the most intense heat and keep working when the power goes out, although the blower will stop. New units sold in the United States must meet the EPA’s 2020 New Source Performance Standards, which cap particulate emissions at 2.0 grams per hour for most certified heaters. Modern certified inserts use either catalytic combustors or secondary burn tubes to burn off smoke. Catalytic models hold a long, even burn; non-catalytic models are simpler and often have a livelier flame. Either way, expect to season wood to roughly 20 percent moisture content or less, stack it off the ground, and clean the chimney regularly.
Gas Inserts
Gas inserts run on natural gas or propane and appeal to homeowners who want warmth without the chores. Most are direct-vent units that pull combustion air from outdoors and exhaust through a pair of flexible liners, either co-axial or co-linear, running up the chimney. That sealed design keeps indoor air out of the combustion process. Many units offer thermostatic control, remote operation, and modulating burners that dial heat up or down. You will need a gas line run to the fireplace, which should always be handled by a licensed plumber or gas fitter.
Pellet Inserts
Pellet inserts burn compressed wood or biomass pellets fed by an auger from a hopper. They combine the renewable-fuel appeal of wood with close to gas-like convenience, since a full hopper can run a day or more on a low setting. They do require electricity to run the auger, fans, and controls, so plan for a battery backup if outages are common. Pellet units have more moving parts, which means regular cleaning of the burn pot and periodic servicing.
Electric Inserts
Electric inserts are the simplest option: slide in, plug in, and enjoy a realistic flame effect with a small built-in heater. They are ideal for apartments, condos with fire restrictions, and homes where the chimney is damaged or unusable. Expect enough heat for a single room rather than a whole floor.
Measuring Your Firebox for the Right Fit
Fit is the step that trips up most buyers. An insert that is too large will not slide in; one that is too small leaves wide gaps that the surround panel may not cover. Measure carefully with a tape measure and write every dimension down.
- Front width: measure across the opening at the front edge.
- Rear width: measure across the back wall of the firebox. Most fireboxes taper toward the back.
- Height: measure from the hearth floor to the top of the opening.
- Depth: measure from the front opening to the back wall, at both the bottom and the top, since many back walls slope forward.
- Damper and smoke shelf: note where the damper sits and whether the liner can pass through it, or whether the damper must be removed.
- Hearth extension: measure how far the hearth projects into the room, because inserts that protrude may need a larger non-combustible floor protector.
Compare those numbers to the manufacturer’s minimum fireplace dimensions, not just the insert’s outside dimensions. Also check the listed clearances to combustible mantels and trim. A wood mantel that sits too close to the opening may need to be raised, shielded according to the manual, or replaced. If your hearth needs upgrading, that becomes part of the project budget.
Sizing Heat Output Correctly
Bigger is not better. An oversized wood insert gets run on a low, smoldering setting that produces creosote and smoke, while an oversized gas unit cycles constantly. Undersized units run flat out and still leave the room cold.
Manufacturers list heat output in BTUs per hour and usually offer an approximate heating area in square feet. Treat those area figures as optimistic, because they assume a well-insulated, open floor plan. Adjust your target based on these factors:
- Climate zone: homes in northern states need more output per square foot than homes in mild regions.
- Insulation and air sealing: older, leaky houses lose heat quickly.
- Floor plan: heat moves easily through open layouts but stalls behind closed doors and down long hallways.
- Ceiling height: vaulted ceilings trap heat up high and effectively enlarge the space.
- Goal: zone heating for one room calls for a smaller unit than primary heat for a whole floor.
When in doubt, talk to a hearth dealer who will ask about your square footage, insulation, and how you plan to use the insert. A good dealer can steer you away from a unit that looks impressive in the showroom but overwhelms your living room.
Understanding Efficiency Ratings
Efficiency describes how much of the fuel’s energy ends up as heat in your home instead of going up the flue. Traditional open fireplaces are often estimated to deliver well under 20 percent efficiency, and some actually lose net heat. Modern certified wood and pellet inserts typically land somewhere in the 70 to 80 percent range, and many direct-vent gas inserts are comparable.
Look for these labels and figures when comparing models:
- EPA certification for wood and pellet units, with the tested emission rate and efficiency listed on the EPA’s database.
- Fireplace Efficiency (FE) or AFUE-style ratings for gas units, which reflect real-world operation better than steady-state figures.
- Turndown ratio on gas and pellet models, showing how low the unit can modulate for mild days.
- Blower performance, since a quiet, variable-speed blower moves heat farther into the house.
Efficiency affects operating cost more than purchase price does over the life of the unit. A slightly pricier insert that burns cleaner and extracts more heat can pay for the difference over several winters. Federal and local incentive programs for high-efficiency heaters change frequently, so check current rules with your dealer or tax advisor rather than assuming a credit applies.
Chimney, Venting and Installation Requirements
Almost every combustion insert needs a new, full-length chimney liner, typically stainless steel, sized to the insert’s flue collar. NFPA 211, the national standard for chimneys and venting, calls for a direct connection from the insert to the liner. Older “slammer” installations that simply pushed an insert against the old damper are no longer considered acceptable because creosote and exhaust collect in the original smoke chamber.
Before installation, the chimney should receive a Level 2 inspection, which includes a video scan of the flue interior and is recommended whenever the venting system changes. Cracked flue tiles, deteriorated mortar joints, and a damaged crown should be repaired first. The chimney must also meet the familiar height rule: at least 3 feet above the roof where it penetrates and at least 2 feet higher than anything within 10 feet, often called the 3-2-10 rule. Chimneys that fall short can draft poorly, which causes smoke spillage.
Electrical needs vary. Wood inserts with blowers, all pellet inserts, and many gas inserts require a nearby outlet, and some manufacturers call for a dedicated circuit. Plan outlet placement before the surround goes on.
When to Call a Licensed Professional
Installing a combustion insert involves fire, carbon monoxide, gas piping, and electrical work, so professional installation is strongly recommended. Use a certified hearth installer or chimney professional for the liner and insert, a licensed gas fitter for any gas line, and a licensed electrician for new circuits. Most jurisdictions require a permit and inspection, and many insurance carriers ask for proof of a professional installation. Install working smoke and carbon monoxide alarms on every level of the home, including near sleeping areas, no matter which fuel you choose.
Budgeting and Final Checklist
Total cost depends on fuel type, unit size, liner length, chimney repairs, gas or electrical work, and finishing touches like a new surround or hearth. Electric inserts are usually the least expensive overall. Wood, pellet, and gas inserts cost considerably more once the liner and installation labor are included, and chimney repairs can add a significant amount. Get at least two written quotes that itemize the unit, liner, labor, permits, and any masonry work.
Use this checklist before you sign:
- Fuel choice matches your supply, budget, and willingness to tend a fire.
- Insert is listed for your fireplace type and fits all measured dimensions.
- Heat output suits your square footage, climate, and floor plan.
- Unit is EPA certified (wood or pellet) or carries published efficiency ratings (gas).
- Quote includes a full-length liner, chimney inspection, and permit.
- Mantel and hearth clearances meet the installation manual.
- Smoke and CO alarms are in place.
Choosing well means you get a quieter, cleaner, and far warmer fireplace that you will actually use all winter. Take the measurements seriously, size for your real house rather than the brochure, and let qualified pros handle the venting and connections.
Frequently Asked Questions
Can any fireplace accept an insert?
Most masonry fireplaces can, provided the firebox dimensions and chimney condition are suitable. Factory-built fireplaces only accept inserts listed for that specific model, so check the fireplace’s data plate and manual first.
Do I need a new chimney liner for a fireplace insert?
Nearly all wood, pellet, and gas inserts require a full-length liner connected directly to the unit. Electric inserts do not need venting. A chimney professional can confirm the correct liner size and type.
Which fireplace insert fuel is cheapest to run?
It depends on local prices. Wood can be very inexpensive if you have access to free or low-cost seasoned firewood, while gas and pellet costs vary by region. Compare your local price per BTU before deciding.
How long does fireplace insert installation take?
A straightforward installation in a sound chimney often takes a single day. Chimney repairs, gas line runs, electrical work, and permit inspections can extend the timeline to several days or weeks.