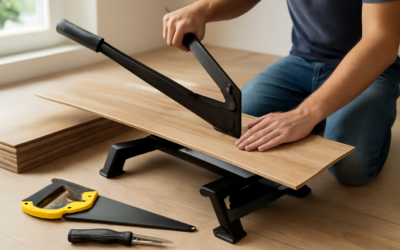
The last row against a wall almost never falls at a full plank width, which means you have to rip a board down its length, and that is where a lot of DIY floors start looking rough. Learning how to cut laminate flooring lengthwise without chipping the decorative surface takes the right tool, the right blade, and a couple of tricks pros use to keep the finish crisp. A crosscut across the short end is easy. A long rip down the whole board is the one that tests your setup.
A lengthwise, or rip, cut runs parallel to the long edge of the plank. You need it for the final row, for boards that run alongside cabinets and closets, and anywhere the floor has to thread through a narrow space. Done right, the cut edge tucks under the baseboard and no one ever sees it. Done wrong, you get a jagged, splintered line that shows every flaw.
Why Lengthwise Cuts Chip So Easily
Laminate is a photographic wear layer bonded over a dense fiberboard core. That top layer is hard, brittle aluminum oxide, and when a saw tooth exits the surface it can blow out tiny chips. A long rip cut exposes far more edge than a short crosscut, so any blade or technique problem shows up over a much greater distance. The fix is controlling which side of the board the blade tears out on and using a blade fine enough to slice rather than tear.
The golden rule: a blade tears out on the side where the teeth exit the material. A standard circular saw spins so the teeth exit the top, so you cut laminate face down. A table saw and a jigsaw with an up-cutting blade exit on top too, so with those you flip your approach. Match your technique to your tool and half the battle is won.
Best Tools for a Lengthwise Rip
Several tools will make a long rip, each with trade-offs.
- Table saw: My first choice for lengthwise cuts. The rip fence guarantees a straight, consistent width down a full 48-inch plank, which is nearly impossible to match freehand.
- Circular saw with a straightedge clamp: A solid budget option. Clamp a guide, cut face down, and take your time.
- Jigsaw: Fine for short rips and notches around cabinets, but it wanders on long cuts and leaves a rougher edge.
- Track saw: The premium pick. Combines table-saw straightness with the dust control and chip-guard of a guided rail.
Whichever you choose, the blade matters more than the machine. Use a fine-tooth blade made for laminate or plywood, ideally 40 teeth or more on a 7-1/4-inch circular blade, or a 60- to 80-tooth blade on a 10-inch table saw. A carbide-tipped or specific laminate blade holds an edge far longer than a general framing blade, which will burn and chip the wear layer within a few boards.
How to Cut Laminate Flooring Lengthwise on a Table Saw
The table saw is the cleanest, fastest way once it is set up. Here is my process for the final-row rip.
- Measure the gap at both ends of the wall, then subtract 1/4 to 3/8 inch for the expansion gap. Walls are rarely parallel, so measure at several points.
- Set the rip fence to the finished width you need. Double-check the distance from the fence to the far edge of a blade tooth.
- Orient the plank face up. On a table saw the teeth exit through the bottom, so the good side rides on top and stays chip-free.
- Feed steadily with push sticks as you approach the blade. Keep the plank tight to the fence and let the blade do the work. Rushing burns the edge.
- Dry-fit before committing the whole row. Cut one board, check the fit against the wall, then run the rest to the same setting.
Because walls bow, some jobs need a tapered rip. For that, snap a chalk line on the plank back matching the wall’s actual profile and follow it freehand or with a jig rather than the straight fence.
Lengthwise Cuts with a Circular Saw
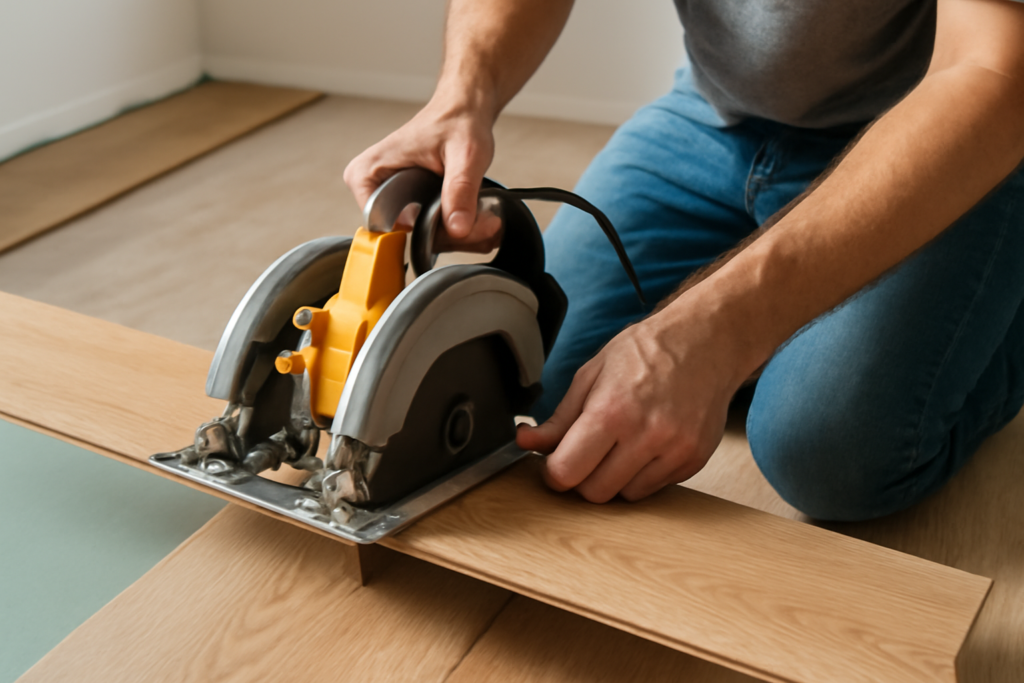
No table saw? A circular saw and a clamped straightedge get you there.
- Mark your cut line on the back of the plank in pencil.
- Flip the board face down. A circular saw’s teeth exit the top, so cutting from the back keeps tearout on the hidden side.
- Clamp a straightedge offset from your line by the exact distance between the blade and the edge of the saw’s baseplate. Measure this once and write it on the saw.
- Support the board fully on foam or sacrificial lumber so it does not sag and pinch the blade mid-cut.
- Run the saw smoothly along the guide at a steady pace. Let the motor reach full speed before the blade touches the plank.
A strip of painter’s tape along the cut line gives the brittle surface extra support and noticeably reduces chipping on either tool. Score the line first with a utility knife for an even cleaner top edge.
Tips for Splinter-Free Edges
Small habits separate a clean floor from a rough one.
- Use a sharp, high-tooth-count blade and replace it the moment cuts start looking fuzzy or you smell burning.
- Apply painter’s tape over the cut line to hold the wear layer together as the teeth pass.
- Cut with the finish on the safe side for your tool: face down for a circular saw, face up for a table saw.
- Slow your feed rate at the start and end of the cut, where blowout is worst.
- Deburr the edge lightly with fine sandpaper if a few whiskers remain. It will hide under the trim anyway.
Safety and Dust Control
Ripping laminate throws fine, gritty dust that is rough on lungs and lenses. Wear safety glasses and a dust mask or respirator every time, and set up near an open door or with a shop vac hooked to the saw. Use push sticks on the table saw and keep your fingers well clear of the blade path. Never freehand a long rip on a table saw without the fence; the board can bind and kick back hard. A slow, deliberate cut is a safe cut.
Handling Bowed and Out-of-Square Walls
Almost no wall in a real house is perfectly straight, and the final row is where that shows up. If you rip every board to one uniform width and the wall bows, you will end up with a gap that widens and narrows along the run. The fix is a scribed, tapered rip. Set each plank in place, use a compass or scribe tool to trace the wall’s actual contour onto the board, then cut along that line instead of a straight one.
For a table saw taper, you cannot use the straight fence, so mark the line and either follow it freehand with care or build a simple taper jig. With a circular saw or jigsaw, just clamp the guide to match your scribed line. It takes a few extra minutes per board, but the ripped edge disappears under the baseboard and the reveal stays consistent, which is what separates a tidy install from a sloppy one.
Practice on Scrap First
Before you rip your good planks, run a test cut on a scrap or a damaged board. It lets you confirm the blade is sharp, the guide is set to the right offset, and the finish side is oriented correctly for your tool. Check the test cut for chipping along the top edge. If you see tearout, add painter’s tape, slow your feed rate, or flip the board, and try again. Five minutes on a scrap saves a wasted plank at three to five dollars a board, and it builds the muscle memory for a smooth, confident cut when it counts.
Putting It All Together
Mastering how to cut laminate flooring lengthwise comes down to three things: pick a tool that keeps the cut straight, run a fine blade and orient the plank so tearout lands on the hidden face, and slow down at the edges. A table saw with a rip fence delivers the most consistent results, a circular saw with a clamped guide is a capable backup, and painter’s tape plus a sharp blade cleans up the finish on either.
Since the ripped edge disappears under baseboard or quarter-round, you have a little margin, but there is no reason to leave it rough when the right method is this simple. Dial in your setup on a scrap piece first, then run your final row with confidence and get clean, professional cuts every time.
Prefer to explore on your own?
See how new flooring looks in your actual room in seconds — free, no signup.
Try the free Floor Studio →