Every hardwood floor I’ve ever refinished has told a story about how it was maintained, and the difference between a floor that still looks great after fifteen years and one that needs refinishing after five almost always comes down to routine. Learning how to keep hardwood floors clean isn’t complicated, but it does require the right tools, the right products, and a bit of consistency, since hardwood is far more sensitive to moisture and abrasive grit than tile or vinyl, and the wrong cleaning habits can quietly damage a finish long before you notice visible wear.
This guide lays out a realistic daily, weekly, and monthly routine, explains which products actually belong in your cleaning cabinet, and covers the mistakes that send more hardwood floors to premature refinishing than actual foot traffic ever does.
Understand What You’re Actually Cleaning
Nearly all hardwood floors installed in the last few decades have a surface finish, either a polyurethane, an oil-modified urethane, or increasingly a UV-cured aluminum oxide finish on prefinished flooring, and this finish is what you’re actually cleaning day to day rather than bare wood. That distinction matters because the finish is a protective topcoat that can be scratched, dulled, or degraded by the wrong products, and once it’s compromised, moisture and dirt can reach the wood underneath and cause real damage that a simple mopping schedule can no longer fix.
If you have older hardwood with a wax finish, which is less common now but still found in some historic homes, the cleaning approach is meaningfully different, since wax finishes need re-waxing periodically rather than the modern maintenance routine described here, and using a water-based cleaner on a true wax finish can leave a cloudy residue. For the vast majority of homes with a polyurethane or aluminum oxide finish, the routine below is exactly what keeps a floor looking new for decades.


Daily Habits That Matter More Than Any Product
The single most damaging thing to a hardwood floor’s finish isn’t liquid, it’s grit, the fine sand, dirt, and gravel that tracks in on shoes and slowly scratches the finish underfoot like sandpaper with every step. A quick daily sweep with a soft-bristle broom, or a five-minute pass with a vacuum on a hard-floor setting, in high-traffic areas like entryways and kitchens removes this grit before it has a chance to grind against the finish all day. This single habit, more than any cleaning product on the market, is what separates floors that stay glossy for fifteen years from ones that look dull and scuffed after three.
Placing walk-off mats at every exterior entry point, ideally both outside and inside the door, catches a huge percentage of the grit before it ever reaches the hardwood at all, and this is genuinely one of the highest-value, lowest-effort things a homeowner can do. Felt pads on furniture legs and a house rule about removing shoes, or at least high heels and cleats, in hardwood-floored rooms rounds out the daily habits that prevent damage rather than clean up after it. None of this takes more than a few minutes a day, but it does more for long-term floor appearance than any deep-cleaning product you could buy.
Weekly Cleaning: Vacuum and Damp Mop
Once a week, or twice weekly in a busy household with kids or pets, a more thorough vacuum pass using a hard-floor attachment, not a beater-bar brush roll designed for carpet, picks up dust and debris the daily sweep misses in corners and under furniture. Beater-bar vacuum heads, the kind with a rotating brush designed to agitate carpet fibers, can actually scratch a hardwood finish over repeated use, so always switch to a hard-floor or bare-floor setting, or use a canister vacuum with a soft brush attachment instead.
Follow the vacuum with a damp mop, and the operative word is damp, using a microfiber mop head that’s been wrung out until it feels barely moist rather than wet. A microfiber flat mop with a spray bottle of hardwood-specific cleaner, applied in a light mist just ahead of the mop head, gives you excellent control over how much liquid actually touches the floor, which matters because standing water or excess liquid can seep into seams between boards and cause cupping or warping over time, especially in solid hardwood. Work in the direction of the wood grain in manageable sections, and always dry any residual dampness with a clean microfiber cloth immediately behind the mop rather than letting it air dry on its own.
Choosing the Right Hardwood Floor Cleaner
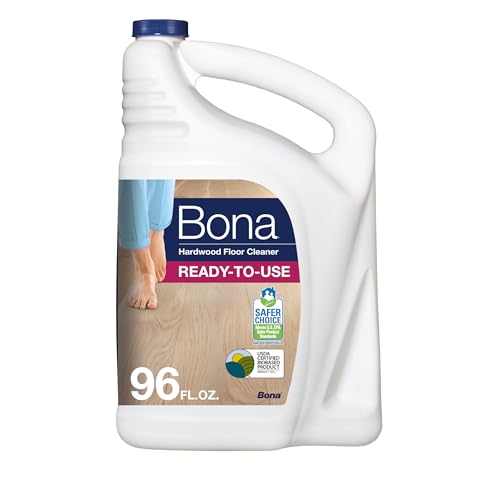
A pH-neutral cleaner specifically formulated for hardwood floors is the right everyday product, and it’s worth paying the modest premium, typically $10 to $20 for a bottle that lasts several months of regular use, over reaching for a generic all-purpose cleaner. Hardwood-specific formulas are designed to clean without leaving the residue or dulling film that all-purpose cleaners can build up on a finish over repeated applications, and many double as a light polish that maintains the finish’s original sheen rather than degrading it.
Steer clear of vinegar-and-water mixtures despite how often they show up in DIY advice, since vinegar’s acidity can dull a polyurethane finish over time with repeated use, slowly eating away at the topcoat’s sheen even though the effect isn’t visible after a single cleaning. Steam mops are another product to avoid on hardwood entirely, since the heat and moisture they introduce can seep between boards and into any hairline gaps in the finish, causing warping, cupping, or finish damage that’s expensive to repair. Oil soaps, once a common hardwood cleaning product, are also worth avoiding on modern polyurethane finishes, since they can leave a residue that dulls the finish and interferes with future refinishing work if you ever need to sand and recoat the floor.
Handling Spills and Spot Cleaning
Any liquid spill on a hardwood floor, water, wine, juice, pet accidents, should be wiped up immediately rather than left to sit, since even a finished floor’s protective topcoat has limits, and standing liquid that finds its way into a seam or a small finish imperfection can cause staining or wood damage within hours, not days. Keep a stack of microfiber cloths within easy reach of the kitchen and any other rooms prone to spills, and treat quick cleanup as a non-negotiable habit rather than something to get to later.
For scuffs and marks that don’t come up with a plain damp cloth, a small amount of hardwood cleaner applied directly to a microfiber cloth, rather than sprayed on the floor itself, and worked gently over the mark usually resolves it without resorting to anything abrasive. Avoid scouring pads, steel wool, or abrasive sponges entirely, since even though they might lift a stubborn mark, they’ll also create fine scratches in the finish that become more noticeable over time, especially under raking light from a window or lamp. If a mark won’t budge with a gentle approach, it’s better to consult a flooring professional than to escalate to harsher scrubbing that risks the finish.
Seasonal and Monthly Maintenance
Beyond the weekly routine, it’s worth doing a more thorough inspection monthly, checking for any areas where the finish looks dull, scratched, or where boards seem to be separating or cupping, since catching these issues early often means a simple screen-and-recoat rather than a full sand-and-refinish down the road. A screen-and-recoat, which lightly abrades the existing finish and applies a fresh topcoat without sanding down to bare wood, typically costs $1.50 to $3 per square foot and can be done every three to five years on a well-maintained floor to keep the protective layer fresh.
Humidity control matters more than most homeowners realize for hardwood longevity. Solid hardwood expands and contracts with seasonal humidity changes, and keeping indoor humidity in the range of roughly 35 to 55 percent year-round, using a humidifier in dry winter months and a dehumidifier in humid summer months if needed, minimizes the gapping and cupping that comes from extreme swings. This isn’t a cleaning task exactly, but it’s part of the broader maintenance picture that keeps a hardwood floor performing well between the more visible cleaning tasks.
Building a Routine That Actually Sticks
The households I see with the best-looking hardwood floors years down the line aren’t necessarily the ones spending the most money on premium cleaning products, they’re the ones with a consistent, low-effort routine: a quick daily sweep or vacuum of high-traffic zones, a weekly vacuum-and-damp-mop with a proper hardwood cleaner, immediate attention to spills, and an occasional deeper look for early signs of wear. None of these steps individually take more than a few minutes, but strung together as a habit, they add up to a floor that can genuinely go a decade or more before needing any refinishing work at all.
If you’re starting fresh with a new hardwood installation or trying to rescue a floor that’s been neglected, don’t try to overhaul your entire cleaning approach overnight. Start with the walk-off mats and daily grit removal, since that single change addresses the majority of long-term finish damage, then layer in the weekly damp-mop routine with a proper pH-neutral hardwood cleaner. Get those two habits locked in, and the rest of a solid maintenance routine follows naturally.
Prefer to explore on your own?
See how new flooring looks in your actual room in seconds — free, no signup.
Try the free Floor Studio →