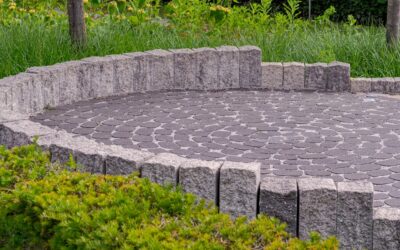
A brick patio that heaves, sinks, and grows weeds in two summers wasn’t laid wrong on the surface; it failed underground. Learning how to lay a brick patio correctly is 80 percent base preparation and 20 percent the satisfying part where you set the bricks. Get the excavation, gravel, and sand layers right, and you’ll have a patio that stays flat and level for decades. Skip them, and no amount of careful brick-laying will save it. This is a doable weekend-or-two DIY project for most homeowners, and here’s the full process.
Part of our Decks & Outdoor guide — explore the full guide →
- Tools and Materials You'll Need
- Step 1: Plan and Mark the Layout
- Step 2: Excavate the Area
- Step 3: Build and Compact the Gravel Base
- Step 4: Screed the Sand Layer
- Step 5: Lay the Bricks
- Step 6: Cut Bricks to Fit the Edges
- Step 7: Install Edging
- Step 8: Lock the Joints with Polymeric Sand
- Estimating Materials and Cost
- Common Mistakes to Avoid
- Maintaining Your New Patio
Tools and Materials You’ll Need
Gather everything before you dig so you’re not running to the store mid-project.
- Patio pavers or clay bricks (calculate square footage plus 10 percent for cuts and breakage)
- Crushed gravel base (3/4-inch road base or paver base)
- Coarse leveling sand and polymeric jointing sand
- Landscape fabric, plastic or metal paver edging, and edging spikes
- Plate compactor (rentable), rubber mallet, masonry saw or brick splitter
- Shovel, wheelbarrow, level, two 1-inch screed pipes, a straight 2×4, and string lines with stakes
Step 1: Plan and Mark the Layout
Decide on the size and shape, then mark the perimeter with stakes and string. Standard brick patios are most economical as rectangles, but you can curve edges with flexible edging. Check the slope: the patio must drain away from your house at roughly 1/4 inch of fall per foot to prevent water pooling against the foundation. Set your string lines to reflect that gentle slope before you dig.
Call 811 to have underground utilities marked before any excavation. It’s free, it’s the law in most areas, and it can save your life.
Step 2: Excavate the Area
Dig out the marked area to a depth that accounts for all your layers: typically 7 to 9 inches total for a standard patio. That’s about 4 to 6 inches of compacted gravel base, 1 inch of sand, plus the thickness of your brick. Keep the excavation bottom even and follow the same drainage slope you’ll want on the finished surface.
Remove all sod, roots, and soft soil. Lay landscape fabric across the compacted soil to suppress weeds and keep the gravel from migrating into the dirt below.
Step 3: Build and Compact the Gravel Base
This is the most important step. Add crushed gravel in 2-inch layers, wetting each layer lightly and running the plate compactor over it before adding the next. Compacting in thin lifts is what creates a rock-solid base; dumping it all at once and compacting the top leaves loose material below that will settle later.
Check the slope as you build with a level on a long 2×4. You want the finished gravel surface to mirror the drainage pitch and sit roughly 1 inch below your final brick height plus the sand layer. Aim for 4 to 6 inches of well-compacted base, more if your soil is soft or you live where the ground freezes.
Step 4: Screed the Sand Layer
Lay two 1-inch-diameter pipes parallel across the gravel as screed guides. Pour coarse sand between them, then drag your straight 2×4 across the pipes to create a perfectly flat 1-inch sand bed. Remove the pipes and fill the channels with sand, smoothing by hand.
Do not walk on or compact the screeded sand. The whole point is a smooth, undisturbed bed for the bricks to nestle into. Work in sections you can reach without stepping on the finished sand.
Step 5: Lay the Bricks
Start in one corner, ideally against a fixed edge like the house or a rigid border, and work outward. Set each brick straight down into the sand and tap it level with a rubber mallet, keeping joints tight and consistent. Use string lines to keep your courses straight.
Popular patterns include running bond (the classic offset brick look), herringbone (the strongest, best for high-traffic and driveways), and basketweave (a traditional, decorative choice). Herringbone resists shifting better than any other pattern, which is why it’s the pro favorite for surfaces that will see real use.
Step 6: Cut Bricks to Fit the Edges
You’ll inevitably need partial bricks along the perimeter. Mark the cut, then use a masonry saw with a diamond blade or a brick splitter for clean results. Always wear safety glasses, hearing protection, and a dust mask, and wet-cut when possible to control silica dust. Test-fit each cut piece before tapping it into place.
Step 7: Install Edging
Edge restraint is what keeps the whole field of bricks from spreading apart over time. Install plastic or metal paver edging tight against the outer bricks and drive 10-inch spikes through it into the base every foot or so. Without solid edging, the perimeter bricks creep outward, the pattern opens up, and the patio fails.
Step 8: Lock the Joints with Polymeric Sand
Sweep polymeric jointing sand across the surface, working it into every joint with a broom. Tamp with the plate compactor (use a protective mat to avoid scratching) to settle the sand, then sweep in more until the joints are full. Mist the surface lightly per the product directions; the polymer activates with water and hardens, locking the bricks together and blocking weeds and ants.
Sweep off all excess before it dries, or you’ll be left with a hazy film on the brick faces.
Estimating Materials and Cost
Plan your quantities before you shop. Measure the length and width to get square footage, then add 10 percent for cuts and breakage, more for herringbone or diagonal patterns. For the base, a rule of thumb is that one cubic yard of gravel covers about 80 to 100 square feet at a 4-inch depth, and you’ll need roughly 1 inch of bedding sand on top.
Cost-wise, a DIY brick patio typically runs $8 to $15 per square foot in materials, while hiring a pro pushes the installed price to $15 to $30 per square foot or more. Renting a plate compactor for a day costs around $60 to $100 and is non-negotiable for a base that won’t settle. Buying a few extra bricks now, from the same lot, gives you matching replacements down the road when dye lots shift.
Common Mistakes to Avoid
Most failed brick patios trace back to a handful of shortcuts. Skipping proper compaction is the worst offender; a base that isn’t compacted in thin layers will settle unevenly within a year. Forgetting the drainage slope causes water to pool, leading to staining, ice, and erosion. Omitting edge restraint lets the bricks spread and the pattern open up over time.
Other avoidable errors include using the wrong sand (fine masonry sand instead of coarse bedding sand, or regular sand instead of polymeric in the joints), digging too shallow so there’s no room for an adequate base, and walking on the screeded sand before laying. Take the base and drainage seriously and you sidestep nearly every problem that plagues amateur patios.
Maintaining Your New Patio
A properly built brick patio needs little upkeep. Rinse it occasionally, pull any stray weeds that sprout at the edges, and top off the polymeric sand every few years as it slowly erodes. If a brick ever sinks, you can lift it, add sand beneath, and re-set it without disturbing the rest. Take your time on the base, respect the drainage slope, and lock those joints, and your brick patio will stay flat, tight, and handsome for the long haul.