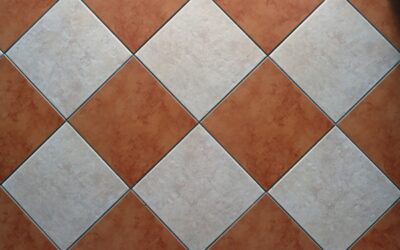
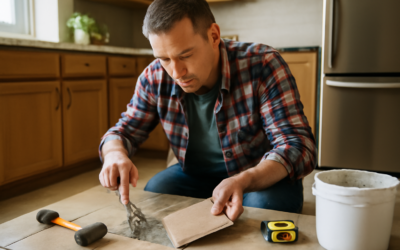
How to remove grout is one of the most common questions homeowners face when tile grout becomes cracked, discolored, or starts crumbling away. Whether you need to regrout a shower, swap grout colors, or repair damage before it spreads to the tiles themselves, removing old grout is a manageable DIY project when you use the right tools and technique.
Part of our Tile & Grout guide — explore the full guide →
This guide walks you through every step — from choosing the correct removal tool to protecting your tiles, clearing debris, and regrouting the joints for a clean, professional finish.
- When to Remove Grout
- Tools for Grout Removal
- Grout Removal Tool Comparison
- How Deep to Remove Grout
- How to Remove Cement-Based Grout (Step-by-Step)
- How to Remove Epoxy Grout (Step-by-Step)
- Protecting Your Tiles During Grout Removal
- Cleanup After Grout Removal
- Regrouting After Removal
- Frequently Asked Questions
- Can I remove grout without damaging the tile?
- How long does it take to remove grout?
- Do I need to remove all the grout or just the damaged parts?
- What is the best tool for removing grout?
- Can I use a chemical grout remover instead of mechanical removal?
- How soon can I regrout after removing old grout?
When to Remove Grout
Not every grout problem requires full removal. Understanding when removal is necessary — and when a simpler fix will do — saves you significant time and effort.
Regrouting deteriorated joints. When grout is cracked, crumbling, or falling out in chunks, surface repairs will not hold. The old material must come out so fresh grout can bond directly to the sides of the tiles. Crumbling grout is often caused by improper mixing during original installation, excessive water exposure, or natural aging after 15 to 20 years.
Changing grout color. If you want to switch from white grout to a dark charcoal (or vice versa), staining or grout pens only work on sanded cement grout in good condition. For a true color change — especially going from dark to light — removal and regrouting is the only reliable option.
Cracked or crumbling grout. Hairline cracks in a few spots can sometimes be patched with grout caulk or a matching repair product. But when cracking is widespread across a floor or wall, it usually indicates a deeper issue like subfloor movement or missing expansion joints, and the grout needs to come out so you can address the root cause before regrouting.
Mold and mildew deep in grout. Surface mold on cement grout can often be cleaned with bleach or hydrogen peroxide. However, if mold has penetrated deep into unsealed grout — common in showers — the only permanent solution is removal and replacement with fresh, properly sealed grout. See our guide on how to clean grout to determine whether cleaning alone will solve your problem.
Tile replacement. When replacing one or more damaged tiles, you must remove the grout around those tiles first to avoid cracking adjacent tiles during removal.
Tools for Grout Removal
The right grout removal tool depends on the grout type, joint width, the area you are covering, and your comfort level with power tools.
Manual grout saw. A grout saw is the simplest and most affordable option — a small handle with a carbide-tipped blade designed to scrape grout from joints. Manual grout saws cost $5 to $15 and give you maximum control, making them ideal for small repairs, delicate tiles, or tight corners. The trade-off is speed: removing grout by hand is slow and physically tiring over large areas.
Oscillating multi-tool. An oscillating tool fitted with a grout-removal blade is the best all-around option for most homeowners. It vibrates rapidly rather than spinning, which reduces the risk of chipping tiles. Blades are available in different widths to match common grout joint sizes. An oscillating tool handles a bathroom floor in one to two hours versus an entire day by hand.
Dremel rotary tool. A Dremel or similar rotary tool with a grout-removal attachment spins at high RPM and can cut through even the hardest grout quickly. However, rotary tools require a steady hand — the spinning bit can easily chip or crack tile edges if you slip. A Dremel is best for experienced DIYers or for tackling stubborn epoxy grout that resists other methods.
Reciprocating saw with grout blade. For very large commercial projects, a reciprocating saw with a thin carbide grout blade can speed up the process. This is overkill for most residential jobs and carries the highest risk of tile damage.
Grout Removal Tool Comparison
| Tool | Cost | Speed | Tile Safety | Best For |
|---|---|---|---|---|
| Manual grout saw | $5 – $15 | Slow | Excellent | Small areas, delicate tiles |
| Oscillating multi-tool | $50 – $150 (tool + blade) | Fast | Very good | Most residential projects |
| Dremel rotary tool | $40 – $100 (tool + bit) | Very fast | Moderate | Epoxy grout, experienced users |
| Reciprocating saw | $80 – $200 | Very fast | Low | Large commercial areas |
How Deep to Remove Grout
You do not need to remove grout all the way to the subfloor or backer board in most cases. The goal is to remove enough old material so new grout can bond securely.
Minimum depth: Remove grout to at least two-thirds the depth of the tile. For a standard 3/8-inch-thick tile, that means removing approximately 1/4 inch of grout depth. This gives new grout enough surface area on the tile edges to create a strong mechanical bond.
For crumbling grout: If the grout is soft and disintegrating, it will often come out easily down to the full depth. Remove everything that is loose or powdery — do not leave compromised material behind for new grout to sit on top of.
For color changes: You need to remove all visible old grout to prevent the previous color from bleeding through. Aim for full depth removal in this scenario.
How to Remove Cement-Based Grout (Step-by-Step)
Cement-based grout (both sanded and unsanded) is the most common type in residential installations and the easiest to remove. Follow these steps for clean, efficient removal.
Step 1: Prepare the area. Clear the room of furniture and rugs. Lay drop cloths over nearby surfaces — grout removal creates significant dust. If working in a bathroom, cover the drain with tape to prevent debris from entering the plumbing. Open windows or set up a fan for ventilation.
Step 2: Soften the grout (optional but helpful). Spray the grout lines with warm water and let it soak for 15 to 20 minutes. Dampening cement grout softens it slightly and reduces airborne dust during removal. Do not oversaturate — standing water makes it harder to see your progress.
Step 3: Start in the center of a grout line. Whether using a manual saw or power tool, always begin your cut in the middle of a grout joint — never at the edge where grout meets tile. Position your blade so it runs down the center of the joint.
Step 4: Score the center channel. Make a shallow pass along the full length of the grout line, cutting a center groove approximately 1/8 inch deep. This center channel guides subsequent passes and prevents your tool from wandering into the tile face.
Step 5: Deepen the cut gradually. Make additional passes to deepen the channel to at least two-thirds of the tile depth. Let the tool do the work — applying excessive pressure increases the risk of chipping tiles. With an oscillating tool, use a steady, moderate pace. With a manual saw, use short back-and-forth strokes.
Step 6: Clean out the edges. After removing the center material, angle your tool or saw slightly to remove grout remaining along each tile edge. Work carefully here — this is where tile damage is most likely. A manual grout saw is useful for fine edge cleanup even if you used a power tool for the bulk removal.
Step 7: Remove cross-joint grout. Clean out the intersections where grout lines meet. These spots often require a pointed tool or the corner of a grout saw blade because power tools can struggle to reach into the junction cleanly.
Step 8: Vacuum and inspect. Vacuum all loose debris from the joints using a shop vacuum with a crevice attachment. Inspect every joint to ensure you have reached adequate depth and that no loose material remains. Run a flathead screwdriver along each joint — if chunks break free easily, remove more.
How to Remove Epoxy Grout (Step-by-Step)
Epoxy grout is significantly harder than cement grout and requires a more aggressive approach. It does not soften with water and resists most chemical grout removers.
Step 1: Identify the grout type. Epoxy grout has a plastic-like sheen, feels hard and smooth (not gritty like sanded cement), and does not absorb water. If you scratch it with a nail and it barely marks, you are dealing with epoxy.
Step 2: Use a rotary tool. A Dremel with a diamond-tipped grout removal bit is the most effective tool for epoxy grout. Oscillating tools and manual saws will work but take considerably longer and wear out blades quickly.
Step 3: Apply epoxy grout remover (optional). Commercial epoxy grout removers (such as Fila Epoxy Pro or Lithofin KF) can soften cured epoxy when allowed to dwell for several hours. Apply the remover, cover with plastic wrap to prevent evaporation, and wait the manufacturer’s recommended time before attempting mechanical removal.
Step 4: Work in short sections. Epoxy generates more heat during removal than cement grout. Work in 6-inch sections, allowing the tool and tiles to cool between passes. Overheating can crack tiles or damage the tool bit.
Step 5: Use fresh bits. Diamond bits dull faster on epoxy. Have spare bits on hand and swap them when cutting slows noticeably. A dull bit requires more pressure, increasing the chance of tile damage.
Step 6: Clean and inspect. Vacuum joints and check depth. Epoxy remnants on tile edges can prevent new grout from bonding — scrape any remaining film with a sharp utility knife or razor blade.
Protecting Your Tiles During Grout Removal
Tile damage is the biggest risk during grout removal. These precautions minimize the chance of chipping, cracking, or scratching your tiles.
Use painter’s tape. Apply painter’s tape along both sides of each grout line before starting. The tape creates a buffer that catches minor tool slips and protects the tile glaze from scratches. This is especially important for glass tile and polished porcelain.
Match blade width to joint width. If your grout joints are 1/8 inch wide, use a 1/16-inch blade and make multiple passes rather than forcing a wider blade into the joint. A blade that is too wide will inevitably contact the tile edges.
Keep tools sharp. Dull blades require more pressure and are more likely to skip or jump, hitting tile surfaces. Replace blades and bits at the first sign of dulling.
Reduce speed on power tools. Start at a lower speed setting and increase only as needed. Higher speeds remove grout faster but give you less control and more vibration.
Work with good lighting. Set up a work light positioned to cast shadows into the grout joints. Good lighting lets you see exactly where your blade is cutting and spot potential problems before they become chips.
Cleanup After Grout Removal
Thorough cleanup is essential before regrouting. Debris left in the joints prevents new grout from bonding properly.
First pass: Shop vacuum. Run a shop vacuum with a crevice attachment along every joint. The suction removes the bulk of loose dust and small grout fragments.
Second pass: Damp sponge wipe. Wipe the tile surface and grout lines with a wrung-out sponge to remove fine dust. Rinse the sponge frequently. Do not flood the joints with water — excess moisture in the joints can weaken new grout if you regrout too soon.
Third pass: Compressed air (optional). A can of compressed air or a small air compressor with a nozzle can blow remaining particles out of deep or narrow joints that vacuuming and sponging missed.
Let joints dry completely. Allow the cleaned joints to dry for at least 24 hours before applying new grout. Moisture trapped under fresh grout can cause adhesion failure and premature cracking.
Regrouting After Removal
Once the old grout is removed and the joints are clean and dry, you are ready to regrout. For a detailed walkthrough, see our complete guide on how to grout tile.
Choose the right grout type. For floor tiles with joints wider than 1/8 inch, use sanded grout. For wall tiles and joints 1/8 inch or narrower, use unsanded grout. For showers and areas with heavy water exposure, consider epoxy grout for its superior waterproofing — despite being harder to apply and remove later.
Mix to the right consistency. Follow the manufacturer’s mixing ratios exactly. Grout should have the consistency of thick peanut butter — stiff enough to hold its shape but smooth enough to pack into joints with a float. Let the mixed grout slake (rest) for 10 minutes, then remix briefly before application.
Apply with a grout float. Hold the float at a 45-degree angle and push grout diagonally across the joints. Working diagonally prevents the float edge from digging grout out of the joints. Pack the grout firmly — voids and air pockets under the surface will crumble later.
Clean excess within the working time. Wipe excess grout from the tile surface with a damp (not wet) sponge within 15 to 30 minutes of application. Letting grout haze dry too long makes cleanup extremely difficult, especially on textured tile.
Seal the new grout. After the grout has cured for 48 to 72 hours (check manufacturer specs), apply a penetrating grout sealer to protect against stains, moisture, and mold. Reapply sealer every 12 months in wet areas like showers.
Explore our full range of tile flooring options to see what is available for your next project.
Frequently Asked Questions
Can I remove grout without damaging the tile?
Yes, with the right tool and careful technique. Use a manual grout saw or oscillating tool, start cuts in the center of the joint, and apply painter’s tape along tile edges for extra protection. Avoid rotary tools on delicate or thin tiles.
How long does it take to remove grout?
A typical bathroom floor (40 to 60 square feet) takes 2 to 4 hours with an oscillating tool or 6 to 10 hours with a manual grout saw. Epoxy grout doubles these estimates. Larger rooms or intricate mosaic tile patterns take proportionally longer.
Do I need to remove all the grout or just the damaged parts?
For spot repairs, you only need to remove grout in the damaged sections — plus a few inches beyond the damage in each direction so the new grout blends with the old. For color changes or widespread deterioration, remove all the grout for a uniform result.
What is the best tool for removing grout?
An oscillating multi-tool with a carbide grout blade is the best choice for most residential projects. It balances speed, control, and tile safety. For small jobs, a manual grout saw works well. For epoxy grout, a Dremel rotary tool with a diamond bit is most effective.
Can I use a chemical grout remover instead of mechanical removal?
Chemical removers can soften cement grout and make scraping easier, but they rarely eliminate the need for mechanical removal entirely. They work best as a pre-treatment before using a saw or power tool. Chemical removers are generally ineffective on epoxy grout without extended dwell times.
How soon can I regrout after removing old grout?
Wait at least 24 hours after removal and cleanup to ensure the joints are completely dry. If you used water or a chemical remover during the process, extend drying time to 48 hours. Moisture in the joints weakens the bond of new grout.
Prefer to explore on your own?
See how new flooring looks in your actual room in seconds — free, no signup.
Try the free Floor Studio →