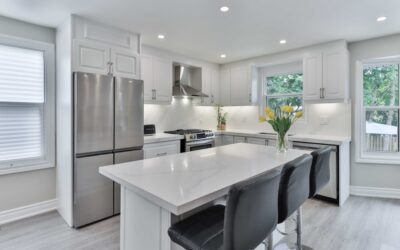
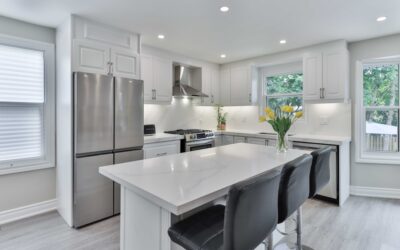
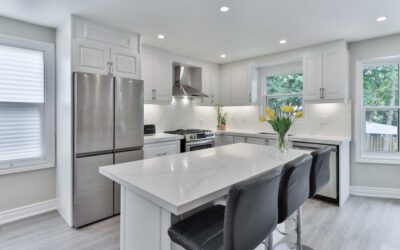
A successful kitchen cabinet installation is the difference between a kitchen that looks custom-built and one where doors sag, countertops rock, and gaps show at every seam. The cabinets themselves may be flawless from the factory, but they only look right if they are hung level, plumb, and firmly anchored to the studs. This guide covers the full process, the tools you need, realistic costs, and the errors that trip up first-timers so you can decide whether to DIY or hire out.
Part of our Kitchen Remodeling guide — explore the full guide →
- Planning and Measuring First
- Locating and Marking Studs
- Tools and Materials You Will Need
- Hanging the Upper Cabinets First
- Setting the Base Cabinets
- Handling Plumbing, Electrical, and Fillers
- Cost: DIY Versus Hiring a Pro
- Common Mistakes That Ruin the Job
- Final Adjustments and Finishing
- Stock, Semi-Custom, and Custom Cabinets
- Preparing the Room Before You Start
- Countertop Coordination
Planning and Measuring First
Everything starts with an accurate layout. Measure the room and transfer your cabinet plan onto the walls with a pencil. Find the highest point of the floor using a level and a long straightedge, because floors are never truly flat, and mark from that point. Standard base cabinets are 34.5 inches tall; with a countertop they reach 36 inches. Upper cabinets typically hang so the bottom sits 54 inches off the floor, leaving an 18-inch gap above a standard counter. Draw a level line at the top of the base cabinets and another for the bottom of the uppers.
Locating and Marking Studs
Cabinets must anchor into framing, not just drywall. Use a stud finder to locate every stud in the run and mark centers with a vertical pencil line above and below your layout lines. Studs are usually 16 inches on center. Marking them clearly now prevents you from fishing for wood later while holding a heavy cabinet overhead.
Tools and Materials You Will Need
- 4-foot level and a laser level
- Stud finder, tape measure, pencil, chalk line
- Drill/driver and a set of 2.5-inch and 3-inch cabinet screws (structural screws, not drywall screws)
- Clamps to hold adjacent cabinets flush during fastening
- Shims (composite or cedar) for leveling
- A ledger board (a straight 1×4) to support uppers during hanging
- Jigsaw for cutting access holes for plumbing and electrical
Never use drywall screws; they are brittle and can shear under load. Use cabinet or structural screws with washer-style heads.
Hanging the Upper Cabinets First
Install uppers before bases so you are not leaning over base cabinets to reach the wall. Screw a temporary ledger board along your upper-cabinet bottom line to hold the weight while you fasten. Start in a corner. Lift the first cabinet onto the ledger, check it for level and plumb, and drive screws through the thick mounting rail at the back into the studs, top and bottom. Two screws per stud is standard. Clamp the next cabinet to the first, align the face frames perfectly flush, and screw the frames together before anchoring to the wall. Repeat down the run, checking level constantly.
Setting the Base Cabinets
Begin base cabinets in the same corner. Slide the first cabinet into place and use shims underneath and behind to bring it to your level line in both directions. This is where floor variation shows up; expect to shim. Once level, screw through the back rail into studs. Join adjacent bases by clamping face frames flush and screwing them together, then continue. Check that the tops form one continuous level plane, because your countertop depends on it. Trim protruding shims flush with a utility knife.
Handling Plumbing, Electrical, and Fillers
Sink base cabinets and any cabinet over an outlet need access holes cut with a jigsaw before you set them. Measure carefully from a fixed reference and transfer to the cabinet back. Filler strips bridge gaps where a run meets a wall or where cabinets do not divide evenly into the space; rip them to width and scribe them to the wall for a tight fit. A well-scribed filler is a hallmark of professional work.
Cost: DIY Versus Hiring a Pro
Installation labor typically runs $200 to $500 per cabinet installed by a professional, or roughly $2,000 to $8,000 for an average kitchen depending on cabinet count and complexity. Doing it yourself saves that labor but requires a full weekend or two, a helper for lifting uppers, and confidence with a level. The cabinets themselves range widely: stock cabinets run $100 to $300 per unit, semi-custom $150 to $650, and custom well beyond. If your walls and floors are badly out of square, the leveling work rewards professional experience.
Common Mistakes That Ruin the Job
- Not finding the high point of the floor first, which throws off every base cabinet.
- Skipping the ledger board, making uppers nearly impossible to hold level solo.
- Using drywall screws that shear under the load.
- Failing to keep face frames flush before screwing cabinets together, leaving visible steps.
- Forgetting to check for plumb front-to-back, so doors swing open or shut on their own.
- Cutting plumbing holes too small or in the wrong spot, forcing ugly patches.
Final Adjustments and Finishing
Once all boxes are anchored, hang the doors and adjust the hinges. Modern European hinges adjust in three directions, letting you align every door and even the reveals. Install drawer fronts and check that gaps are consistent. Add toe-kick trim, crown molding at the top if desired, and touch-up caulk where cabinets meet walls. Only after everything is level and secure should a countertop be measured and templated, since the counter can only be as flat as the cabinets beneath it.
Stock, Semi-Custom, and Custom Cabinets
The type of cabinet you install affects the process. Stock cabinets arrive in fixed sizes (usually 3-inch increments) either assembled or as ready-to-assemble flat packs; you fill odd gaps with filler strips. Semi-custom cabinets offer more sizes, finishes, and modifications, giving a tighter fit. Custom cabinets are built to your exact wall dimensions, minimizing fillers but costing the most. Flat-pack (RTA) cabinets save money but require careful assembly on a flat surface before installation; a rushed or square-out-of-square box will fight you on the wall. Whichever you choose, inspect every box for damage and confirm you have all doors, shelves, and hardware before you start, because a missing part discovered mid-install stalls the whole job.
Preparing the Room Before You Start
Good prep saves hours. Remove old cabinets, patch and repair the drywall, and paint the walls before installing new cabinets, since painting around them later is tedious. Confirm the location of plumbing supply and drain lines and electrical outlets, and have any rough-in changes done ahead of time. If you are installing a new floor, decide whether it goes in before or after the cabinets; installing flooring first is common, but installing cabinets first and flooring up to them can save material. Acclimate wood cabinets to the room for a day or two so they adjust to humidity. Finally, clear a staging area to unbox and organize cabinets in installation order.
Countertop Coordination
Cabinets and countertops are a team. Do not order or template the countertop until the base cabinets are fully installed, level, and secure, because the fabricator measures off the actual installed boxes. Stone countertops (granite or quartz) are heavy and unforgiving of an out-of-level base; a rocking counter or a visible gap at the backsplash traces directly back to uneven cabinets. Leave the specified overhang, and make sure sink and cooktop cutout locations align with the cabinets below. If you are installing a laminate counter yourself, the same rule applies: a flat, level cabinet run is the foundation everything else depends on.
Kitchen cabinet installation rewards patience and a fanatical attention to level and plumb. Take the time on layout, anchor into real framing, and keep every face frame flush, and your finished kitchen will look like it was built by a pro, whether or not it was.