
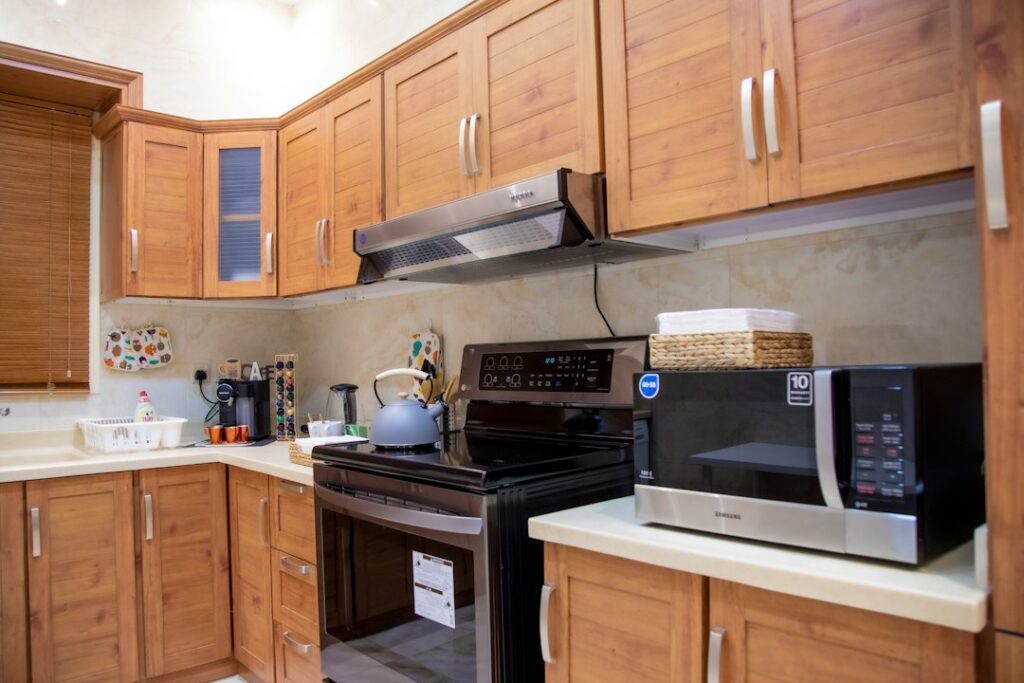
Ripping out solid wood cabinets to replace them with new boxes of the same quality is often a $15,000 mistake. Kitchen cabinet restoration takes the sturdy frames you already own and brings back the finish, tightens the joints, and swaps the hardware for a fraction of that cost, usually a few hundred dollars in materials and a couple of weekends of work. If your cabinet boxes are sound and the layout works, restoring beats replacing almost every time. Here is how to do it right, step by step.
Part of our Kitchen Remodeling guide — explore the full guide →
Restore, Reface, or Replace?
Before you sand a single door, decide which path fits your cabinets, because they solve different problems.
- Restoration: clean, repair, and refinish the existing wood, best when the finish is worn but the wood is solid
- Refacing: new door and drawer fronts plus veneer on the frames, for when the boxes are good but you want a new style
- Replacement: all-new cabinets, reserved for water-damaged, particleboard, or badly laid-out kitchens
Restoration makes the most sense for real wood cabinets with grease buildup, faded stain, or a tired finish. If the boxes are swollen particleboard or crumbling at the base, no amount of refinishing will save them.
Start With a Deep Clean
Years of cooking leave an invisible film of grease on every surface, and finish will not bond over it. Begin by removing all the doors and drawers, labeling each with painter’s tape so they return to their exact openings. Then scrub every surface with a degreaser or a mix of warm water and TSP substitute.
Pay special attention to the areas around the stove and the edges where hands touch the cabinets daily. Rinse with clean water and let everything dry fully. This single step decides whether your new finish sticks or peels within a year.
Make the Repairs
With the cabinets clean, inspect closely for the small failures that make old cabinets feel worn out. Fixing them now sets up a flawless finish later.
- Re-glue loose joints and clamp them until the glue sets
- Fill dents, gouges, and old hardware holes with wood filler, then sand flush
- Tighten or replace worn hinges and drawer slides
- Sand out water rings and rough spots
Take your time filling old hinge or pull holes if you are changing hardware layout. A filled hole that is sanded smooth and refinished disappears completely, while a lazy patch shows through the finish forever.
Sand for Adhesion
You do not always need to strip cabinets to bare wood. If you are refinishing with a similar stain or applying paint, a thorough scuff-sand with 150-grit paper gives the new coating something to grip. Sand strip only when you want to change the wood tone dramatically or the old finish is peeling.
Work with the grain, not across it, and wipe away every trace of dust with a tack cloth before you apply anything. Dust is the enemy of a smooth finish, and it hides in corners and profiled edges.
Refinish or Repaint
Now comes the transformation. Your two main directions are keeping the wood look or going painted.
- Re-stain and topcoat: apply gel stain to even out color, then two to three coats of polyurethane or lacquer for durability
- Paint: prime with a bonding primer, then two coats of a hard enamel or cabinet-grade paint in satin or semi-gloss
For painted cabinets, a quality enamel that levels smooth is worth the extra cost, since brush marks stand out on a flat door. Spray if you can, but a foam roller and a fine brush give excellent results with patience. Let each coat cure fully; rushing recoat times causes the finish to stay soft and mark easily.
New Hardware Changes Everything
Fresh knobs and pulls are the cheapest, highest-impact upgrade in the whole project. Even if you keep the same finish on the wood, swapping dated brass pulls for brushed nickel or matte black instantly modernizes the look. Use a simple drilling jig to keep new holes perfectly aligned. While the hardware is off, add soft-close hinges or drawer dampers for a touch of luxury that costs little and makes the kitchen feel new.
Reassemble and Adjust
Rehang the doors using your tape labels so each returns to its home opening. Modern European hinges have three adjustment screws that let you fine-tune each door up and down, side to side, and in and out. Spend a few minutes evening out the gaps so every door lines up with its neighbors. A row of perfectly aligned doors is what makes a restored kitchen read as professional rather than DIY.
Tools and Materials to Gather
Before you start, collect everything so you are not stopping mid-project to shop. A restoration needs modest supplies, most of which you may already own.
- A screwdriver or drill for removing doors, hinges, and hardware
- Degreaser or TSP substitute, plus sponges and rags
- Wood glue, clamps, and wood filler for repairs
- Sandpaper in 150 and 220 grit, plus a sanding block
- Primer and enamel paint, or gel stain and topcoat
- A quality brush, foam roller, or sprayer, and new hardware
Budget roughly $150 to $400 for materials on an average kitchen, depending on whether you paint or re-stain and how much new hardware you add. That figure is a small fraction of what replacement cabinets cost.
Common Mistakes to Avoid
A few missteps undo an otherwise careful job. Skipping the degreasing step is the biggest one, since finish will not bond to greasy wood. Rushing the recoat times is another; enamel that is painted over before it cures stays soft and marks easily. Finally, do not ignore the door adjustment at the end. Ten minutes with the hinge screws is what makes the difference between cabinets that look aligned and professional and ones that betray the DIY effort.
What You Save and Gain
A full kitchen cabinet restoration typically runs a few hundred dollars in cleaner, filler, finish, and hardware, against many thousands for replacement cabinets of equal quality. Beyond the money, you keep the solid wood construction that new budget cabinets rarely match. Clean thoroughly, repair honestly, refinish with patience, and finish with new hardware, and you end up with a kitchen that looks freshly remodeled on a fraction of the budget, all from the good bones you already had.


