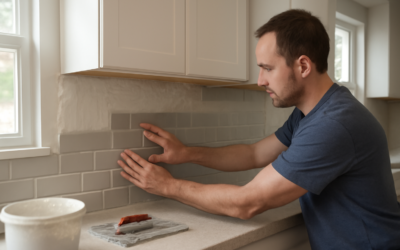
The difference between a tile job that looks custom and one that looks amateur usually comes down to what happens before a single tile goes down. Kitchen tile installation rewards preparation more than any other part of a remodel — a flat subfloor, the right mortar, and a smart layout will carry you further than fancy tile ever could. I’ve fixed too many DIY jobs that failed at the prep stage, so here’s the full process the way I run it on a real jobsite, for both floors and backsplashes.
Part of our Kitchen Remodeling guide — explore the full guide →
- Planning and Layout First
- What Kitchen Tile Installation Costs
- Tools and Materials You’ll Need
- Preparing the Surface
- Setting the Tile
- Grouting the Joints
- Sealing and Finishing
- Common Mistakes to Avoid
- How Long Kitchen Tile Installation Takes
- Choosing the Right Tile for a Kitchen
- Working Around Cabinets and Appliances
- Should You DIY or Hire a Pro?
Planning and Layout First
Before buying anything, measure the space and add 10 to 15 percent for cuts and waste — more if you’re running a diagonal or herringbone pattern. Snap chalk lines to find the center of the room and dry-lay a row of tile in both directions. The goal is to avoid a sliver cut smaller than half a tile against any wall or cabinet. Shift your starting lines so cuts fall in less visible spots, like under the toe-kick or against the least-seen wall.
For a backsplash, find the center of the main wall or the range, and plan so full tiles land at eye level and the cuts hide at the counter and upper cabinets.
While you’re upgrading the kitchen floor, it might be a good time to rethink the seating too. Swapping out old bar stools is one of those small changes that makes the whole room feel more pulled together.
We may earn a commission when you purchase through our links.
What Kitchen Tile Installation Costs
Doing it yourself, your main costs are tile plus materials. Ceramic runs $1 to $8 per square foot, porcelain $3 to $10, and natural stone $5 to $15 and up. Add roughly $1 to $2 per square foot for thinset, grout, and backer board. Hiring a pro adds $7 to $14 per square foot in labor, more for stone, mosaics, or intricate patterns. A typical 150 square foot kitchen floor runs $1,500 to $3,600 installed; a 30 square foot backsplash often lands between $600 and $1,500 installed because the detail work is slow.
Tools and Materials You’ll Need
- Tile wet saw (rent one for around $50 to $75 a day) and a nipper for curves
- 1/4 inch square-notch trowel for floors, 3/16 inch V-notch for small backsplash tile
- Modified thinset mortar (large-and-heavy-tile mortar for planks over 15 inches)
- Tile spacers (1/16 to 3/16 inch depending on look) and leveling clips for large format
- Cement backer board and screws, or an uncoupling membrane for floors
- Grout (sanded for joints over 1/8 inch, unsanded for tighter), float, sponge, and buckets
- Level, chalk line, notched trowel, margin trowel, and knee pads
Preparing the Surface
This is where jobs are won or lost. For a floor, the substrate must be flat, solid, and free of flex. Over a wood subfloor, install cement backer board in thinset and screw it down, or roll out an uncoupling membrane, which prevents subfloor movement from cracking your tile. Flatness matters: no more than 1/4 inch of variation over 10 feet for standard tile, and 1/8 inch over 10 feet for large format. Self-level or grind out any dips and humps first.
For a backsplash, the drywall just needs to be clean, dry, and sound. Turn off the power, remove outlet covers, and pull outlets forward to sit flush with the new tile thickness. Wipe off grease — kitchens are greasy, and mortar won’t grab an oily wall.
Setting the Tile
Mix thinset to a peanut-butter consistency and let it slake for 10 minutes, then remix. Work in sections small enough that the mortar stays wet and tacky — usually a few square feet at a time.
- Comb thinset onto the surface with the notched trowel held at a 45-degree angle, all ridges running the same direction.
- Back-butter larger tiles and any plank over 12 inches for full coverage — you want 80 percent minimum on dry areas, 95 percent in wet zones.
- Press each tile with a slight twist to collapse the ridges and seat it firmly.
- Set spacers at every joint and use leveling clips on large-format tile to fight lippage.
- Check level and flatness constantly with a straightedge across multiple tiles.
- Cut tiles at outlets, corners, and edges on the wet saw as you reach them.
Keep grout lines consistent — 1/16 to 1/8 inch is typical for backsplashes, 1/8 to 3/16 inch for floors. Wipe stray mortar off tile faces before it sets, and clear it out of the joints deep enough that grout has room.
Grouting the Joints
Wait 24 to 48 hours after setting so the mortar fully cures — grout too soon and you’ll trap moisture and shift tiles. Mix grout, then spread it diagonally across the joints with a rubber float, packing it in fully. Hold the float on edge and scrape off the excess, again working diagonally so you don’t dig grout back out of the lines.
After 15 to 20 minutes, wipe the surface with a damp (not wet) sponge in gentle circles, rinsing often. A haze will form — buff it off with a dry microfiber cloth once the grout has set a bit more. Don’t flood the joints with water while cleaning, or you’ll wash out the color and weaken the grout.
Sealing and Finishing
Let grout cure 48 to 72 hours, then apply a penetrating grout sealer — critical near the sink and stove where splashes and grease hit constantly. Natural stone tile itself also needs sealing; porcelain and glazed ceramic do not. Run a bead of color-matched flexible caulk (not grout) where the backsplash meets the countertop and in inside corners, because those joints move and rigid grout will crack there. Reinstall outlets and covers, and wait 24 hours before heavy use of a floor.
Common Mistakes to Avoid
- Skipping the dry layout and ending up with a sliver cut in the most visible spot
- Tiling over a bouncy or uneven subfloor — the number one cause of cracked tile and grout
- Grouting before the mortar cures
- Using rigid grout in corners and along the countertop instead of flexible caulk
- Wiping grout with a soaking sponge and washing the color out
How Long Kitchen Tile Installation Takes
Set realistic expectations, because rushing the cure times is how jobs fail. A backsplash is typically a two-day project for a DIYer: one day to set the tile, then a rest overnight, and grouting plus caulk the next day. A kitchen floor runs three to four days when you account for prepping and curing the backer board or membrane, a day of setting, a 24 to 48 hour cure, then grouting and sealing. Add drying time before you move the refrigerator and stove back into place. Professionals move faster, but even they can’t compress the mortar and grout cure times — those are chemistry, not labor.
Choosing the Right Tile for a Kitchen
Kitchens are high-traffic, high-spill, high-grease environments, so material matters. Porcelain is my default recommendation for floors because it’s dense, water-resistant, and rated hard enough to shrug off dropped pans and dragged bar stools — look for a PEI rating of 4 or 5 for floors. For slip resistance near the sink, choose a floor tile with a DCOF rating of 0.42 or higher. On backsplashes, ceramic, porcelain, and glass all work well and wipe clean of grease easily. Natural stone looks beautiful but demands sealing and stains from acidic splashes like lemon and tomato, so think twice before putting marble directly behind a cooktop.
Working Around Cabinets and Appliances
One detail that separates a clean job from a sloppy one: decide whether your floor tile runs under the cabinets or stops at them. In new construction, tiling the whole floor first and setting cabinets on top is cleanest. In a remodel with existing cabinets, tile up to the toe-kick and leave a small expansion gap at the walls, hidden by baseboard or shoe molding. Always leave a 1/4 inch gap around the perimeter and at any fixed object so the floor can expand and contract with temperature without buckling. Never grout tight against a wall or cabinet base.
Should You DIY or Hire a Pro?
A straightforward backsplash in standard subway tile is a realistic weekend DIY project and a great place to learn. A large floor, big-format planks, natural stone, or an intricate pattern is where I’d bring in a pro — the material cost is high, and a failed floor means tearing everything out. Whichever route you take, respect the prep and the cure times, and your kitchen tile installation will look sharp and hold up for decades of daily cooking, spills, and traffic.
Prefer to explore on your own?
See how new flooring looks in your actual room in seconds — free, no signup.
Try the free Floor Studio →