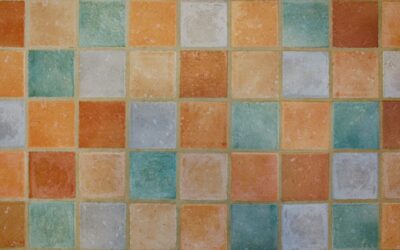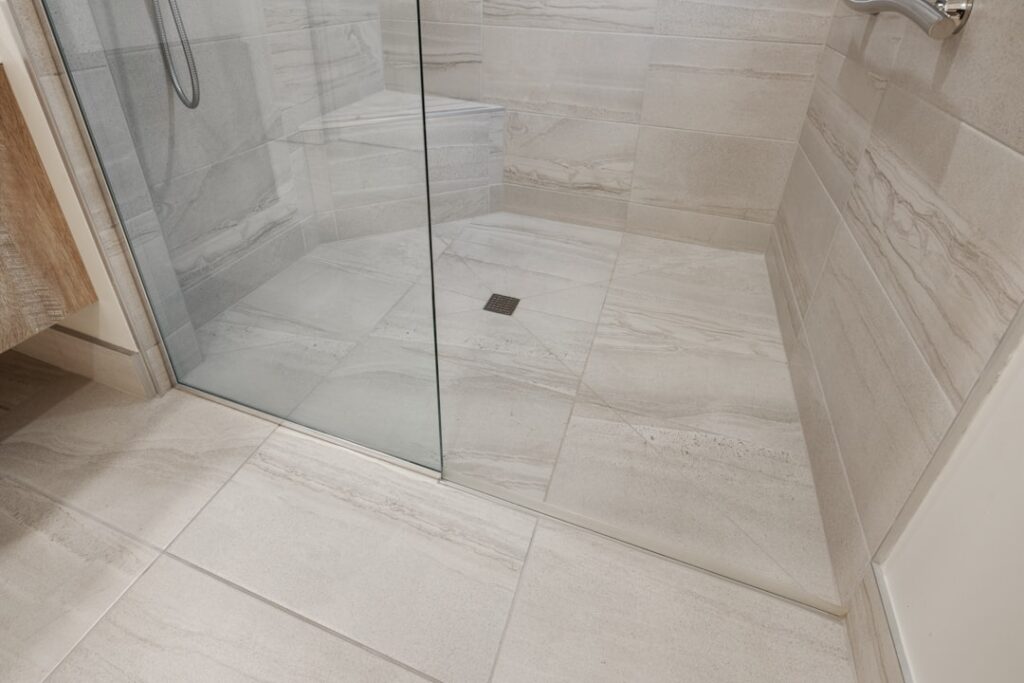
Nothing modernizes a bathroom floor faster than going big. Large format bathroom floor tile — anything with an edge of 15 inches or more, running up through 24×24, 12×24 planks, and dramatic 24×48 slabs — trades the busy grid of small tile for broad, uninterrupted planes of stone-look porcelain. Fewer grout lines mean a cleaner, more contemporary look, easier maintenance, and the illusion of a larger room. But those same big tiles are far less forgiving to install than a mosaic sheet, and the difference between a stunning floor and a lippage-riddled mess comes down to substrate prep and mortar technique.
Part of our Bathroom Remodeling & Flooring guide — explore the full guide →
I have set a lot of these floors, and I can tell you the tile itself is the easy part. In this guide I will cover the design reasons to go large, then dig into the real install requirements: substrate flatness, large-format medium-bed mortar, trowel selection, back-buttering, and the leveling clip systems that keep the surface dead flat. Get the prep right and large format is a joy; skip it and every high corner will haunt you.
Why Large Format Works in Bathrooms
The visual case for large format is simple. Every grout line is a visual interruption, and small tile creates a dense grid that can make a compact bathroom feel busier and smaller. Cover that same floor in 24×24 porcelain and you get expansive, calm planes with only a handful of thin grout joints. The eye reads the floor as one continuous surface, which makes the room feel bigger and more architectural.
There is a practical payoff too. Fewer grout lines means less grout to seal, scrub, and watch discolor over the years. Grout is the weak link in any tile floor’s appearance and maintenance, so minimizing it is a genuine long-term advantage in a wet, frequently cleaned room. A 24×48 slab floor might have a quarter of the grout footage of a 12×12 floor covering the same area.
Large format also plays beautifully with current design trends — marble-look and concrete-look porcelain in big formats reads as high-end stone slab at a fraction of the cost and maintenance. Running the same tile up the shower walls and across the floor, or matching floor tile to a large-format wall, creates the seamless, spa-like continuity that defines modern bathroom design.
The Flatness Problem You Cannot Ignore
Here is the hard truth about big tile: the bigger the tile, the flatter your substrate must be. A small tile can bridge minor dips and humps because each piece only spans a few inches. A 24-inch tile spans two feet, and any deviation in the subfloor over that span shows up as lippage — one tile edge sitting proud of its neighbor. On a large glossy tile, even a slight lip catches light and toes, and it looks terrible.
The industry standard for large format is a substrate flat to within 1/8 inch in 10 feet, and no more than 1/16 inch in 24 inches. That is considerably tighter than the 1/4-inch-in-10-feet tolerance that is acceptable for smaller tile. Before you set a single tile, you check the floor with a long straightedge and mark every high and low spot.
Low spots get filled with a patching compound or self-leveling underlayment; high spots get ground down. This flattening step is not optional busywork — it is the foundation of the entire job. I spend more time getting the substrate flat on a large-format floor than I spend actually setting tile, and that ratio is exactly right. You cannot fix a wavy subfloor with mortar under big tile; you fix it before the mortar goes down.
Medium-Bed Mortar and the Right Trowel
Standard thinset is not the right adhesive for large format. Thinset is designed for a thin bed, and under a big tile it can slump and shrink, leaving voids and allowing the tile to sag out of plane before it cures. For anything with a side of 15 inches or more, you want a large-and-heavy-tile mortar, often called medium-bed mortar. It is formulated to be built up thicker without slumping, so it supports the tile’s weight and holds it in plane while it sets.
Trowel selection follows the tile size. For large format I reach for a large-notch trowel — commonly a 1/2 inch by 1/2 inch square notch, and sometimes larger for the biggest slabs. That deep notch lays down enough mortar to achieve the coverage a big tile demands. The goal is at least 95 percent mortar coverage under a wet-area floor tile, with no hollow spots that could crack under load.
I always directional-trowel, combing the mortar ridges all in one straight direction rather than swirling them. Straight ridges collapse and release trapped air when you set the tile, giving you full contact. Swirled ridges trap air pockets that become voids. It is a small habit that makes a measurable difference in coverage under large tile.
Back-Buttering Is Mandatory
With large format, troweling the floor alone is not enough. You also back-butter every tile — spread a thin, flat skim coat of mortar across the back of the tile with the flat edge of your trowel before setting it. Back-buttering fills the slight concave warp that most large porcelain tiles have from the firing process, and it dramatically improves your mortar contact.
The combination of a properly combed floor and a back-buttered tile is what gets you to that 95 percent coverage target. Skip the back-butter and you will find hollow spots in the center of your tiles where the tile’s natural cupping kept it off the mortar ridges. Those hollows are where cracks start when someone drops something heavy or the tile flexes underfoot.
When you set the tile, press it down and give it a slight back-and-forth motion perpendicular to the trowel ridges to collapse them and seat the tile fully. On the biggest slabs, a beating block and rubber mallet, or a vibrating leveling tool, helps embed the tile evenly without cracking it. Then check that it is sitting in plane with its neighbors before the mortar grabs.
Leveling Clip Systems for a Dead-Flat Surface
Even with a flat substrate and good mortar technique, holding adjacent large tiles perfectly in plane while the mortar cures is a challenge — tiles can shift and settle at slightly different rates. This is where tile leveling clip systems earn their place in your kit. These are plastic clips that slide under the tile edges with a wedge or cap that clamps the tops of adjacent tiles to the same height.
You place clips along each tile edge, set your tiles, then drive the wedges to pull neighboring tiles flush at the surface. The system forces the edges into the same plane and holds them there through the critical early cure, eliminating the small lippage that even careful setters get by eye alone. After the mortar cures, you snap off the clip tops and the bases stay buried in the mortar.
Leveling systems are not a substitute for a flat floor — if the substrate is wavy, the clips just fight you and can crack tiles. But on a properly prepped floor, they are the insurance that turns a good large-format job into a flawless one. For 24×48 slabs especially, I consider them essential rather than optional.
Slip Resistance and DCOF
A bathroom floor gets wet, and large glossy tile can get dangerously slick. This is where you pay attention to the DCOF rating — dynamic coefficient of friction. The widely referenced benchmark is a DCOF of 0.42 or higher for tile installed in areas expected to be walked on when wet, which includes bathroom floors. Tile below that number belongs on walls or dry areas, not on a floor you will step onto with wet feet.
Many large-format porcelains come in both polished and matte or textured finishes. For bathroom floors I steer clients toward the matte, honed, or lightly textured surfaces that carry the higher slip rating, and I save the polished versions for walls where their shine is safe. A marble-look tile with a soft matte finish gives you the luxury look without the skating-rink risk.
The trade-off is that more texture means slightly more effort to clean, since micro-texture holds a little more soil. But in a bathroom, safety wins that argument every time. I would rather wipe a matte floor a little more often than explain to a homeowner why their beautiful polished floor sent someone to the emergency room.
Grout, Movement Joints, and Finishing
Large format floors still need grout joints, and I resist the urge to go too tight. A minimum joint around 1/16 to 1/8 inch gives the grout something to hold onto and absorbs the slight dimensional variation between tiles — even rectified tiles are not perfectly identical. Ultra-thin joints look sleek but leave no room for the tile’s natural size tolerance, and they concentrate stress at the edges.
Because the tiles are big and the joints are minimal, choosing a grout color that closely matches the tile enhances the seamless look, while a contrasting color emphasizes the grid — a design choice more than a technical one. In a bathroom I usually go with a close match on the floor for that calm, continuous plane, and I always use a quality grout and seal it, since bathroom floors see constant moisture.
Do not forget movement joints. Any tile floor needs soft, flexible joints at the perimeter and at changes of plane, filled with matching silicone rather than rigid grout, so the assembly can expand and contract without cracking. On large-format installs the tiles transmit more stress to fewer joints, so honoring these movement accommodations is even more important. Do the prep, use the right mortar and trowel, back-butter, level, and respect the movement joints, and your large format bathroom floor tile will look like a designer slab and last for decades.
Prefer to explore on your own?
See how new flooring looks in your actual room in seconds — free, no signup.
Try the free Floor Studio →