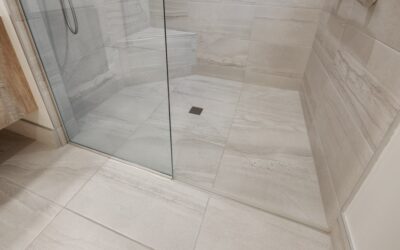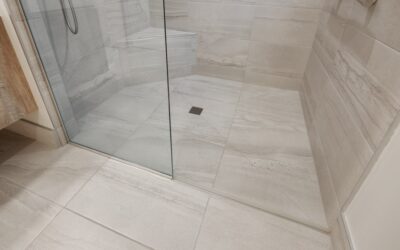
When you move up to 12×24, 24×24, or plank-format porcelain, the thinset you used for 6-inch tile will fight you the whole way. That is where a purpose-built mapei large format tile mortar earns its keep. These are medium-bed, non-sag formulas engineered to hold a heavy tile flat without slumping, sliding, or lippage, and to give you enough working time to bed a big piece before the mortar skins over. After roughly 20 years setting tile, I reach for Mapei’s large-and-heavy-tile line on nearly every big-format job because the mix behaves predictably, and predictable is exactly what you want with a $9-per-square-foot tile in your hands.
The catch is that a good mortar only performs if you use it the way it was designed to be used. Wrong trowel, wrong water ratio, or skipping the back-butter and you will still get hollow spots and lippage no matter whose bag is on the pallet. This guide walks through mixing, troweling, coverage, open time, and cure so you get flat, fully bonded large-format tile the first time.
Why Large-Format Tile Needs a Medium-Bed Mortar
The tile industry defines large-format (LFT) as any tile with at least one edge 15 inches or longer. Once you cross that line, standard thinset stops being a safe choice. Ordinary thinset is designed to be combed out at about a 3/16-inch notch and compressed thin, and it shrinks as it cures. Under a big, heavy tile that shrinkage and the inability to build a thick, consistent bed leaves you chasing voids and lippage across the whole floor.
A medium-bed or large-format mortar is formulated with coarser aggregate and a stiffer, non-sag chemistry so it can be applied thicker, up to about 3/4 inch after the tile is embedded, without slumping or shrinking enough to break the bond. The non-sag part matters most on walls and on any tile with warpage, because it lets the mortar hold the tile’s position instead of letting a heavy piece drift downward while you work the next one. Mapei’s large-format products are built specifically for this, which is why a dedicated mapei large format tile mortar outperforms a general-purpose thinset the moment tiles get big.
The other reason is coverage. Building and safety standards call for at least 80% mortar contact on interior tile and 95% on exterior or wet areas. Hitting those numbers under a 24×24 porcelain with a thin bed is nearly impossible; a medium-bed mortar gives you the body to fill the gap between a slightly bowed tile and a slightly uneven floor.
Choosing the Right Mapei Product
Mapei makes several mortars suited to big tile, and picking the right one saves headaches. For most residential large-format floors, a large-and-heavy-tile mortar or a medium-bed polymer-modified mortar covers the job. If you are on a schedule and need to grout the same day, there is a rapid-setting version that cuts cure time dramatically. For fully vitrified porcelain, glass, or exterior work, step up to a higher-performance modified or a Porcelain Tile Mortar rated for low-absorption tile.
Read the bag for the ANSI rating. You want at least ANSI A118.4 for a modified mortar, and A118.11 if the substrate has any flex. Check whether the product is non-sag; the large-format lines are, and that single feature is what keeps a heavy wall tile from sliding. Also match the color, white or gray, to your grout and tile. White mortar under a translucent or light-colored tile prevents the gray bed from ghosting through and dulling the finish.
One practical note: do not assume every Mapei bag labeled thinset is right for LFT. A basic economy thinset will not carry a 24-inch tile the way the medium-bed formulas do. Spend the extra couple of dollars per bag for the correct product, because the cost of the mortar is trivial next to the cost of tearing out a lippage-ridden floor.
Mixing It Correctly
Consistency is everything. Start with clean, cool water in the bucket, then add powder, not the other way around, so you avoid dry pockets. Mapei’s bags list the water ratio, usually somewhere around 5 to 6 quarts per 50-pound bag, but treat that as a starting point and go by feel. You want a mix that holds a firm ridge when you comb it and does not slump back flat.
Mix with a low-speed drill, under 300 rpm, and a proper mortar paddle. High speed whips air into the mix and weakens it. Blend for a couple of minutes until it is lump-free and smooth, then let it slake, sit undisturbed, for about 5 to 10 minutes. Slaking lets the polymers and additives fully activate. Remix briefly after slaking and do not add more water at that point; if it stiffened, it is supposed to be that way. Adding water after slaking is one of the most common mistakes and it directly weakens the bond.
Mix only what you can use inside the pot life, generally about two hours depending on temperature. On a hot day in a sunny room, that window shrinks. If the mortar in your bucket starts to stiffen and you find yourself wanting to loosen it with water, dump it and mix fresh. Retempering with water trades a few dollars of material for a compromised installation.
Trowel Selection and Notch Size
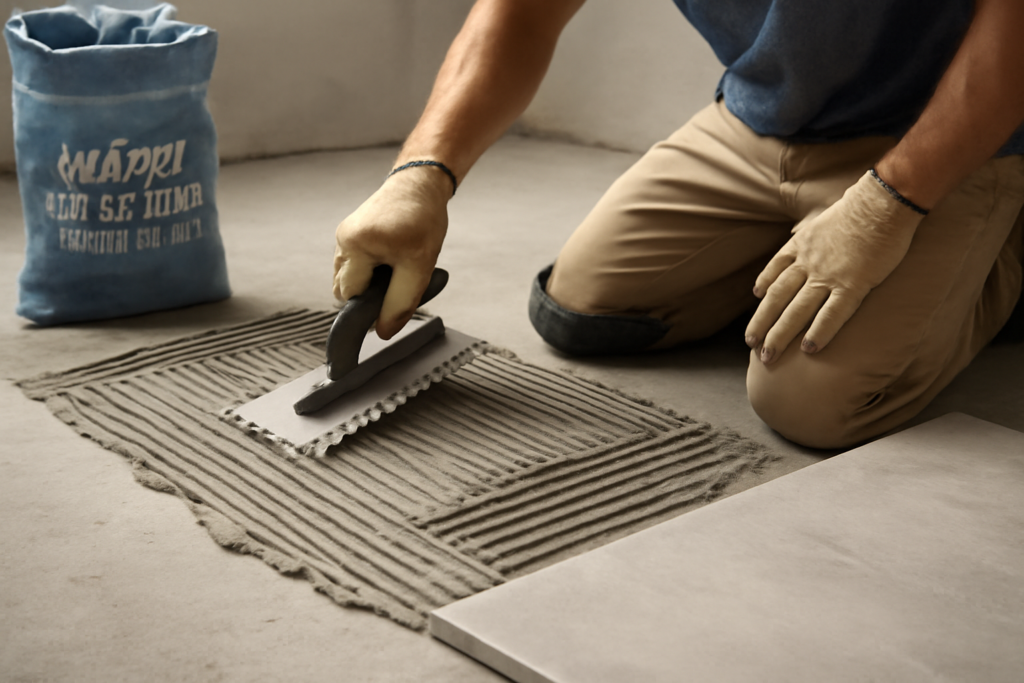
The trowel is where large-format installs are won or lost. For 12×24 and up, use a large notch, typically a 1/2-inch square-notch, and step up to a 3/4-inch notch on very large or heavily textured tile. Some pros use a euro-notch or a slanted-notch trowel because the ridges collapse more completely and release trapped air, which improves coverage. On plank-format tile the collapse of ridges matters even more since the long, narrow shape traps air easily.
Hold the trowel at a consistent 45-degree angle and comb all the ridges in one direction, not in swirls. Straight ridges let air escape out the ends when you set and beat in the tile; swirled ridges trap air and create hollow spots that sound off when you tap them and can crack the tile under load. This single habit, straight parallel ridges, eliminates a huge share of coverage problems.
Match your notch to the tile’s flatness too. A tile with visible warpage across a 24-inch span needs a deeper bed to fill the low center or the high edges. When in doubt, pull a tile immediately after setting one and look at the transfer pattern on the back; you should see near-total mortar contact with no dry islands.
Back-Buttering Is Not Optional
On any tile 15 inches or larger, back-buttering is mandatory, not a nice-to-have. After combing the substrate, use the flat side of the trowel to skim a thin, tight coat of mortar across the entire back of the tile, filling the ridges and dovetails in the porcelain and keying the mortar into the surface. Then set the tile into the combed bed and it bonds mortar-to-mortar.
This does two things. It guarantees you reach that 80% to 95% coverage standard, and it eliminates the dry-back voids that porcelain’s slick, low-absorption surface is prone to. Skipping the back-butter on big porcelain is the number-one cause of hollow tiles and bond failures I see on other people’s work. The mapei large format tile mortar can only bond to what it touches, and back-buttering makes sure it touches the whole tile.
Set each tile with a slight perpendicular slide across the ridges, a quarter inch or so, then beat it in with a rubber mallet and a beating block, or use a leveling clip system. The slide-and-beat action collapses the ridges and squeezes out air. Pull your first tile of the day to confirm full transfer before you commit to the rest of the run.
Open Time, Coverage, and Working Window
Open time is how long the combed mortar stays workable on the wall or floor before it skins over. For standard modified Mapei mortars it runs roughly 20 to 30 minutes under normal conditions, but heat, low humidity, a fan, or a dry, absorptive substrate can cut that in half. Once a skin forms, the mortar has lost most of its grab; if you press a finger into a combed ridge and it comes back dry and does not stick, that mortar is dead and must be scraped and recombed.
Work in small sections you can tile before the mortar skins, often only 5 to 10 square feet at a time with big tile. It is far better to comb small areas repeatedly than to trowel out a big field and watch half of it skin over. Coverage-wise, a 50-pound bag combed with a 1/2-inch notch covers somewhere around 40 to 50 square feet, less with a 3/4-inch notch, so buy accordingly and keep a spare bag on hand.
Keep checking your coverage as you go. Every several tiles, or any time conditions change, pull one and inspect the back. Adjust your notch, back-butter thickness, or section size based on what the transfer tells you rather than assuming the first setup holds all day.
Cure Time Before Grout and Traffic
Patience at the end protects everything you did right up front. A standard modified mortar generally needs about 24 hours before light foot traffic and 24 to 48 hours before grouting, longer in cold or humid conditions, or over a non-absorptive substrate like a waterproofing membrane where the mortar can only cure from one face. A rapid-set version can be ready to grout in as little as 2 to 3 hours, which is the reason to reach for it when the schedule is tight.
Do not rush grouting. Grouting over mortar that has not set traps moisture, can cause grout-color shading, and disturbs tiles that have not fully gripped. Keep heavy loads, furniture, and appliances off the floor for a solid few days, and give the full cure, typically 14 to 28 days for maximum strength, before exposing a wet area to standing water or a shower to daily use.
Temperature drives all of this. Below about 50 degrees Fahrenheit the chemistry slows dramatically and cure times stretch out; above 90 degrees everything accelerates and your open time collapses. Keep the room in a comfortable range while the mortar sets, and when in doubt, wait the extra day. A large-format floor set in the right mapei large format tile mortar, troweled correctly, back-buttered, and given time to cure, will stay flat and bonded for decades.
Prefer to explore on your own?
See how new flooring looks in your actual room in seconds — free, no signup.
Try the free Floor Studio →