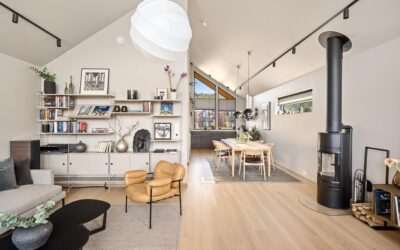
A round fixture over a long table leaves both ends of the meal in shadow, which is why so many homeowners are switching to a linear dining room chandelier. Long, rectangular fixtures follow the shape of the table, spread light evenly from one end to the other, and look proportional over seating for six to twelve. The catch is that they are less forgiving than a round fixture: a bar that is too long crowds the room, one that is too short looks stingy, and a junction box that is not centered over the table becomes obvious.
The short version: choose a fixture about two-thirds of the table’s length (and no wider than the table minus 12 inches), hang the bottom 30 to 36 inches above the tabletop, and make sure the ceiling box and mounting can carry the weight, especially for fixtures with two canopies.
- Linear Dining Room Chandelier Sizing Rules
- Hanging Height and Ceiling Height
- Choosing the Right Style and Light Output
- Mounting: Weight, Two-Point Support and Off-Center Boxes
- Installation Steps for Replacing an Existing Fixture
- Troubleshooting
- Cost Ranges and When to Call a Licensed Professional
- Frequently Asked Questions
Linear Dining Room Chandelier Sizing Rules
Length is the dimension that matters most. Measure the tabletop, not the room, because the fixture’s job is to light the table.
- Length: About 50 to 66 percent of the table length. A 72 inch table suits a 36 to 48 inch fixture; a 96 inch table suits roughly 48 to 64 inches.
- Clearance from the ends: Keep at least 6 inches, ideally 12 or more, between each end of the fixture and the edge of the tabletop so no one bumps it when standing.
- Width: Most linear fixtures are 8 to 18 inches deep. Stay at least 12 inches narrower than the table’s width so it does not loom over diners.
- Visual weight: An open frame of thin metal can run toward the upper end of the length range. A solid wood beam or heavy glass shade looks bigger, so size it toward the lower end.
Very long tables (10 feet or more) sometimes look better with two matching rectangular dining chandeliers or a row of three pendants rather than one enormous bar. Space them evenly so the gap between fixtures roughly matches the gap from each outer fixture to the table end.
Hanging Height and Ceiling Height
For an 8 foot ceiling, the bottom of the fixture usually lands 30 to 34 inches above the tabletop. Add about 3 inches of height for every additional foot of ceiling, so a 10 foot ceiling puts the fixture around 36 to 40 inches above the table.
Check sightlines by sitting at the table. You should be able to see the person across from you without the fixture cutting through their face. Frosted or diffused shades can sit a little lower; exposed bulbs or bare LED strips should hang a touch higher to avoid glare in the eyes.
Sloped and vaulted ceilings
Many linear fixtures hang from rods or cables that must stay vertical. On a sloped ceiling you need a sloped-ceiling adapter or a canopy that swivels, and the fixture should run parallel to the table, not to the slope. Confirm the adapter is rated for the fixture’s weight.
Choosing the Right Style and Light Output
Long dining chandeliers come in a few broad families:
- Multi-arm or candle-style bars: Traditional look, five to ten sockets in a row.
- Integrated LED bars: Slim, modern and energy-efficient, often with a diffuser that spreads light evenly.
- Glass globe clusters: Several globes on a rectangular frame; popular in contemporary dining light fixtures.
- Wood beam or rustic fixtures: A timber or faux-beam body with pendants or sockets beneath.
- Crystal rectangles: Tiered crystal on a rectangle frame for formal rooms.
Plan for about 30 to 40 lumens per square foot of tabletop area for a comfortable mix of dining and task light, with more if the table doubles as a homework or craft station. A 42 by 84 inch table is about 24.5 square feet, so 750 to 1,000 lumens from the fixture is a good starting point. Warm white (2700K to 3000K) flatters food and skin tones. Always put a dining fixture on a dimmer that is compatible with the bulbs or integrated LED driver.
Mounting: Weight, Two-Point Support and Off-Center Boxes
This is where a linear dining light differs most from a standard chandelier.
Box rating and weight
A standard light fixture box is typically rated for fixtures up to 50 pounds. Heavier fixtures need a box marked for fan or heavy fixture support or independent support from the framing. Check the box label and the fixture’s listed weight before you start. Long wood-beam and crystal fixtures can exceed that limit.
Two-canopy fixtures
Many long fixtures use two canopies: one covers the electrical box, and the second is a purely mechanical support point. That second point must screw into solid framing (a joist or blocking) or into a heavy-duty toggle rated for the load in drywall. Use a stud finder to locate joists before choosing the exact position, since the two canopies are a fixed distance apart.
Centering an off-center junction box
Few dining rooms have the box exactly where the table will sit. Common solutions:
- Move the table. Often the simplest fix if the difference is a few inches and traffic flow allows it.
- Swag the fixture. Some fixtures allow a decorative chain or cable to be hooked across to a ceiling hook over the table center. This works best with lighter fixtures and looks deliberate when done with a matching hook.
- Offset canopy or ceiling plate. Wide rectangular canopy plates or offset mounting kits let the fixture sit several inches from the box while hiding the original opening.
- Relocate the box. Moving the electrical box to a new spot over the table is the cleanest long-term answer. That involves new cable runs in the ceiling and should be handled by a licensed electrician.
Installation Steps for Replacing an Existing Fixture
If you are swapping one fixture for another on an existing, properly supported box, a confident DIYer can do it with a helper. Anything involving new wiring, a new box location or added circuits belongs to a licensed electrician.
Tools and materials
- Non-contact voltage tester
- Sturdy step ladder (6 foot for most 8 to 9 foot ceilings)
- Screwdrivers, wire strippers, wire connectors
- Stud finder and drill/driver
- Toggle bolts or lag screws rated for the fixture weight (for a second canopy)
Steps
- Turn off the breaker for the dining room lighting circuit, not just the wall switch. Then confirm power is off with a non-contact voltage tester at the existing fixture’s wires. Never work on or test wires while they are energized.
- Have a helper support the old fixture while you remove the canopy, disconnect the wire connectors and lower it.
- Inspect the box. It should be firmly attached to framing and rated for the new fixture’s weight. If it wobbles or is a plastic box not rated for the load, stop and have it replaced.
- Assemble the new fixture on a padded surface or its box. Adjust rod or cable lengths to your target hanging height before lifting.
- Install the mounting bracket on the electrical box, and install the second support point into a joist or rated anchor if the fixture has two canopies.
- Connect the fixture: ground to ground (green or bare), neutral to neutral (white), hot to hot (black, sometimes red). Twist on connectors firmly and tug-test each.
- Fold wires into the box, secure the canopy and level the fixture along the table’s length.
- Install bulbs, restore power at the breaker and test the dimmer through its full range.
Low-voltage vs line-voltage fixtures
Most dining chandeliers run on standard 120 volt line voltage. Some slim cable-and-bar systems are low voltage and use a transformer or driver, either in the canopy or remote. Low voltage is safer to touch at the fixture itself, but the transformer still connects to line voltage and must be installed and wired with the same precautions. Use only UL-listed drivers matched to the fixture.
Troubleshooting
- Fixture hangs crooked. Adjust cable lengths in small increments, measuring from the tabletop at both ends.
- LEDs flicker when dimmed. The dimmer is likely incompatible. Replace it with one rated for LED loads and check the minimum load requirement.
- Buzzing sound. Often a dimmer or driver mismatch. Turn off the breaker and have the setup checked if it persists.
- Glare in diners’ eyes. Raise the fixture a couple of inches, lower the color temperature or switch to frosted bulbs.
- Canopy will not sit flush. Too many wires or connectors in the box, or the box is recessed. A box extension ring can help.
Cost Ranges and When to Call a Licensed Professional
Linear fixtures span a wide range. Basic multi-light bars and simple LED models often cost from roughly a hundred to a few hundred dollars. Designer, crystal and solid-wood fixtures can run well over a thousand. Professional installation of a replacement fixture on an existing box typically costs a modest service fee, while relocating a box, adding blocking or running a new circuit adds labor and possibly drywall repair.
Call a licensed electrician when the box needs to move, when there is no box at all, when the fixture is heavier than the box rating, when you find aluminum wiring or scorched insulation, or when you need a new circuit or switch location. Many areas require permits for new wiring, and an electrician will know local requirements. For vaulted ceilings above about 12 feet, a pro with scaffolding is also the safer choice.
Frequently Asked Questions
What size linear chandelier do I need for a 6 foot table?
A 72 inch table suits a fixture roughly 36 to 48 inches long, leaving at least 12 inches from each end of the fixture to the edge of the table.
How high should a rectangular dining chandelier hang?
With an 8 foot ceiling, hang the bottom 30 to 34 inches above the tabletop. Add about 3 inches for each extra foot of ceiling height.
Can I install a long dining chandelier if the box is not centered?
Yes. You can shift the table, use an offset canopy plate or swag the fixture. For a clean result, a licensed electrician can relocate the box over the table.
Do linear chandeliers need extra support?
Heavy fixtures and those with two canopies need a box rated for the weight plus a second support point anchored into a joist or a rated heavy-duty anchor.
What color temperature is best over a dining table?
Warm white in the 2700K to 3000K range flatters food and faces. Pair it with a compatible dimmer so you can adjust light for meals or tasks.