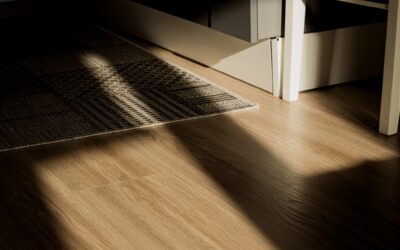
The fastest-growing floor in American homes is not hardwood or tile. Luxury LVT, short for luxury vinyl tile, has taken over kitchens, basements, and whole houses because it is genuinely waterproof, looks startlingly like real wood or stone, and survives kids, pets, and spills without complaint. But “luxury vinyl” covers a huge quality range, and the cheap stuff fails fast. This guide explains the specs that actually matter so you buy a floor that lasts 20 years, not five.
- What Luxury LVT Actually Is
- SPC vs WPC Cores
- Wear Layer: The Number That Predicts Lifespan
- What It Costs
- Where Luxury LVT Excels
- The Honest Drawbacks
- Installation: Why It Is DIY-Friendly
- Subfloor Prep and Acclimation
- Cleaning and Maintenance
- How LVT Compares to Laminate and Tile
- Choosing Color and Style
- The Bottom Line
What Luxury LVT Actually Is
LVT is a multi-layer engineered plank or tile. From the bottom up you have a stabilizing backing, a rigid or flexible core, a printed photographic design layer, and a clear wear layer on top. The realism comes from high-resolution printing and embossed-in-register texture that you can feel matching the grain you see. Unlike the sheet vinyl of decades past, modern LVT is sold in planks and tiles that mimic individual boards or stone slabs.
SPC vs WPC Cores
The core is the single most important spec, and it splits into two families.
- SPC (stone-polymer composite): dense, rigid, and dimensionally stable. It resists dents from heavy furniture and hides minor subfloor imperfections. Slightly harder and louder underfoot.
- WPC (wood-polymer composite): a lighter, foamier core that feels warmer and quieter, with a more cushioned step. Less impact-resistant than SPC.
For high-traffic and commercial-style durability, choose SPC. For comfort underfoot in bedrooms and living rooms, WPC has the edge.
Wear Layer: The Number That Predicts Lifespan
The clear top layer is measured in mils. This is what stands between your floor and daily abrasion.
- 6 mil: light residential use only, budget tier
- 12 mil: solid for most family homes
- 20 mil and up: heavy traffic, pets, and light commercial
Do not confuse total plank thickness with wear layer. A thick plank with a thin wear layer will still scratch through quickly.
What It Costs
Material runs $2 to $7 per square foot depending on core, wear layer, and brand. Professional installation adds $1 to $3 per square foot. Click-lock floating planks are very DIY-friendly, which lets many homeowners skip the install cost entirely. Budget another $0.30 to $0.50 per square foot if you want an attached or separate acoustic underlayment.
Where Luxury LVT Excels
Because it is 100 percent waterproof, LVT thrives exactly where wood and laminate fail: kitchens, bathrooms, mudrooms, and below-grade basements. It handles radiant heat, takes dropped pans without denting like real wood, and cleans up with a damp mop. The realistic visuals mean guests rarely guess it is vinyl.
The Honest Drawbacks
LVT is not flawless. It can dent under extremely heavy point loads, sharp objects can gouge it, and like all vinyl it does not add the resale value of genuine hardwood. Sunlight can fade lower-quality planks, so look for UV-stable wear layers in bright rooms. And while it is repairable plank by plank, color matching a discontinued line years later can be tough.
Installation: Why It Is DIY-Friendly
One of LVT’s biggest appeals is the click-lock floating install. Planks snap together edge to edge and float over the subfloor without glue or nails, riding on the room rather than fastened to it. A handy homeowner can do an average bedroom in a weekend with just a tapping block, a pull bar, and a utility knife. Glue-down LVT is more demanding and dead-flat, favored where you want maximum stability and the thinnest profile, such as over radiant heat or in commercial settings.
- Click-lock floating: fastest, most forgiving, ideal for DIY
- Glue-down: flattest and most stable, better for pros and heavy traffic
- Loose-lay: heavy planks held by friction, easy to lift and replace
Subfloor Prep and Acclimation
LVT is more forgiving than tile, but it is not magic. The subfloor still needs to be clean, dry, and flat to within about 3/16 inch over 10 feet, or you will feel and hear deflection underfoot. Fill low spots with a leveling compound and sand down high spots. Let the planks acclimate in the room for 48 hours so they reach room temperature before installation, which prevents gapping or buckling after the floor settles.
Cleaning and Maintenance
This is where LVT pays you back daily. Sweep or dry-mop regularly to keep grit from dulling the wear layer, then damp-mop with a pH-neutral cleaner. Skip steam mops, wax, and harsh abrasives, which can damage the surface or void the warranty. Felt pads under furniture legs and walk-off mats at entries protect against the few things that can scratch it. That is genuinely the entire maintenance routine.
How LVT Compares to Laminate and Tile
Against laminate, LVT wins decisively on water: laminate’s fiberboard core swells when wet, while LVT shrugs off standing water. Against tile, LVT is warmer and softer underfoot, quieter, far easier to install, and cheaper, though tile still edges it on ultimate hardness and resale prestige in upscale homes. Against real hardwood, LVT loses on resale value and authenticity but wins on price, waterproofing, and maintenance. For most family homes, that trade is worth it.
Choosing Color and Style
LVT comes in an enormous range of looks, so let the room guide you. Lighter wood tones make a space feel airy and hide dust between cleanings, while dark planks read dramatic but show every crumb and pet hair. Wide planks suit open-plan living areas, narrower boards fit traditional rooms, and stone-look tiles work beautifully in bathrooms and entries. For a cohesive home, carry one plank style through connected rooms to make the floor plan feel larger and avoid choppy transitions at every doorway.
The Bottom Line
Luxury LVT is the right call when you want a waterproof, low-maintenance floor that looks like wood or stone for a fraction of the price and hassle. Prioritize a 12 mil or thicker wear layer, pick SPC for durability or WPC for comfort, prep the subfloor flat, and let the planks acclimate before installing. Do that and you will get a floor that quietly outlasts almost everything else in the house.
Prefer to explore on your own?
See how new flooring looks in your actual room in seconds — free, no signup.
Try the free Floor Studio →