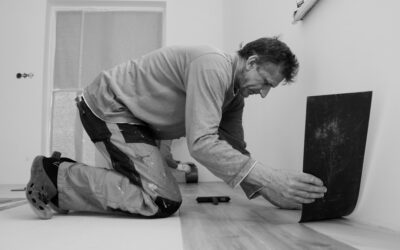
Luxury vinyl plank is the most DIY-friendly flooring on the market, but “DIY-friendly” does not mean “no tools required,” and showing up to the job with the wrong kit is the fastest way to turn a weekend project into a frustrating week. The right LVP tools make the difference between planks that click together tight and gap-free and a floor with lifted seams, chewed-up edges, and crooked rows. The good news is that the essential toolkit is short, mostly affordable, and largely reusable, so a modest upfront investment pays off in a cleaner, faster, better-looking installation.
This guide walks through the tools you actually need, what each one does, what it costs, and which gadgets you can safely skip so you spend your money where it counts.
Cutting Tools: The Heart of the Kit
Most of your work on an LVP job is cutting planks to length and width, so cutting tools top the list. A vinyl plank cutter, essentially a large guillotine-style shear, is the star tool for this material: it slices planks cleanly with a single push of the lever, produces no dust, and makes no noise, which is a revelation compared to power saws. A quality plank cutter runs roughly $40 to $120 and is worth every dollar for straight crosscuts, which make up the bulk of your cuts.
For notches, curves, and cuts around door casings, a jigsaw handles the irregular shapes the shear cannot. A simple utility knife with plenty of sharp blades is also indispensable; on thinner flexible LVP you can score the surface deeply with a straightedge and snap the plank, avoiding power tools entirely. Many pros also keep a miter saw or a circular saw with a fine-tooth blade for high-volume straight cuts, though these create dust and demand hearing protection. If you buy one dedicated tool, make it the plank cutter.
Measuring and Layout Tools
Accuracy starts before the first cut, and a few basic measuring tools keep the whole floor straight and tight. A good tape measure and a carpenter’s pencil or marker are obvious essentials for marking cut lengths. A carpenter’s square or a speed square ensures your cross-cut marks are truly perpendicular, so planks meet at clean 90-degree ends rather than drifting out of square as the rows progress.
A chalk line helps you establish a straight reference line across the room, which matters because rooms are rarely perfectly square and starting off a wall without checking can leave you with a visibly crooked floor by the far side. A long straightedge doubles as a scoring guide for the snap-cut method and as a check for high spots on the subfloor. These tools are inexpensive, often already in a homeowner’s kit, and they prevent the compounding errors that ruin an otherwise good installation.
Installation Tools: Getting Planks to Lock
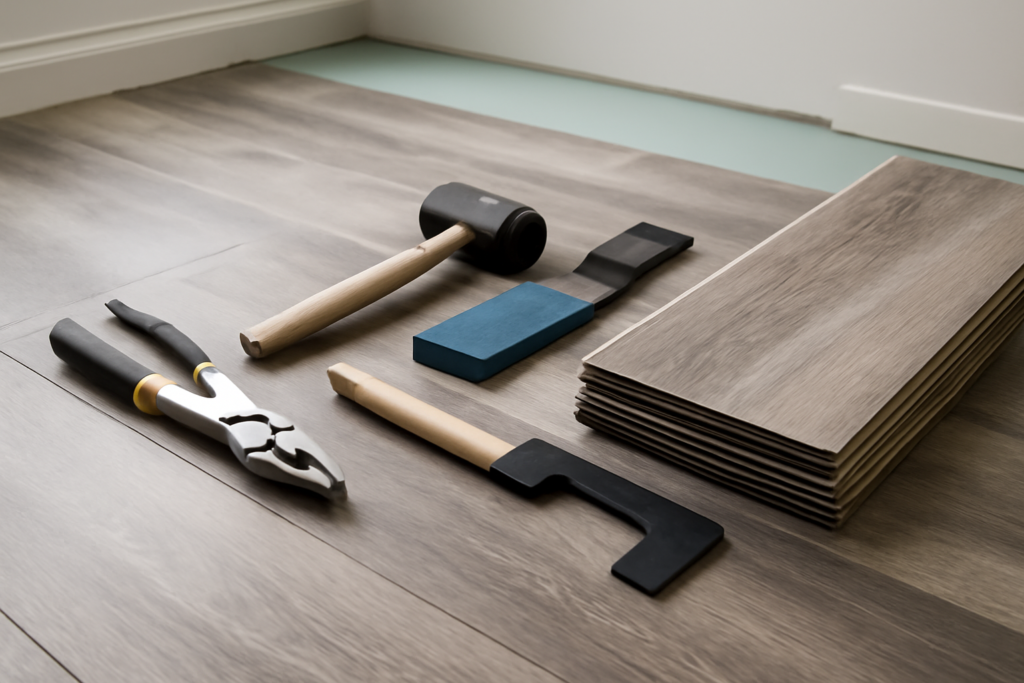
Click-lock LVP snaps together, but it usually needs persuasion to seat fully, and this is where a few purpose-made tools protect both the floor and your patience. A tapping block, a hard plastic block you set against a plank’s edge and strike with a mallet, closes the seams between planks without damaging the delicate locking edge you would otherwise crush by hitting the plank directly. Always tap the block, never the plank itself.
A pull bar is the companion tool for the last row and for planks against a wall where a tapping block will not fit; you hook one end over the plank edge and tap the other to draw the joint closed from the tight side. A rubber mallet drives both the tapping block and the pull bar with a controlled, non-marring blow, far better than a metal hammer, which can crack or dent vinyl. These three, tapping block, pull bar, and rubber mallet, are the trio that turns a loosely assembled floor into a tight, seamless one, and together they cost only $20 to $40.
Spacing and Fitting Tools
LVP expands and contracts with temperature, so it must be installed with a gap around the room’s perimeter, typically a quarter inch, that the baseboard or quarter-round later hides. Spacers, small wedges set between the planks and the wall, hold this expansion gap consistent while you work. Skipping them is a classic mistake that leads to buckling later when the floor has no room to move. A set of plastic spacers costs just a few dollars.
For fitting planks around door casings and jambs, an undercut saw, or a simple flush-cut handsaw, lets you trim the bottom of the casing so the plank slides underneath for a clean, professional look rather than being awkwardly notched around it. A contour gauge (profile gauge) is a handy inexpensive tool that copies the shape of pipes, moldings, and irregular obstacles so you can transfer the exact outline to a plank for a precise cut. These fitting tools separate a rushed job from one that looks like a pro laid it.
Prep and Safety Tools
The floor beneath the LVP determines how the finished floor looks and lasts, so a few prep tools earn their place. A floor scraper and a good vacuum clear the subfloor of old adhesive, debris, and dust, since even a small pebble under a plank telegraphs through as a bump. A long level or a straightedge checks the subfloor for flatness, because LVP demands a flat surface, generally within about 3/16 inch over 10 feet, and low or high spots need patching or grinding before installation.
Do not overlook basic safety and comfort gear. Knee pads are not optional for a job spent kneeling on a hard floor, and they will save your knees over a full room. Safety glasses matter whenever you use a saw, and a dust mask is wise for any power cutting. These items are cheap, and skipping them makes a long installation genuinely miserable and occasionally hazardous.
What You Can Skip and Smart Buying Tips
Not every gadget marketed for vinyl flooring is necessary. Expensive specialty jigs, powered plank-lifting tools, and premium branded install kits are largely optional for a single-room DIY job; the core hand tools do the same work for far less. If you already own a jigsaw, tape, square, and utility knife, your additional spend on a plank cutter, tapping block, pull bar, mallet, and spacers can total well under $150, and much of it is reusable for future projects.
A cost-saving option is renting or borrowing the plank cutter and miter saw if you only plan to install one floor, since these are the priciest items. Buy quality on the tapping block and pull bar, which take repeated impact, and do not skimp on sharp utility blades, since a dull blade tears vinyl and produces ragged edges. With the right LVP tools in hand, a homeowner can install a beautiful, tight, professional-looking vinyl plank floor over a weekend, and the same kit will be ready the next time a room needs new flooring.
Prefer to explore on your own?
See how new flooring looks in your actual room in seconds — free, no signup.
Try the free Floor Studio →