The biggest mistake first-time installers make is showing up with a utility knife and a hammer. The right lvp flooring tools turn a stressful weekend into a clean Sunday afternoon — and most of the kit costs less than $150 if you skip the gimmicks. Here is the actual list a working contractor brings to a luxury vinyl plank install, what each tool does, and where the budget swaps make sense.
Cutting Tools
Score-and-Snap Cutter
For straight crosscuts on LVP up to 8 mm, a guillotine-style score-and-snap cutter is faster than any saw and produces zero dust. The Roberts 10-94 ($120) handles 13-inch widths and lasts for years. Budget alternative: a sharp utility knife with a metal straight edge — score the wear layer three to four times, flex the plank, and snap. Slower but functional.
Jigsaw With Fine-Tooth Blade
Essential for cuts around toilets, vents, and door jambs. Use a Bosch T101AOF or Diablo DS0008CF blade for clean cuts in vinyl. Cut face down to keep chip-out on the underside. A Ryobi 18V cordless jigsaw runs $59 with battery and is plenty for LVP work.
Oscillating Multi-Tool
For undercutting door jambs and casing. Lay a piece of plank flat against the jamb, rest the blade on top, and trim a clean kerf for the new flooring to slide under. Skip this step and you spend an hour scribing every doorway. A corded oscillating tool runs $65; a cordless model with batteries adds $50 to $100.
Layout Tools
- 25-foot tape measure — Stanley FatMax or similar with stiff blade
- Carpenter’s square — 12-inch speed square works perfectly
- Chalk line — for snapping the starting reference line across the room
- Pencil and fine-tip marker — pencil for cuts, marker for end seams that need tracking
Set the starting line one full plank width plus 3/8 inch off the longest straight wall. Walls in real homes are rarely square, and starting on a chalk line rather than the wall keeps the entire field running parallel to itself.
Install Tools
Tap Block and Pull Bar
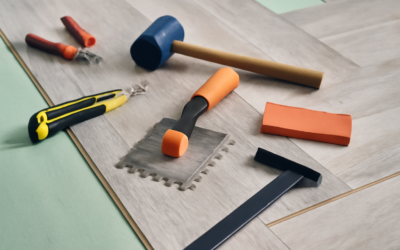
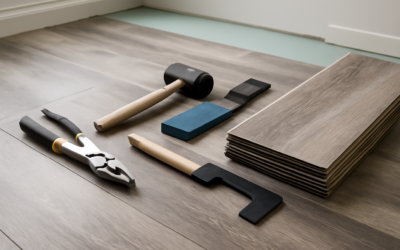
The single most important pair. A rubber-faced tap block ($15) lets you seat plank end joints without damaging the locking edge. The pull bar ($20) handles the last row against the wall where you cannot swing a tap block. Both belong in every kit. Cheap plastic tap blocks crack within a 500-square-foot install — pay the extra five dollars for the rubber-faced version.
Spacers
Quarter-inch expansion gaps at every wall and vertical obstacle. T-shaped spacers from Roberts cost $12 for 50 and slide out cleanly when the install is complete. Do not skip these — failure to maintain expansion gaps is the leading cause of warranty denials on click-lock LVP.
Knee Pads
Most underrated tool on the list. ProKnee 0714 pads ($90) save your kneecaps over a 1,000-square-foot install. Cheaper foam pads from Home Depot at $25 work for a single project. Either way, do not install on bare knees — six hours of crawling on a hard subfloor causes lasting joint damage.
Rubber Mallet
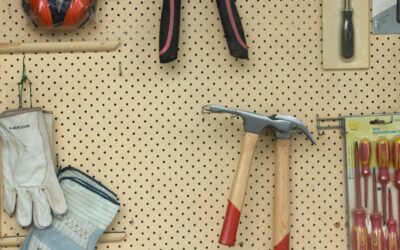
An 18-ounce rubber mallet is for tapping the tap block, never for hitting the plank directly. Stanley sells a usable mallet for $14.
Subfloor Prep Tools
- Floor scraper — for removing old adhesive residue, scrim glue, or paint splatter
- Long straightedge — 6 or 8 foot aluminum level for checking flatness
- Self-leveling compound and trowel — for low spots beyond 3/16 inch over 10 feet
- Shop vac — clean the subfloor down to dust-free before laying underlayment or planks
- Moisture meter — Tramex CMEX2 ($230) for slabs, or a Calculated Industries pin meter ($45) for wood subfloor
Skipping subfloor prep is the second most common cause of LVP failure. A floor that looks flat by eye is rarely flat by gauge. Spend the first morning on prep and save the rest of the week.
Tools to Skip or Borrow
Several tools marketed for LVP installs are either gimmicks or overkill for a single project.
- Power flooring nailers — only relevant for nail-down hardwood, not LVP
- Specialty LVP install kits at $80 — usually just a flimsy tap block, plastic spacers, and a thin pull bar. Buy the components separately for better quality at lower cost
- Rolling underlayment cutters — utility knife works fine
- Manual flooring saws — useful but not essential. A jigsaw plus score-and-snap cutter covers the same use case
Borrow rather than buy: large oscillating tools, miter saws, and floor sanders if your install only requires them briefly. Home Depot’s tool rental program is reasonable for one-day uses.
The Budget Kit That Actually Works
For a homeowner installing 600 to 1,200 square feet of LVP for the first time, this kit handles 95 percent of the job for under $200:
- Roberts tap block and pull bar combo: $30
- Spacers: $12
- Sharp utility knife with extra blades: $25
- Cordless jigsaw with fine-tooth blade: $70
- Knee pads: $25
- Rubber mallet: $14
- 12-inch speed square: $12
- 25-foot tape measure: $20
Safety Gear That Belongs in the Kit
Power tools and dust make eye and ear protection non-negotiable. Add a pair of ANSI-rated safety glasses ($8), foam earplugs or muffs ($5 to $25), and a fit-tested N95 dust mask for sanding and tear-out work ($15 for a 10-pack). For tear-outs that involve old vinyl tile, ventilation matters — older 9-by-9-inch tiles can contain asbestos and should be tested before disturbance. Modern LVP and laminate produce nuisance dust rather than hazardous particulate, but a mask still beats a sore throat at the end of a long install day.
The Pro Upgrade
For frequent installs or jobs over 1,500 square feet, add a Roberts 10-94 score-and-snap cutter ($120), a quality oscillating tool ($150), and a moisture meter ($45 to $230 depending on subfloor type). The pro kit pays for itself in time saved by the third install.
Quality lvp flooring tools are an investment that turns DIY anxiety into confidence. Buy what you need, borrow the rest, and skip the marketed kits that bundle low-quality versions of every component.
Prefer to explore on your own?
See how new flooring looks in your actual room in seconds — free, no signup.
Try the free Floor Studio →