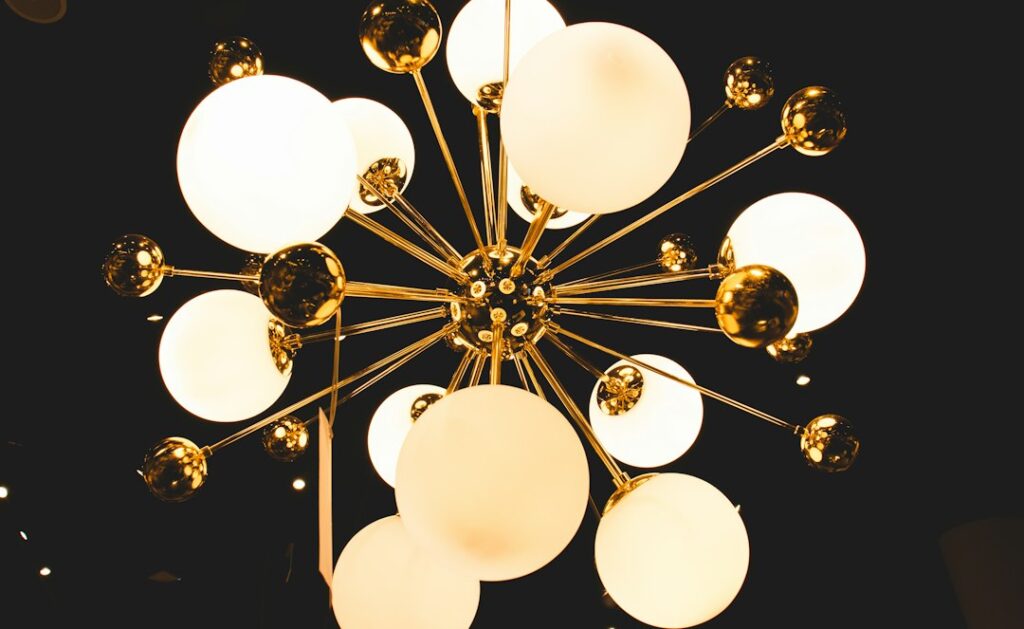
Clear glass shows off the bulb. Milk glass hides it. That simple difference is why a milk glass chandelier gives a room such a calm, even glow: the white, slightly translucent glass spreads light in every direction and softens the hot spot of the bulb into a gentle moon-like shine. It is the same reason old schoolhouses, train stations and farmhouse kitchens used opal glass shades for decades.
Milk glass, sometimes called opal glass, gets its white color from additives mixed into the molten glass. The result can be dense and opaque or lightly translucent, and many shades show a faint opalescent shimmer when lit. Today you can find genuine vintage fixtures, faithful reproductions and modern designs that use milk glass globes in sleek frames.
- Why a Milk Glass Chandelier Works in Modern Rooms
- Vintage vs Reproduction
- Popular Milk Glass Shapes and Where They Suit
- Sizing and Hanging Height
- Bulbs and Light Quality
- Installing a Milk Glass Chandelier Safely
- Cleaning and Care
- Troubleshooting
- Cost Ranges
- When to Call a Licensed Electrician
- Frequently Asked Questions
Here is how to choose between vintage and reproduction pieces, which shapes suit which rooms, how to size and light one, and how to install it safely.
Why a Milk Glass Chandelier Works in Modern Rooms
Many modern homes have lots of hard surfaces: quartz counters, tile floors, large windows and painted drywall. Bright, bare bulbs bounce off all of it and create glare. A milk glass chandelier diffuses the light before it reaches those surfaces, so the room feels warmer and more relaxed even at the same brightness.
The look also bridges styles. White globes on a black or brass frame read as mid-century or modern farmhouse. Ruffled or hobnail shades on a curved brass arm look vintage. Clusters of milk glass globes at different heights feel contemporary. Because white goes with everything, these fixtures rarely clash with wall colors or finishes.
Vintage vs Reproduction
Both have a place. The right pick depends on how much you value authenticity, budget and convenience.
Genuine vintage fixtures
Antique and mid-century milk glass chandeliers turn up at salvage yards, estate sales and antique shops. They carry real character: hand-blown variations, aged brass and patterns no longer made. Watch for these points:
- Wiring: old fixtures often have brittle cloth or rubber insulation. Plan to have the fixture rewired with new wire and sockets before use.
- Shade fitters: vintage shades may use odd fitter sizes. Measure the opening at the neck before buying spare or replacement shades.
- Chips and cracks: run your fingers lightly around rims and look for hairline cracks with a light behind the glass. Cracked shades can fail from heat.
- Weight: thick old glass and cast frames can be heavier than modern fixtures, so the ceiling box must be rated for the load.
Reproduction and modern fixtures
Reproductions copy classic forms with new, listed wiring and standard fitters, so replacement shades are easy to find. They are ready to install, usually lighter and often dimmable with modern LED bulbs. Some use lightweight opal acrylic instead of glass; it is less fragile but can yellow over time and lacks the depth of real glass. If you want the true milk glass glow, confirm the shades are glass.
Choose vintage for a one-of-a-kind focal point and reproduction for a set of matching fixtures or a busy family space where a broken shade needs a quick replacement.
Popular Milk Glass Shapes and Where They Suit
- Globe: round opal globes, single or clustered, give the most even 360 degree glow. Great over dining tables and in entries.
- Schoolhouse: a cylinder that flares slightly, often with a band or rim. Perfect in farmhouse kitchens, breakfast nooks and mudrooms.
- Tulip and bell: shades that point up or down on curved arms. Upward shades bounce light off the ceiling for softer ambient light; downward shades put more light on the table.
- Hobnail and ruffled: textured or scalloped edges for a vintage cottage look in bedrooms and dining rooms.
- Sputnik style: many small milk glass globes radiating from a center hub. A playful, mid-century statement in living rooms.
- Bowl or dome: a broad shade hung on chains, often seen in older homes over kitchen tables.
Sizing and Hanging Height
A handy rule: add the room’s length and width in feet, and use that number in inches as a rough chandelier diameter. A 12 by 14 foot dining room suggests a fixture around 26 inches wide. Over a dining table, choose a diameter about half to two thirds of the table width so people do not bump it when standing.
Hang the bottom of the fixture roughly 30 to 36 inches above a dining table with an 8 foot ceiling, adding about 3 inches for each extra foot of ceiling height. In walkways and entries, leave at least 7 feet of clearance below the fixture. Large milk glass globes look heavier visually than clear glass, so in small rooms, step down a size or choose a cluster of smaller globes.
Bulbs and Light Quality
Milk glass absorbs some light, so you may need a little more output than with clear shades. Choose LED bulbs with a warm color temperature, around 2700K to 3000K, for a cozy glow, and a high color rendering index so food and skin tones look natural. Check the fixture’s maximum wattage rating and stick to it, especially in enclosed globes where heat builds up. LEDs run much cooler than incandescent bulbs, which is easier on vintage glass and old sockets.
Put the fixture on a dimmer and confirm the bulbs are labeled dimmable. A dimmed milk glass chandelier makes a beautiful low-light ambiance for dinners.
Installing a Milk Glass Chandelier Safely
Replacing an existing ceiling fixture is a common DIY job, but chandeliers combine three hazards: electricity, ladders and fragile glass. Take each seriously.
Electrical safety
- Turn off the breaker for the circuit, not just the wall switch, and confirm power is off at the wires with a non-contact voltage tester before touching anything.
- Never test or work on wires while they are powered.
- Use an electrical box rated for fixture support at the fixture’s weight. Heavy fixtures may need a fan-rated or brace-mounted box.
- Connect wires per the fixture instructions and make sure the ground wire is attached.
- Use a fixture that carries a recognized safety listing, and have vintage pieces rewired and checked before installation.
- Adding a new ceiling box, a new circuit or new switch wiring is a job for a licensed electrician.
Ladder safety
Use a stable stepladder or extension ladder rated for your weight plus tools, on a level floor, and never stand on the top cap. Keep three points of contact and do not overreach; move the ladder instead. For foyers and stairwells with two-story ceilings, hire a pro with scaffolding or a tall platform.
Handling the glass
Wear gloves and eye protection when handling shades, especially vintage ones with chipped rims. Install the frame first, then add the shades last, ideally with a helper passing them up. Never force a shade into a fitter or overtighten thumb screws, as uneven pressure can crack glass. Snug the screws just enough to hold the shade securely.
Basic install sequence
- Turn off the breaker and verify power is off with a non-contact voltage tester.
- Remove the old fixture and inspect the ceiling box and its support.
- Mount the new crossbar or mounting strap to the box.
- Adjust chain or downrod length for the right hanging height.
- Have a helper support the fixture while you make wire connections and attach the ground.
- Secure the canopy, then add bulbs and shades.
- Restore power and test, including the dimmer.
Cleaning and Care
Milk glass shows dust and dead bugs less than clear glass but still benefits from cleaning a few times a year. With the power off and bulbs cool, remove shades and wash them by hand in warm water with mild dish soap. Avoid abrasive pads and harsh cleaners, which can dull the surface, and do not put vintage glass in a dishwasher. Dry thoroughly before reinstalling. Wipe the frame with a soft, dry cloth.
Troubleshooting
- Flickering with LED bulbs: use a dimmer compatible with LEDs, or try a different bulb type.
- Shade loose or tilted: tighten fitter screws evenly, adding a thin heat-resistant gasket if the fitter is slightly oversize.
- Hot spots visible: switch to frosted or lower-output bulbs, or choose a denser milk glass.
- Fixture sways or sags: check that the box and mounting strap are secure and rated for the weight.
Cost Ranges
New reproduction fixtures range from under a couple hundred dollars for simple pendant clusters to the low thousands for large designer pieces. Vintage chandeliers vary widely by age, condition and rarity, and rewiring adds some cost. Professional installation of a replacement fixture often runs from about one hundred to a few hundred dollars, more for heavy fixtures, tall ceilings or new boxes.
When to Call a Licensed Electrician
Hire a licensed electrician if there is no existing box, if the box is not rated for the weight, if you see scorched or brittle wires, if you want to add a switch or dimmer on a new line, or if the ceiling is too high for safe ladder work. Many areas require permits for new wiring, and a pro will handle them.
Frequently Asked Questions
What is milk glass made of?
It is regular glass with added opacifiers that turn it white and translucent to opaque, giving the soft, diffused glow it is known for.
Is a milk glass chandelier bright enough for a dining room?
Yes, with warm LED bulbs of adequate output and multiple shades. A dimmer helps you adjust from task light to ambiance.
How can I tell vintage milk glass from a reproduction?
Vintage pieces often show wear, slight irregularities and older fitter sizes. Reproductions have uniform shades and modern sockets and wiring.
Can I install a vintage chandelier myself?
Have it rewired first. Then a confident DIYer can replace an existing fixture with the breaker off, power confirmed off and a rated ceiling box.
How do I clean milk glass shades?
Hand wash in warm, soapy water with a soft cloth and dry completely. Skip abrasives and dishwashers.