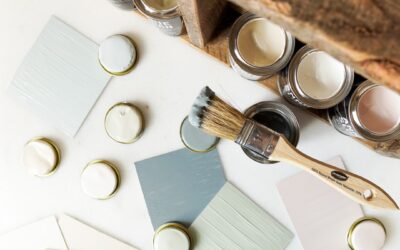
Long before synthetic paints filled hardware store shelves, people finished furniture and walls with a simple mix of milk protein, lime, and natural pigment. Milk paint colors carry that centuries-old character: soft, chalky, and deeply matte, with a slightly variable finish that gives antiques their authentic patina. Today milk paint colors are prized by furniture restorers and DIYers who want an eco-friendly, low-odor finish that either chips into a charming distressed look or, with the right primer, bonds smooth and solid.
Part of our Paint & Walls guide — explore the full guide →
This guide covers what makes milk paint unique, the best shades and brands, and how to mix and apply it for either a distressed or a solid finish.
What Milk Paint Actually Is
Traditional milk paint is made from just a few natural ingredients: casein (milk protein), hydrated lime, clay, and natural earth or mineral pigments. It ships as a powder you mix with water, which is part of its charm and its learning curve. Because it’s made from food-grade and mineral components, it’s non-toxic, virtually odorless, and biodegradable, a genuine draw for nurseries and food-adjacent pieces like kitchen tables.
The finish is unmistakable: a flat, matte, slightly translucent coat with subtle color variation that never looks plastic. That authenticity is exactly why restorers use it on period furniture where a modern uniform finish would look wrong.
The Best Milk Paint Colors
Milk paint palettes lean toward muted, historical tones rather than bright modern colors, which suits their vintage character. Popular shades from leading makers like Old Fashioned Milk Paint Company and Miss Mustard Seed cluster around a few timeless families.
- Soft whites and creams: shades like Marzipan and Grain Sack for a farmhouse base
- Muted blues: Shutter Gray, Kitchen Scale, and dusty French blues
- Earthy greens: Boxwood and Lucketts Green for a sage, garden feel
- Warm neutrals: Trophy, Ironstone, and soft taupes
- Deep classics: Tricycle red, Curio black, and rich navy tones
Because milk paint is translucent, layering two colors and sanding through creates beautiful depth, such as a red base peeking through a cream topcoat on a distressed piece.
The Two Finishes You Can Achieve
Milk paint is unusual because it behaves completely differently depending on your prep, giving you two very different looks from the same product.
- Chippy, distressed finish: applied directly over an old sealed or glossy surface, milk paint resists in spots and flakes off as it dries, creating an authentically worn, chippy look prized on farmhouse pieces.
- Smooth, solid finish: mix in a bonding agent, or apply over raw wood, and the paint adheres fully for an even, durable coat with no chipping.
Knowing which you want before you start determines your prep, so decide up front. Want random chipping? Paint straight over the existing finish. Want solid coverage? Add the bonding agent or work on bare wood.
Mixing Milk Paint Correctly
Since it comes as a powder, getting the consistency right matters. Too thick and it clumps; too thin and it’s watery and weak.
- Start with a roughly 1-to-1 ratio of powder to warm water.
- Stir or whisk thoroughly, breaking up every lump, until it reaches a light-cream consistency.
- Let it sit for 10 to 15 minutes so the pigments fully dissolve, then stir again.
- Mix only what you’ll use in a day, since activated milk paint spoils, literally, within a few days.
A small handheld frother makes quick work of lumps. If you want a solid finish, stir in the manufacturer’s bonding agent at this stage per the label ratio.
Applying and Sealing
Application is forgiving, and brush marks tend to level into the matte finish. Use a natural-bristle brush and apply in thin coats, letting each dry before the next.
- Expect two to three thin coats for full coverage, since early coats look streaky and translucent
- Watch for the chipping to begin as it dries if you’re going for the distressed look
- Sand lightly between coats for a smoother solid finish
- Distress with fine sandpaper on edges and high spots once fully dry
Milk paint is porous and needs sealing to protect it, especially on high-touch furniture. Finish with a clear furniture wax, hemp oil, or a matte water-based topcoat. Wax gives a soft sheen and hand-buffed feel; a water-based sealer offers more durability for tabletops and dressers that see heavy use.
Milk Paint vs. Chalk Paint
People often lump milk paint and chalk paint together, but they’re genuinely different products with different strengths. Chalk paint, popularized by brands like Annie Sloan, comes premixed and offers a thick, opaque, reliable coat that adheres to almost anything with little prep. Milk paint comes as a powder, applies thinner and more translucent, and behaves unpredictably by design.
The practical differences come down to a few points:
- Consistency: chalk paint is thick and opaque; milk paint is thin, layered, and translucent
- Adhesion: chalk paint grips most surfaces; milk paint chips over sealed finishes unless you add a bonder
- Look: chalk paint gives even, controlled coverage; milk paint gives authentic, variable, antique character
- Prep: chalk paint needs little; milk paint needs mixing and more attention to substrate
- Cost: milk paint powder is often cheaper per project, though it has a steeper learning curve
Choose chalk paint when you want a predictable, forgiving finish, and milk paint when you specifically want that centuries-old, chippy authenticity that no premixed paint can quite fake.
Troubleshooting Milk Paint Problems
Because milk paint is a living, natural product, a few quirks catch first-timers off guard. Most are easy to correct once you know what’s happening.
- Too much chipping: if the paint flakes off more than you want, you’re painting over a slick surface. Add a bonding agent or lightly scuff-sand first.
- Not enough coverage: early coats look streaky and thin by nature. Build two or three coats rather than one thick one.
- Grainy or lumpy paint: the powder wasn’t fully dissolved. Whisk longer and let it rest 15 minutes before use.
- Chalky, dusty surface: unsealed milk paint rubs off. Seal with wax or a topcoat to lock it in.
- Spoiled batch: mixed milk paint sours within days, so mix small amounts fresh each session.
The most common surprise is unwanted chipping, and it’s entirely controllable. If you want a smooth, solid finish, commit to a bonding agent or bare wood from the start rather than fighting the chips after the fact.
Popular Milk Paint Brands
A handful of makers dominate the milk paint market, and knowing them helps you find the colors and formulas you want. Each has a slightly different palette and approach, from traditional powders to modern conveniences.
- Old Fashioned Milk Paint Company: the traditionalist’s choice, a genuine powdered casein paint in historical colors, ideal for authentic restoration
- Miss Mustard Seed’s Milk Paint: hugely popular with the furniture-flipping crowd, known for soft designer colors and a strong online following
- Real Milk Paint Co.: offers a wide color range plus companion oils and waxes for sealing
- Homestead House: a Canadian maker with rich, earthy shades favored by restorers
Most sell the paint as a powder you mix with water, though some offer premixed versions for convenience at a higher price. If authenticity is your goal, the traditional powdered brands give the most genuine chippy, translucent character. If you want easier, more predictable results, the designer-focused lines and their bonding agents smooth the learning curve.
Sealing Options and Their Effects
Because milk paint is porous and can rub off unsealed, the topcoat you choose shapes both the durability and the final look. Each sealer gives a distinct feel, so match it to how the piece will be used.
- Furniture wax: the classic choice, giving a soft, hand-buffed sheen and a smooth touch, though it needs occasional reapplication on high-use pieces.
- Hemp oil: a natural oil that soaks in, deepens the color slightly, and gives a matte, food-safe-friendly finish popular for cutting boards and rustic tables.
- Water-based matte topcoat: the most durable option for tabletops and dressers that see heavy use, with minimal color shift.
- Tung or linseed oil: penetrating oils that build a tougher, water-resistant surface over several coats.
Wax is perfect for a decorative piece you want to feel silky, while a water-based topcoat is the smarter pick for a kitchen table or a kid’s dresser that gets wiped down constantly. Whichever you choose, sealing is not optional on anything you’ll touch regularly, since unsealed milk paint stays chalky and vulnerable to wear.
Where Milk Paint Shines
This finish isn’t for every project, but it excels in specific applications. It’s ideal for refinishing antique and vintage furniture where authenticity matters, for children’s furniture thanks to its non-toxic makeup, and for anyone chasing a genuine farmhouse or cottage aesthetic.
It’s less suited to slick modern surfaces without a bonding agent, or to projects that demand a flawless factory-smooth coat. But for a dresser you want to look like it’s held a century of character, milk paint colors deliver a depth and softness that acrylics simply can’t fake. Decide on your finish first, mix small fresh batches, build thin coats, and seal for durability. The result is a piece with real old-world soul, made with a paint whose recipe your great-great-grandparents would recognize.