On a low-slope roof where shingles will not work and a hot tar kettle is impractical, modified bitumen is the workhorse most roofers reach for. Modified bitumen roofing installation takes the century-old idea of layered asphalt roofing and rolls it into polymer-reinforced sheets you can torch, mop, cold-adhere, or peel-and-stick into place. It gives you the redundancy of a multi-ply built-up roof with a fraction of the mess. I have installed it on countless flat additions, porch roofs, and commercial decks, and while the material is forgiving, the details, laps, seams, and flashings, are where a job lives or dies.
Part of our Roofing guide — explore the full guide →
This guide walks through modified bitumen roofing installation from choosing the membrane type to sealing the last lap, so you understand what a proper install involves.
What Modified Bitumen Is
Modified bitumen is asphalt that has been modified with polymers to improve its flexibility and durability, then reinforced with a fiberglass or polyester mat and formed into rolls. It is essentially built-up roofing evolved into a factory-made sheet. Most systems are two-ply: a base sheet laid first for redundancy, then a cap sheet on top that provides the weather surface, often with a granulated finish for UV protection.
The rolls are typically 1 meter (about 39 inches) wide and cover roughly one square (100 square feet) per roll depending on the lap. Because it installs in overlapping plies, it gives you the leak redundancy that single-ply membranes lack.
APP vs. SBS: Know the Difference
There are two chemistries, and they are not installed the same way:
- APP (atactic polypropylene): A plastic-modified bitumen that becomes fluid when heated. It is designed to be torch-applied, melting the underside to bond it. APP is more UV- and heat-tolerant, common in hot climates.
- SBS (styrene-butadiene-styrene): A rubber-modified bitumen that stays flexible in cold. It can be torch-applied, hot-mopped, cold-adhered with adhesive, or self-adhered. SBS handles freeze-thaw and building movement better, favored in cold climates.
Match the chemistry to your climate and your install method. Never assume a roll is torch-grade; self-adhered SBS should not be torched, and the label tells you which application methods the product is rated for.
Application Methods
Modified bitumen can be installed four ways, and the right one depends on the product, the substrate, and safety concerns:
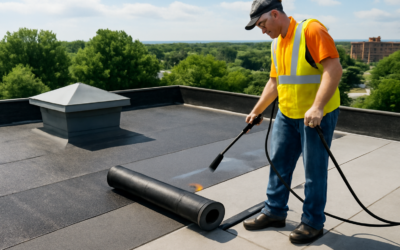
- Torch-applied: A propane torch melts the sheet’s underside as it is unrolled, fusing it down. Fast and strong, but a serious fire hazard, especially near walls, wood, and combustible insulation.
- Hot-mopped: Sheets are set into mopped hot asphalt, like traditional built-up work, requiring a kettle.
- Cold-adhered: Sheets are bonded with cold-applied adhesive, no flame or kettle, slower cure but far safer.
- Self-adhered (peel-and-stick): Sheets have a factory adhesive back; you peel the release film and roll them down. Safest and DIY-friendliest, ideal near combustibles.
For homeowners and anyone near flammable materials, self-adhered or cold-adhered systems are the sane choice. Torch application belongs with trained, insured crews carrying fire watch and extinguishers.
Substrate and Prep
A modified bitumen roof is only as good as what it sits on. The deck must be clean, dry, and structurally sound. Most installs go over a rigid insulation board and a base of roofing felt or a compatible base sheet, not directly on bare wood in most systems. Check the manufacturer’s substrate requirements.
Before installing, sweep the deck spotless, replace any rotten decking, confirm the slope drains (minimum 1/4 inch per foot), and let everything dry completely. Torch and self-adhered systems both fail on damp or dirty surfaces. Install drip edge and any base flashing metal at the perimeter first.
Step-by-Step Install
The general sequence for a two-ply system:
- Install rigid insulation and/or the base sheet, fastened or adhered per spec, starting at the low edge.
- Lay the modified base ply, working from the lowest point up so laps shed water. Overlap side laps about 3 inches and end laps about 6 inches.
- Fully bond each roll by your chosen method, torch, mop, adhesive, or peel-and-stick, working out air and ensuring full contact with no voids.
- Stagger the cap sheet seams so they do not align with the base sheet seams, then install the granulated cap ply the same bottom-up way.
- Roll every seam with a weighted seam roller to ensure full bond, and check that a slight bleed-out of bitumen appears at torched or mopped laps, the sign of a complete seal.
- Flash all penetrations, walls, and drains with compatible modified bitumen flashing, extending membrane up walls at least 8 inches and sealing around pipes with target patches.
Flashing and Details
Most modified bitumen leaks start at the details, not the field. Walls, curbs, drains, and penetrations need proper flashing plies that lap the field membrane and turn up vertical surfaces. Base flashing should extend up walls and parapets at least 8 inches and be terminated with a counter flashing or termination bar and sealant. At drains, the membrane laps into the drain bowl under a clamping ring. Around pipes, use a modified bitumen boot or a target patch sealed with mastic.
Granule the cap sheet at all field-cut edges by pressing granules into a smear of mastic so no bare bitumen faces the sun. Exposed asphalt is the first thing UV attacks.
Common Mistakes and Safety
The failures I see: cold laps on torch work where the sheet was not heated enough to bond, no bitumen bleed-out at seams, laps run the wrong way so water drives into them, and skimped flashing height at walls. On self-adhered systems, installing in temperatures too low for the adhesive to bond is a common error, most peel-and-stick products need the deck and air above roughly 45 to 50 degrees Fahrenheit.
The biggest concern with torch application is fire. Torch-down roofs have caused countless structure fires because the flame ignited hidden combustibles behind flashing or in wall cavities, and fires can smolder for hours before flaring after the crew leaves. If you torch, keep an extinguisher and a charged hose at hand and conduct a fire watch for at least two hours after finishing. When in doubt, choose a cold-adhered or self-adhered SBS system and skip the flame entirely. Done carefully, a two-ply modified bitumen roof gives you 15 to 25 years of watertight, redundant protection on the flat roofs where nothing else quite fits.
Cost and What to Budget
Modified bitumen sits in the affordable-to-mid range for flat roofing. Installed, expect roughly $5.00 to $8.50 per square foot, or $500 to $850 per square, depending on the number of plies, the application method, insulation, and access. Self-adhered systems can cost a bit more in material but save on labor and eliminate the safety overhead of torching.
Material alone, base and cap sheets, runs roughly $1.50 to $3.50 per square foot, with the rest going to labor, insulation, cover board, and flashing. A small residential flat section of a few squares might land at $2,000 to $5,000, while a larger commercial deck scales up accordingly. Budget separately for tear-off of any existing roof, decking repairs, and insulation upgrades, which can rival the membrane cost on a re-roof.
Maintenance and Lifespan
A two-ply modified bitumen roof lasts 15 to 25 years, and maintenance stretches it toward the top of that range. Inspect it twice a year and after storms for these issues:
- Open or fishmouthed seams where laps have lifted
- Blisters and bubbles from trapped moisture beneath the membrane
- Bare spots on the granulated cap where UV can attack the asphalt
- Ponding water that sits more than 48 hours
- Cracked or pulling flashing at walls, curbs, and penetrations
Re-granulate bare spots, seal lifting seams, keep drains clear, and address ponding promptly. Applying a reflective coating every several years protects the cap from UV, lowers rooftop temperature, and adds years of service, a cost-effective way to extend the roof.
Modified Bitumen vs. Single-Ply Membranes
Homeowners often ask how modified bitumen stacks up against TPO, PVC, and EPDM. The core difference is redundancy versus simplicity. Modified bitumen is a multi-ply system with a base and cap sheet, giving it excellent puncture resistance and a backup layer, well suited to roofs with foot traffic or rooftop equipment. Single-ply membranes are a single sheet, lighter, faster to install, and, in the case of TPO and PVC, more reflective for energy savings.
Neither is universally better. Modified bitumen wins where toughness and redundancy matter and where a granulated surface handles foot traffic. Single-ply wins where reflectivity, speed, and low weight are priorities. For a small residential flat roof a homeowner might install themselves, a self-adhered modified bitumen system is often the most forgiving and DIY-friendly option because there is no flame and the multi-ply construction is tolerant of minor install imperfections.
The Bottom Line
Modified bitumen roofing installation gives you the century-proven redundancy of built-up roofing in a clean, factory-made, roll-out sheet. Choose the right chemistry for your climate, APP for hot regions, SBS for cold, pick the safest application method your situation allows, favoring cold-adhered or self-adhered SBS over torching near combustibles, prep the substrate meticulously, lap everything bottom to top, roll every seam for full bond, and flash the details generously. Respect the fire risk if you torch, and never leave a torched roof without a two-hour fire watch. Done carefully, a two-ply modified bitumen roof delivers 15 to 25 years of watertight, redundant protection on exactly the low-slope roofs where shingles will not work and a hot kettle is impractical.