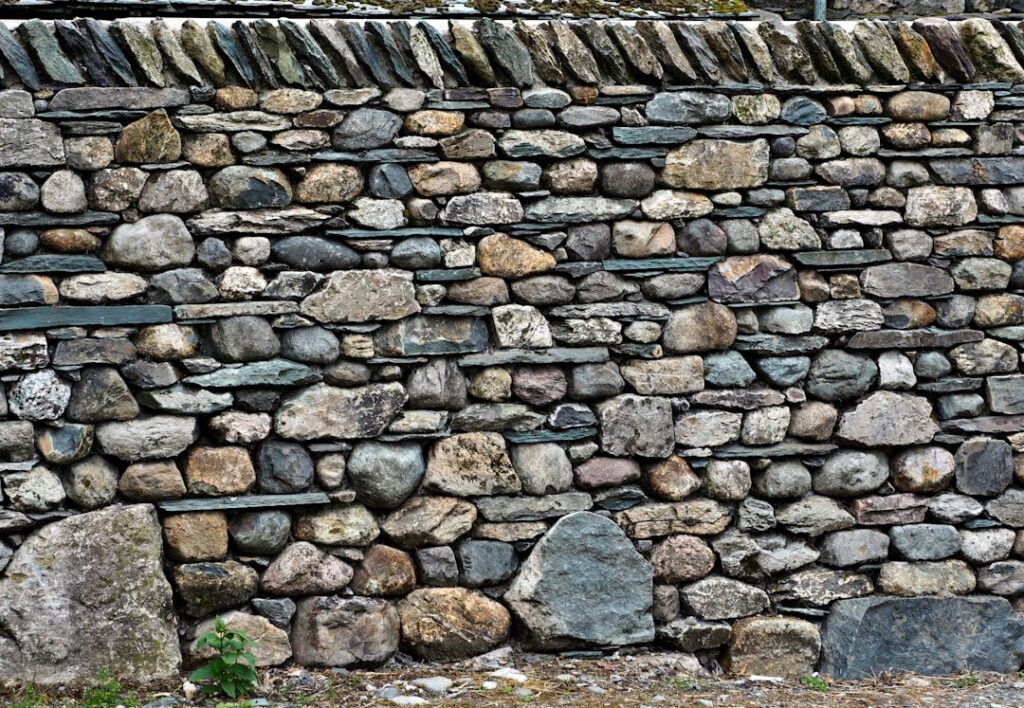
A natural stone retaining wall is one of the most durable and visually striking landscape features you can add to a property, capable of lasting 50 to 100 years or more when built correctly. Beyond their timeless beauty, these walls perform serious work: they hold back soil on slopes, prevent erosion, create usable flat terraces, and can manage stormwater runoff. A single ton of natural stone can retain a surprising amount of earth, but the engineering behind a lasting wall is more involved than simply stacking rocks.
At D and G Flooring we appreciate quality natural materials, and stone retaining walls bring the same lasting craftsmanship to the landscape that fine flooring brings indoors. This guide covers stone choices, drainage, the build process, costs, and the critical point at which you should bring in a professional.
What a Retaining Wall Does
A retaining wall resists the lateral pressure of soil, holding back earth that would otherwise slide or erode. This lets you transform an unusable slope into level, functional space, protect your foundation from soil movement, and control where water flows during heavy rain. The forces involved are significant: soil is heavy, and when saturated with water it pushes against a wall with tremendous force. That is why proper materials, drainage, and a sound base are non-negotiable.
Types of Natural Stone for Retaining Walls
The stone you choose affects appearance, cost, and how the wall is built:
- Fieldstone: Rounded, naturally weathered stones that create a rustic, organic look. Often used in dry-stacked walls.
- Flagstone: Flat, layered stone that stacks neatly and gives a clean, structured appearance.
- Limestone: A popular, workable stone with warm tones that splits into usable blocks.
- Granite: Extremely hard and durable, ideal for high-strength walls and harsh climates.
- Sandstone: Easy to shape with attractive earthy coloring, though softer and best for moderate applications.
- Quarried wall stone: Stone cut into more uniform blocks for easier stacking and a more refined finished look.
Dry-Stacked vs Mortared Walls
Natural stone walls are built in two main ways. Dry-stacked walls rely on the weight and careful fitting of the stones to stay in place, with no mortar. They flex slightly with ground movement, drain freely, and have a timeless appearance, but they require skill to build and are best for lower heights. Mortared walls bond the stones with mortar for added strength and a more permanent structure, but they demand proper drainage behind them, since trapped water has nowhere to escape and can build destructive pressure. For many residential projects under a few feet tall, a well-built dry-stacked wall is both beautiful and practical.
Why Drainage Is Everything
The single most common reason retaining walls fail is poor drainage. When water collects behind a wall and cannot escape, it adds enormous hydrostatic pressure that can bow, crack, or topple even a heavy stone structure. Proper drainage includes:
- A layer of gravel backfill behind the wall to let water move freely.
- A perforated drain pipe, often called a French drain, at the base to carry water away.
- Weep holes or gaps in mortared walls that let water escape through the face.
- Grading the soil above the wall so surface water flows away rather than pooling.
Never skip drainage to save time or money. It is the difference between a wall that lasts decades and one that fails in a few seasons.
How to Build a Basic Natural Stone Retaining Wall
For a modest dry-stacked wall, the general process looks like this:
- Plan and mark the layout with stakes and string, and check local codes for permit and height limits.
- Dig the trench for the base, typically about 6 inches deep plus the height of your first course, and as wide as your stones.
- Compact the base and add 4 to 6 inches of gravel, then tamp it firm and level. A solid, level base is the foundation of the entire wall.
- Lay the first course using your largest, flattest stones, setting them firmly and level. This base course determines the quality of everything above.
- Build up in courses, staggering joints like brickwork so no vertical seams line up, which would create a weak point.
- Set the wall back slightly, a technique called batter, leaning the wall into the hill so gravity helps hold the soil.
- Add gravel backfill and a drain pipe behind each course as you go.
- Cap the wall with broad, flat capstones for a finished look and added stability.
Cost Considerations
Natural stone retaining walls vary widely in price based on stone type, wall size, site access, and labor. As a general guide, professionally installed natural stone walls often run somewhere in the range of $25 to $75 per square face foot, with premium stone and difficult sites pushing higher. Materials alone, including stone, gravel, and drainage components, can run from $150 to $400 or more per ton of stone depending on the variety and your region. A small DIY garden wall can cost a few hundred dollars, while a large engineered wall is a multi-thousand-dollar investment. Always get the drainage right regardless of budget, because cutting corners there guarantees expensive repairs later.
When to Hire a Professional
Height is the dividing line. Many building codes require an engineered design and permit for any retaining wall over about 3 to 4 feet tall, because the forces involved become substantial and a failure can damage property or injure people. You should hire a professional or structural engineer when:
- The wall will exceed roughly 3 to 4 feet in height.
- It will support a driveway, structure, or other heavy surcharge load.
- The slope is steep or the soil is unstable.
- Local code requires engineered plans and permits.
For low garden walls under that threshold, a careful DIY build is very achievable.
Maintenance Tips
- Inspect the wall each year for bulging, leaning, or shifting stones.
- Keep drainage paths and weep holes clear of debris and sediment.
- Watch for water pooling above or behind the wall and correct the grading.
- Reset any stones that have worked loose before the problem spreads.
- Control vegetation whose roots could disturb the structure.
Final Thoughts
A natural stone retaining wall combines lasting beauty with serious functional value, controlling erosion and creating usable space on sloped lots. Success comes down to three fundamentals: a solid compacted base, proper drainage behind the wall, and staggered, battered courses of well-fitted stone. Keep walls under code-height limits for DIY work and bring in an engineer for anything taller or load-bearing. Build it right and your stone wall will stand strong and handsome for generations.